How did I even came to this?
Recently, I was busy assembling my HomeLab and needed some powerful enough hardware to run several dozen dockerized apps, databases, and VMs for a Kubernetes cluster. I had been renting cloud VMs for this purpose, but it's always nice and interesting to host non-critical resources on your own, extending experience in all those fancy DevOps things.
When hosting your own server at home or using colocation services, you probably want full remote access to the hardware, including the BIOS, to change CPU operation modes, update RAM timings and frequencies, perform health checks, or even just power off/on and reboot the machine physically. Of course, no one wants to be near the server 24/7. For such cases, clever minds developed an IPMI Interface that allows controlling and setting up a machine remotely, even when it's powered off.
The downside is that IPMI and similar alternatives are usually available only on expensive professional server motherboards or enterprise-level PCs, like DELL or Lenovo workstations. But thanks to other brilliant minds, we have a few cool open-source alternatives in the form of standalone devices or PCI extension cards.
The story about choosing server components and minimizing costs deserves its own post. Meanwhile, I want to share my experience with an interesting device that I believe belongs in every geek's arsenal. Today's story is about one such alternative solution available to everyone.
PiKVM - an Open DIY KVM over IP
The KVM over IP main feature is the ability to remotely control any PC as if you were sitting right in front of it with a monitor, keyboard and mouse.
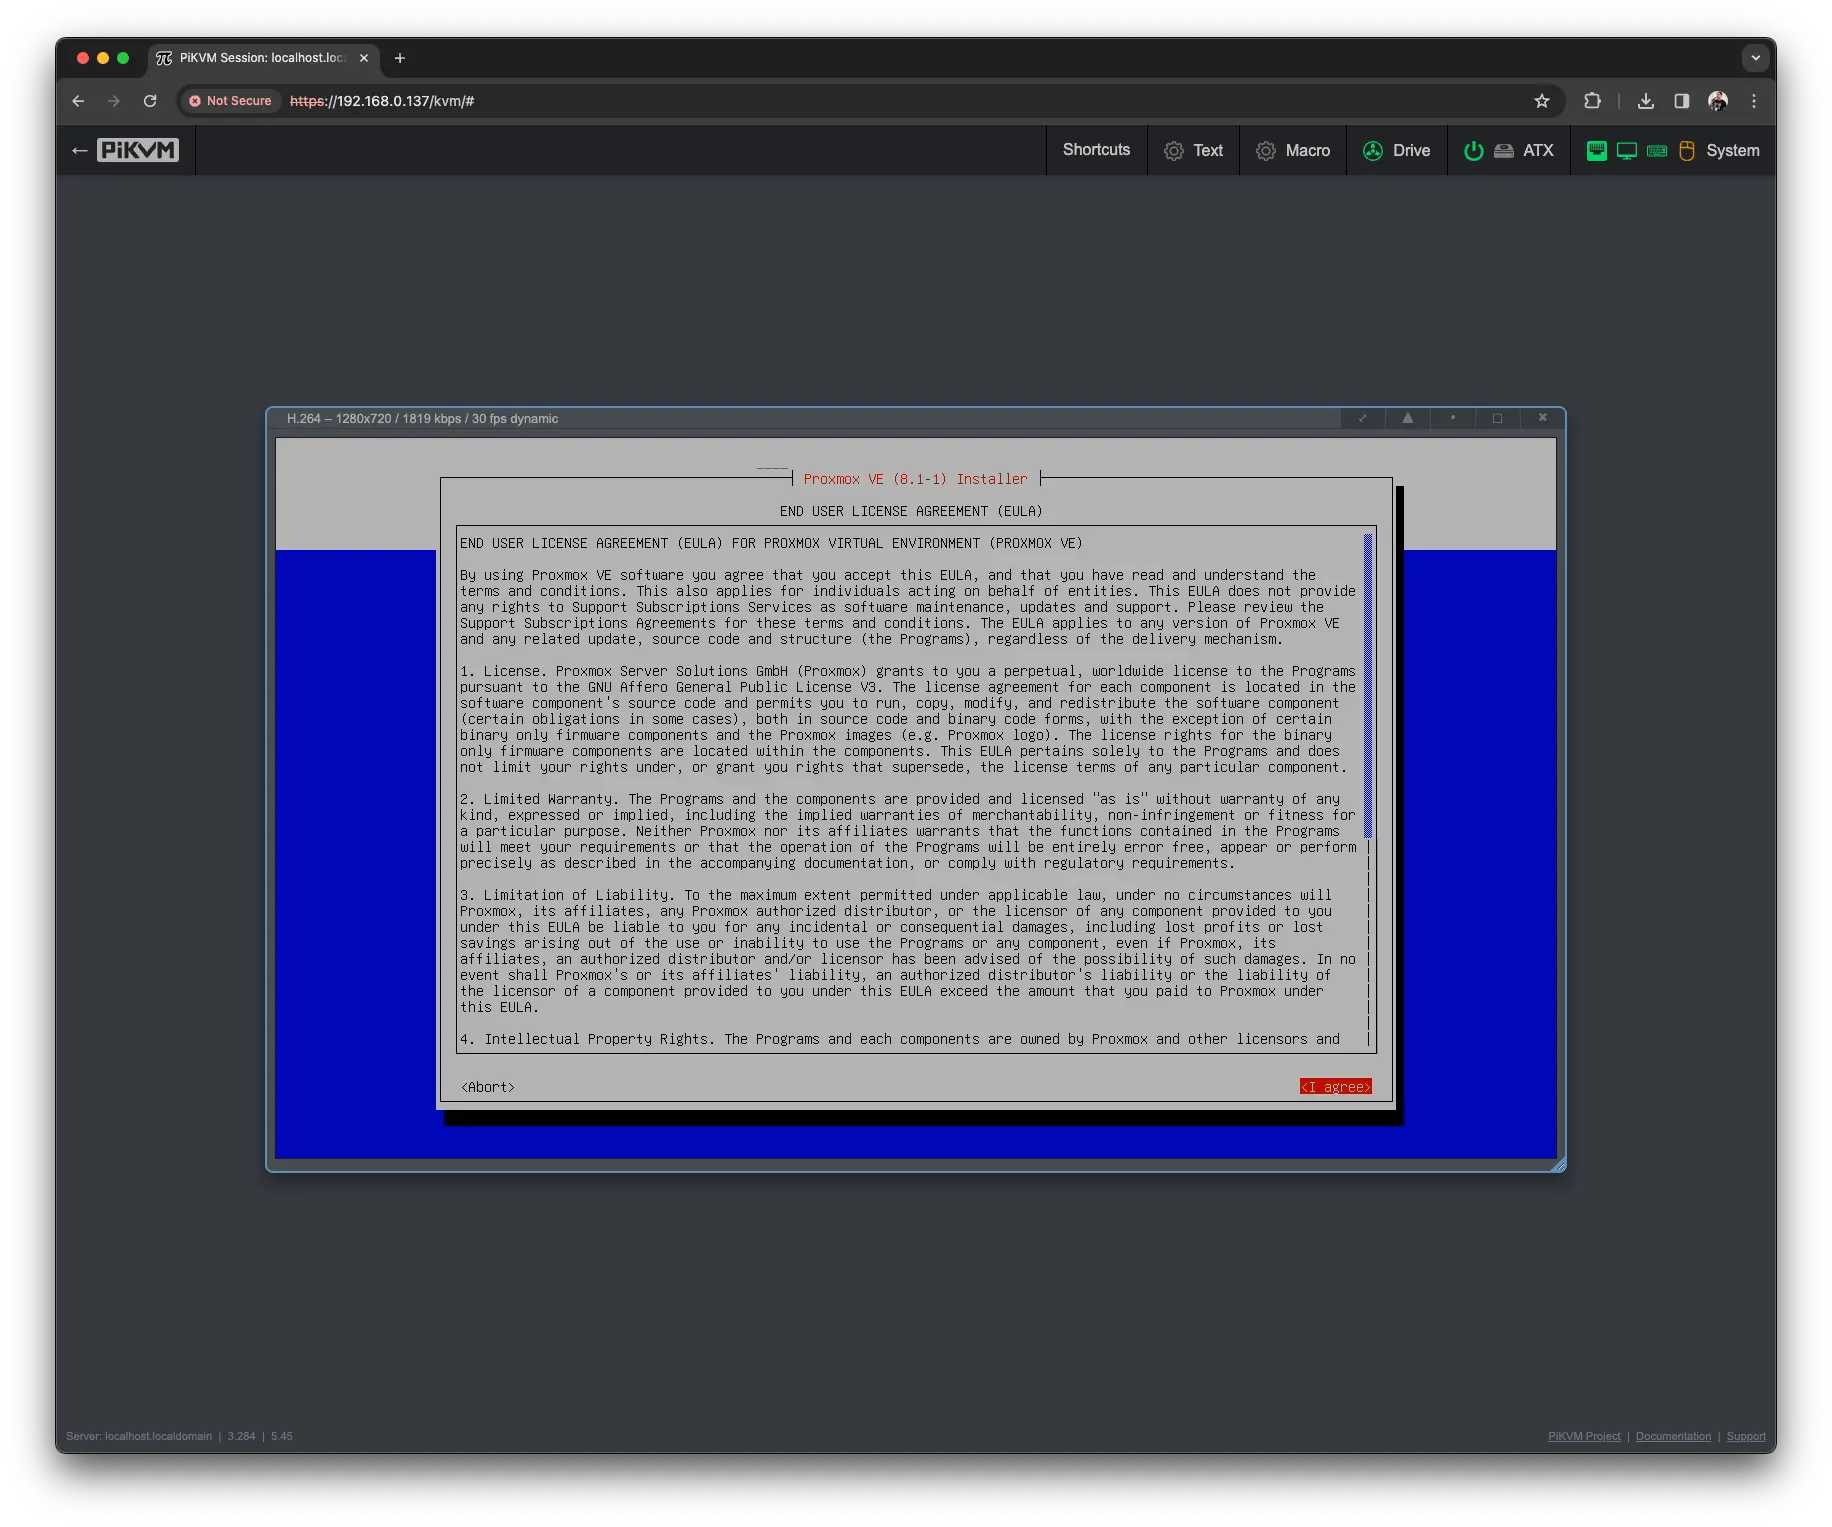
For instance, I installed Proxmox VE by remotely accessing the server directly from the browser, using an image uploaded to the PiKVM and mounted via its Mass Storage Drive emulation:
PiKVM is a simple, relatively cheap (mine cost me ~$50), and functional Raspberry Pi-based solution for KVM over IP. You can either buy it from the official website or make it yourself by following the instructions. Some of its main features include:
- HDMI full HD video capture and streaming with low latency and fine-grained compression controls
- WiFi or LAN connectivity (with PoE support)
- Keyboard and mouse emulation
- Mounting disk images and pretending to be a drive
- ATX power control
- Web-based terminal
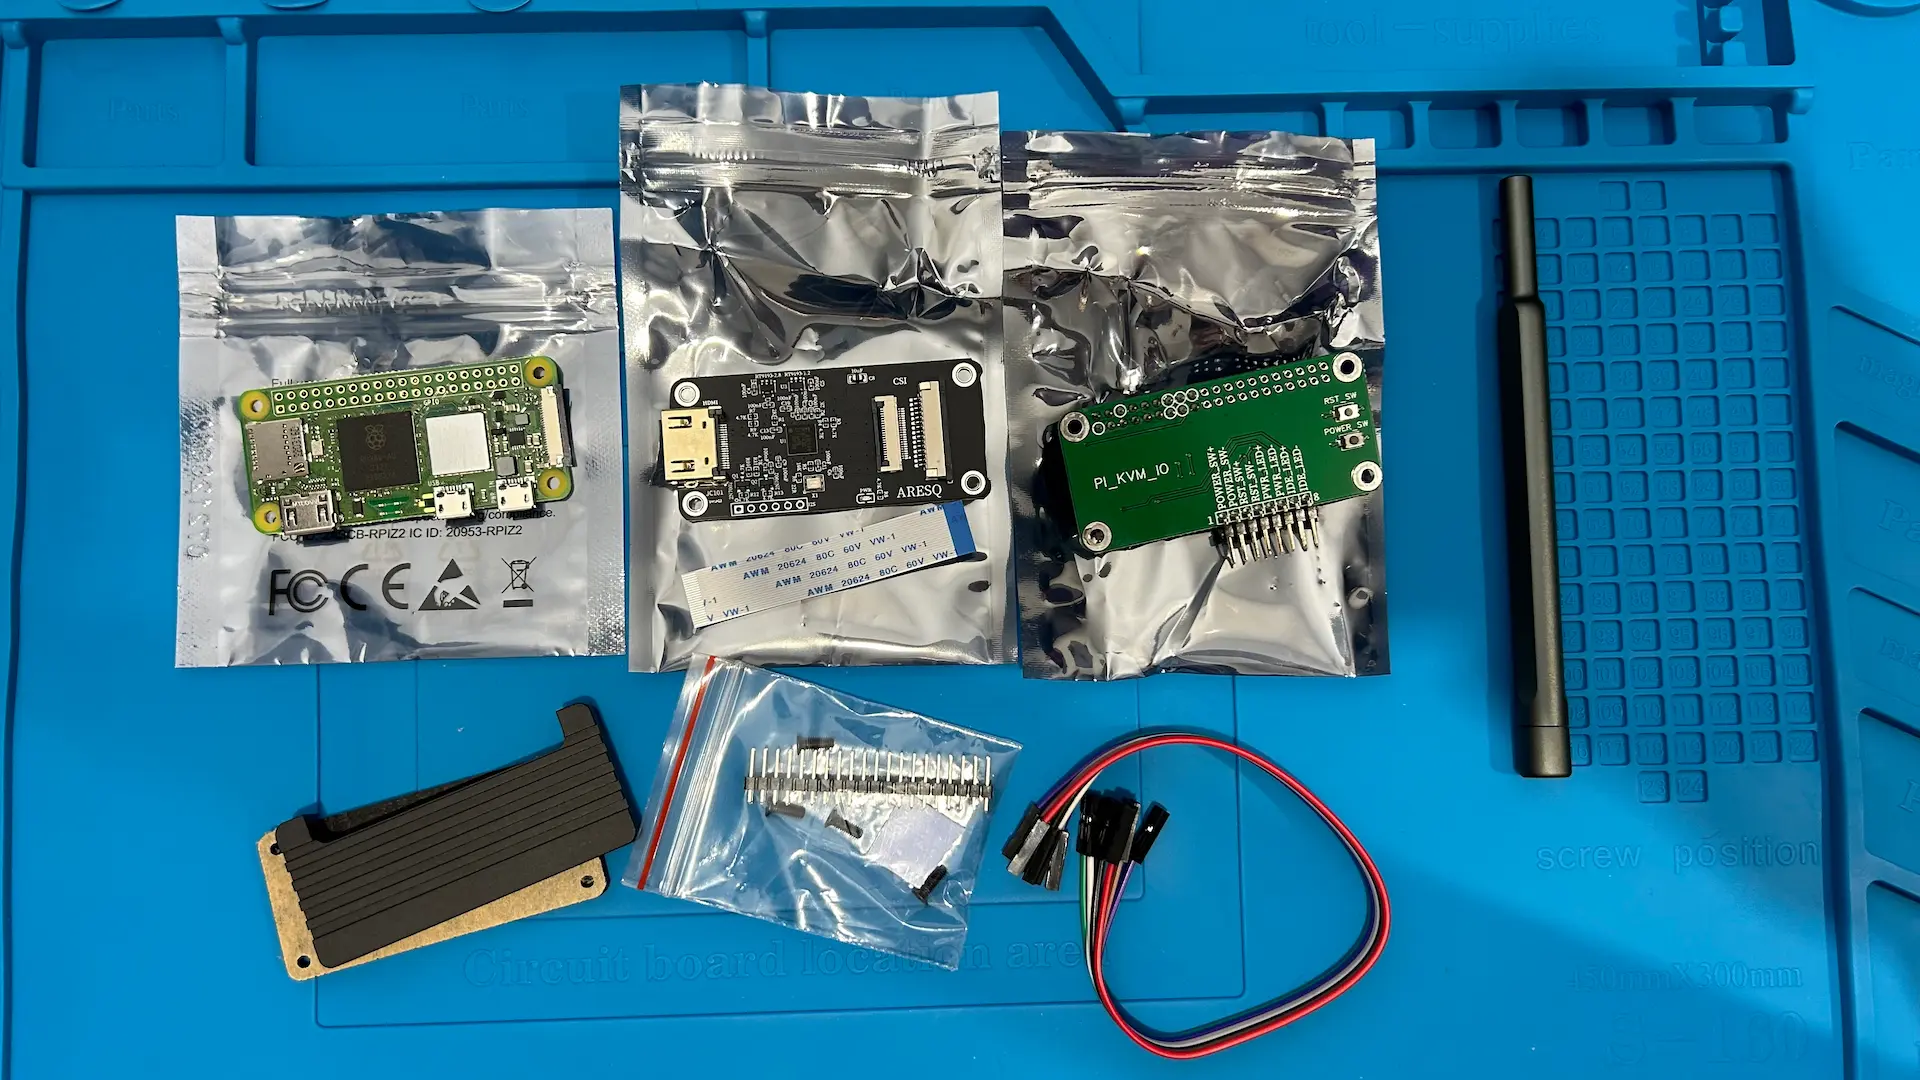
Bill of Materials
- Raspberry Pi Zero 2W ($25)
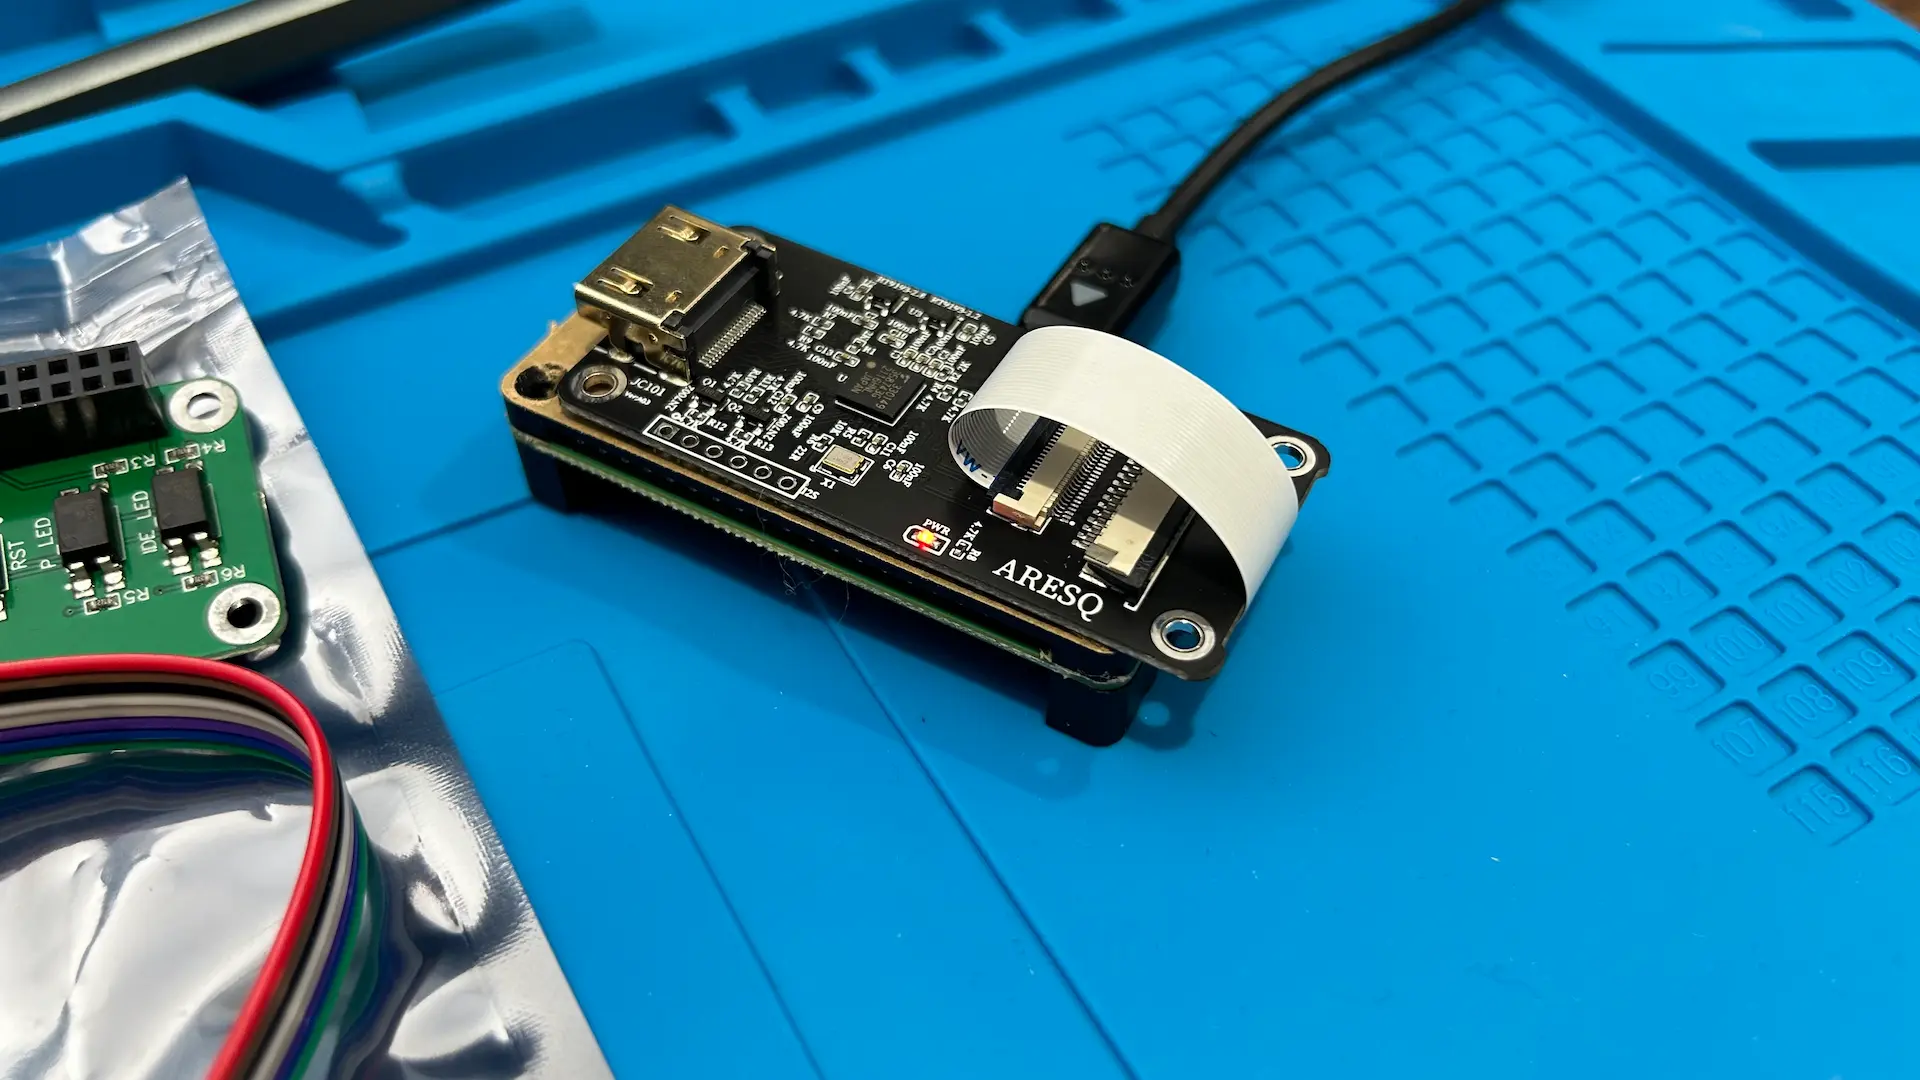
- HDMI to CSI adapter for RPi ($25)
- Optional ATX controller to manage the server's power (DIY or $8)
- 0.96" IIC OLED display module ($2, better toget a pair of them)
- MicroSD card >=16GB class 10
- USB-A to USB-Micro cable (male-male)
- Any micro USB cable and at least a 10W power supply for Zero 2W
- Wires, soldering iron, and tools to wire up the display
- Time (priceless)
Prices above are for AliExpress buyers but should not differ significantly from Amazon.
We are going to:
- Solder RPi GPIO pins (you may find a version with already soldered pins)
- Install the ATX controller extension board
- Solder the 0.96" OLED display
- Print a housing case and assemble everything inside
- Install and configure PiKVM Operating System
Assembling
The parts were shipped separately, and once I received the full package (except the OLED display), it was time to ensure everything worked fine and wasn't damaged. I also got a cheap aluminum RPi Zero case for convenience.
Be careful with the flexible cable for the CSI module. I accidentally ruined one during initial tests and had to order new ones :).
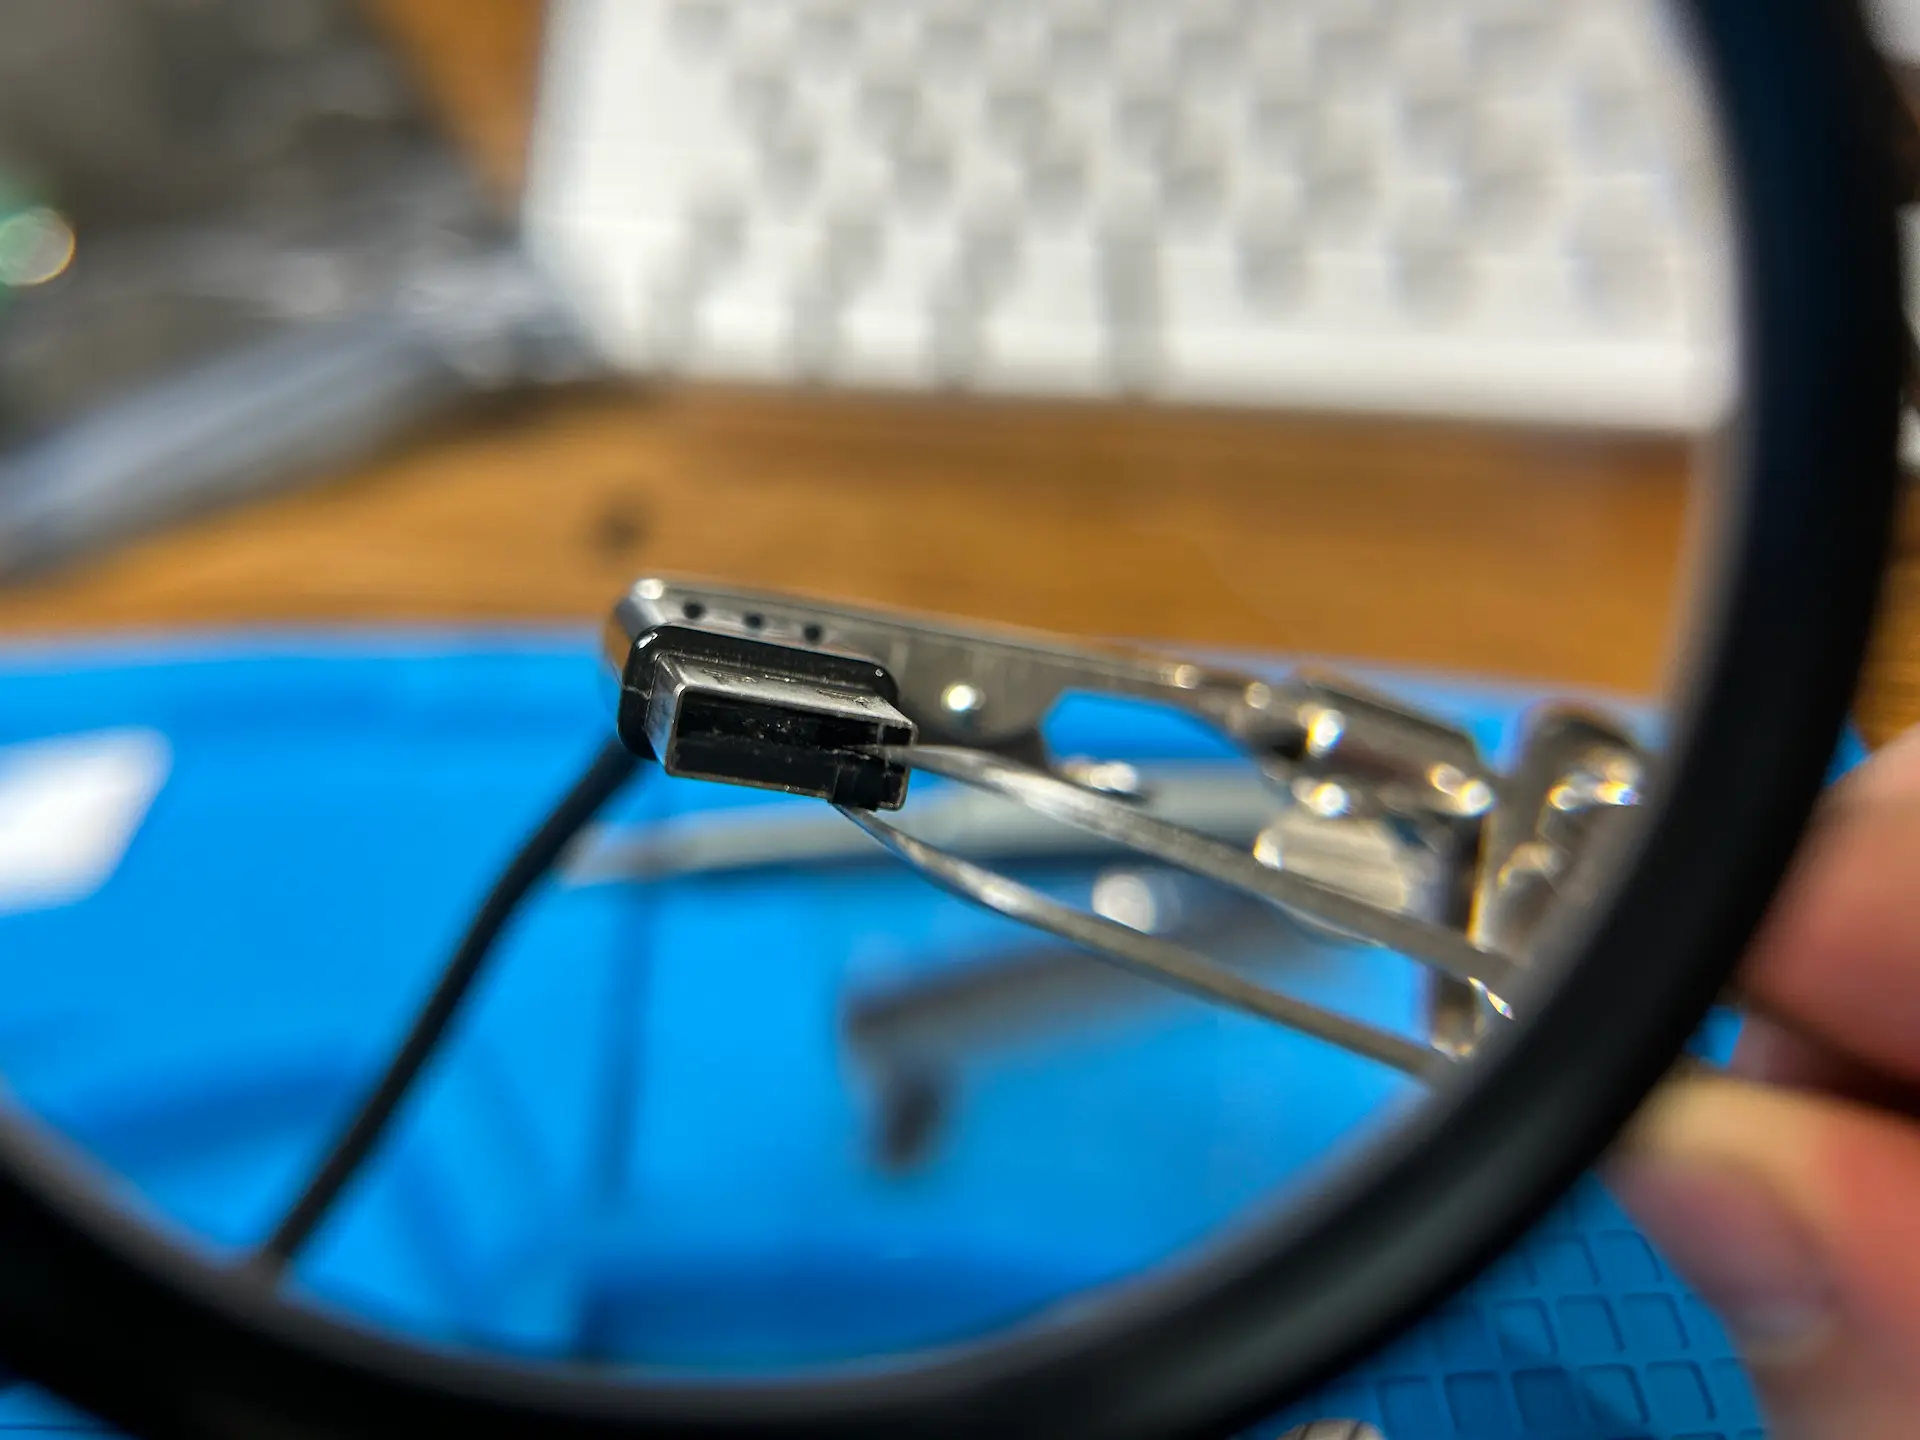
Please be aware that connecting an RPi OTG to a PC together with an external power supply may result in back-powering over that USB. If you notice your server fans keep spinning after powering off, hear weird sounds, or anything unusual, please disconnect it and address the troubleshooting section.
Both boards are operational, and we're ready to proceed:
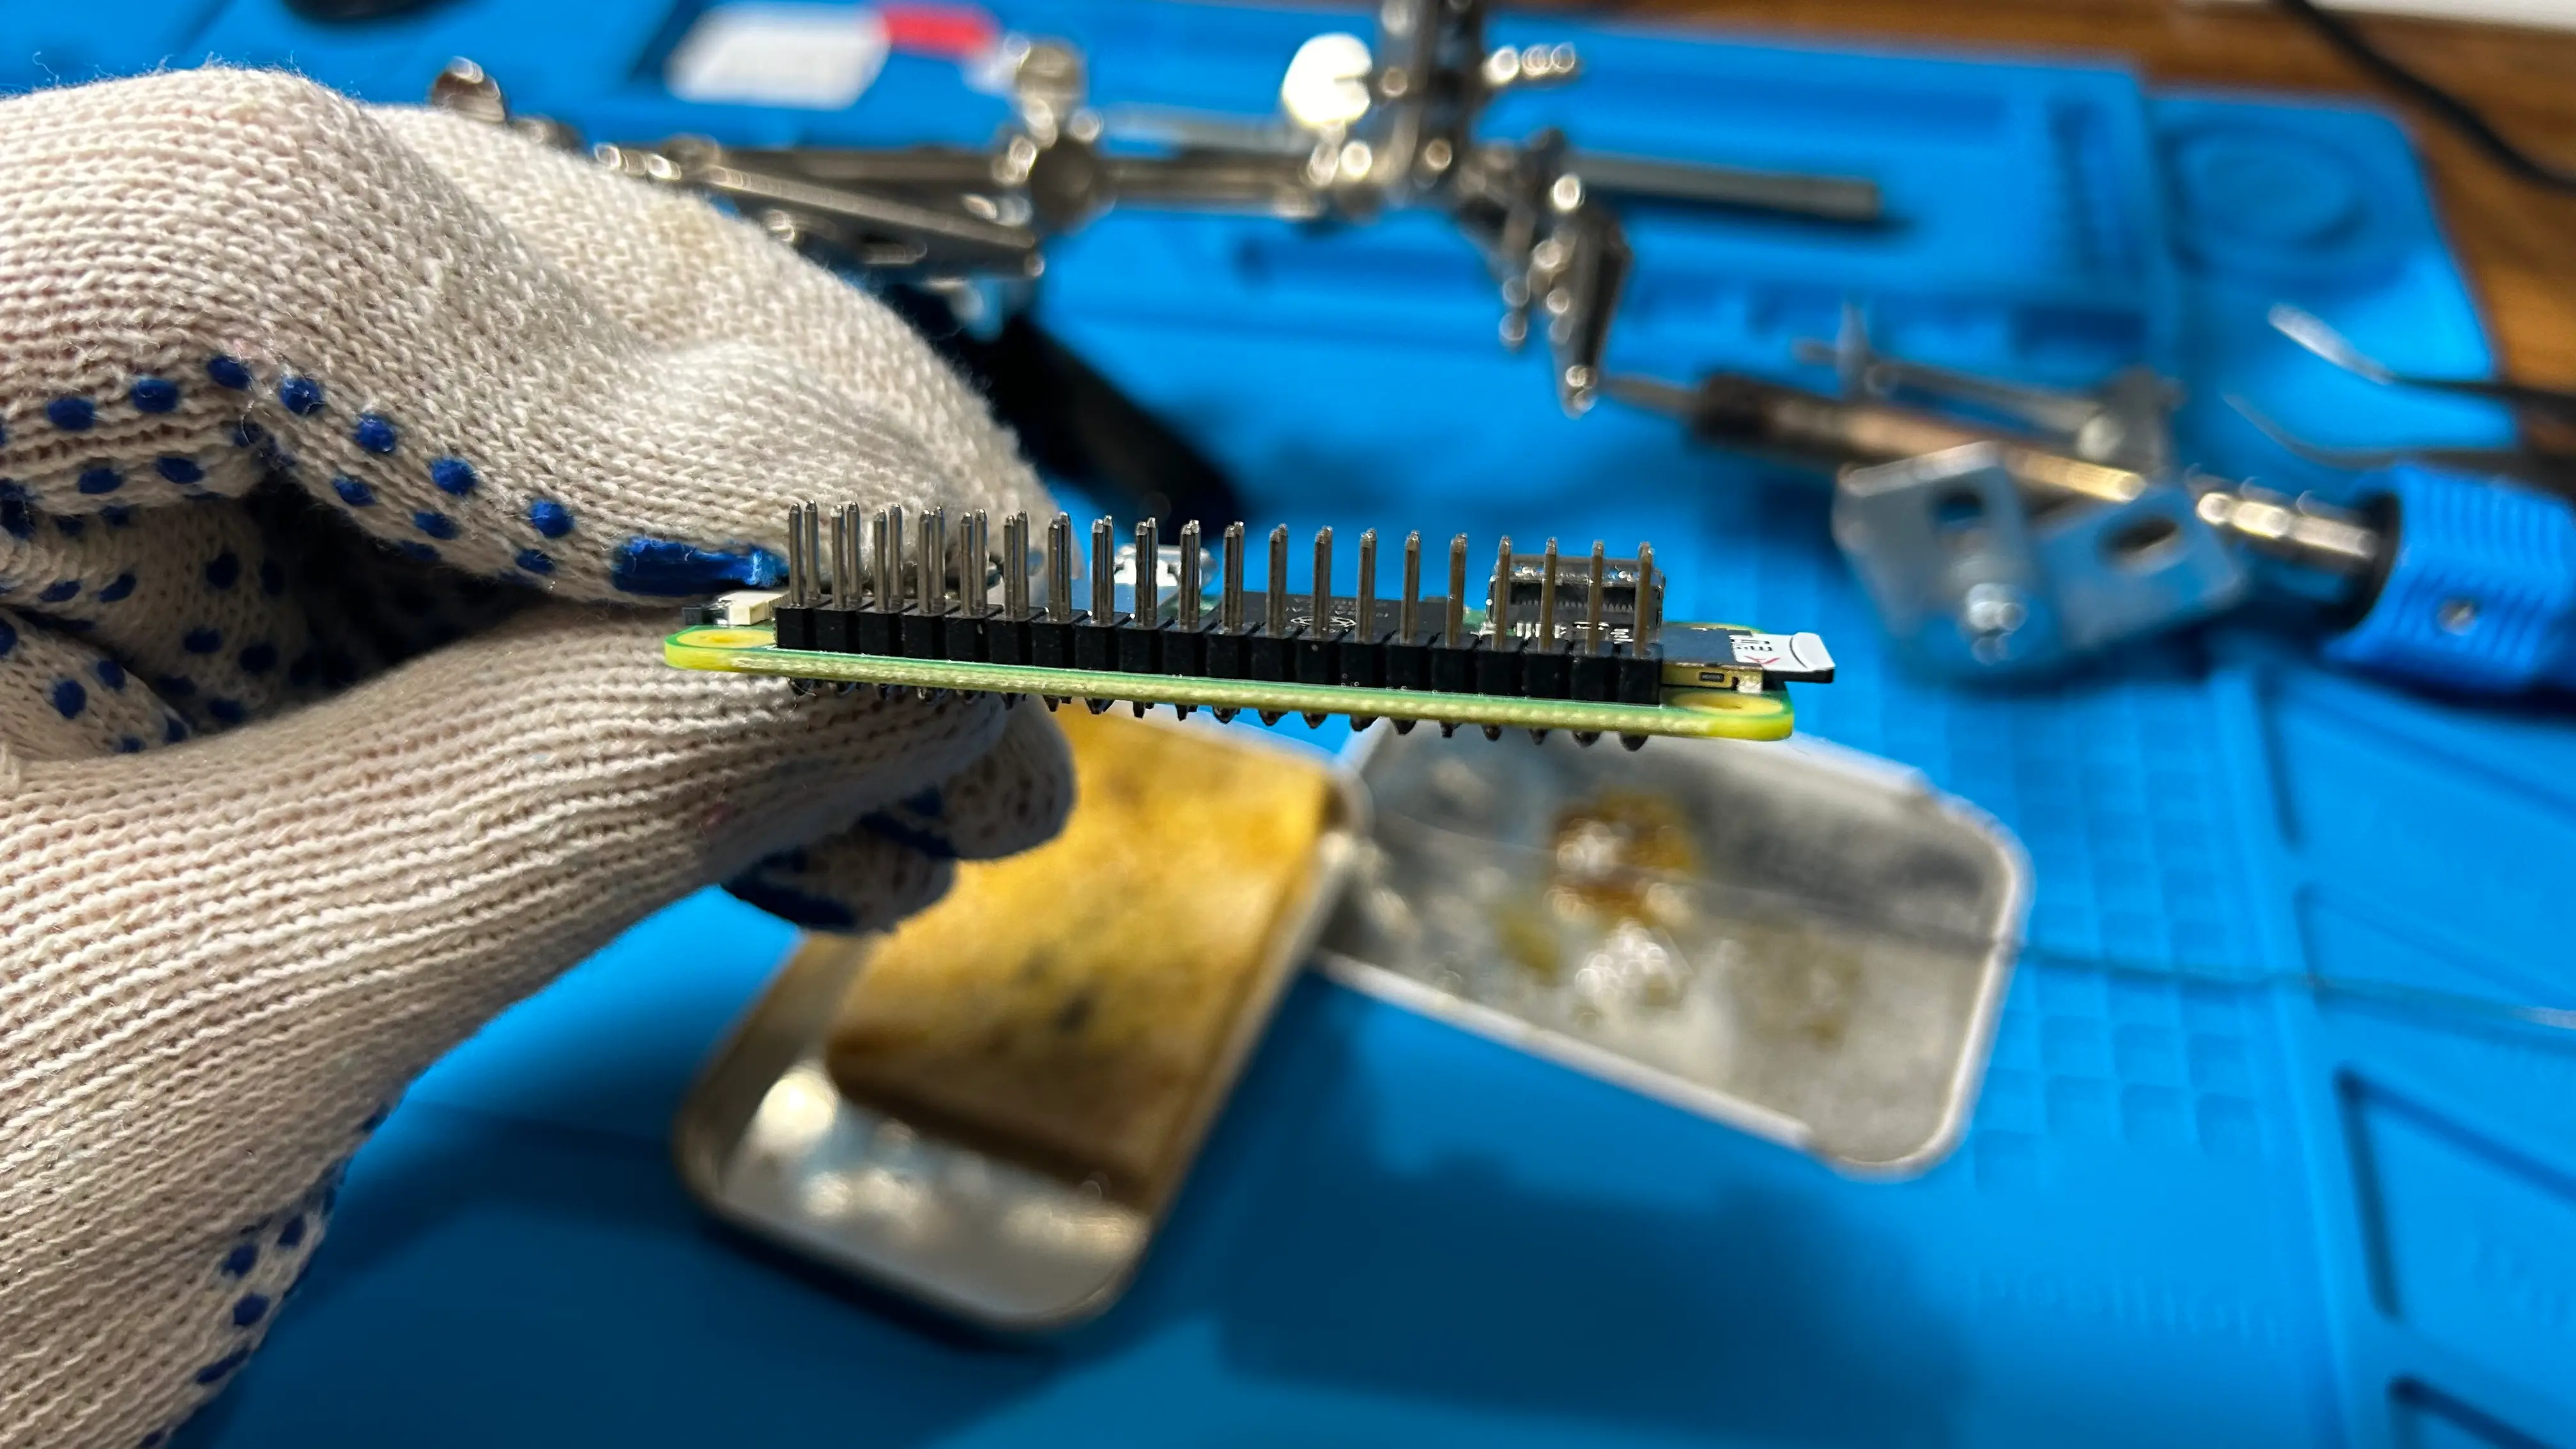
Next, it's time to solder the RPi GPIO pins. Nothing special if you've ever handled a soldering iron:
Once the GPIO pins are in place, let's connect the ATX controller extension. I decided to buy one, as you can see. It's not that expensive to build it from scratch, but if you want to follow the DIY path, you'll need a breadboard, 4x MOSFETs, and resistors.
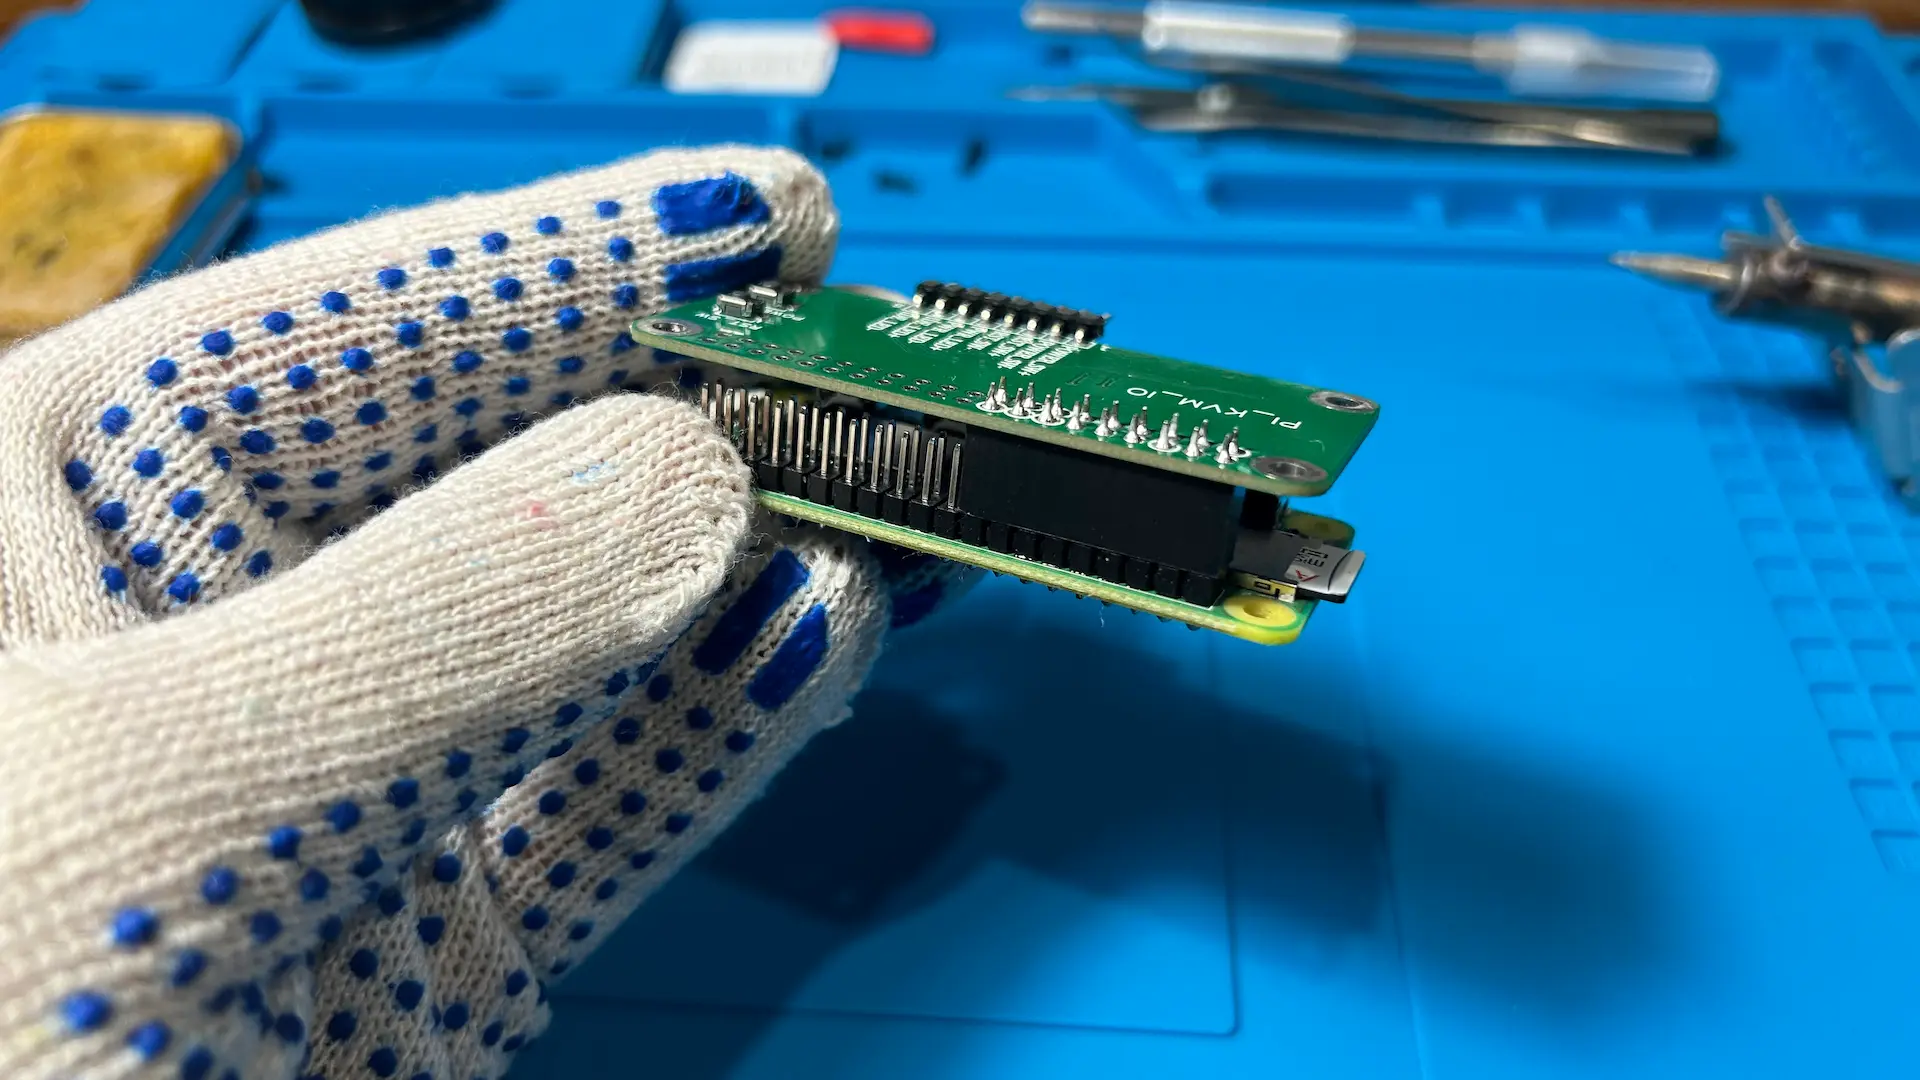
If everything is done right, we should have a PiKVM sandwich:
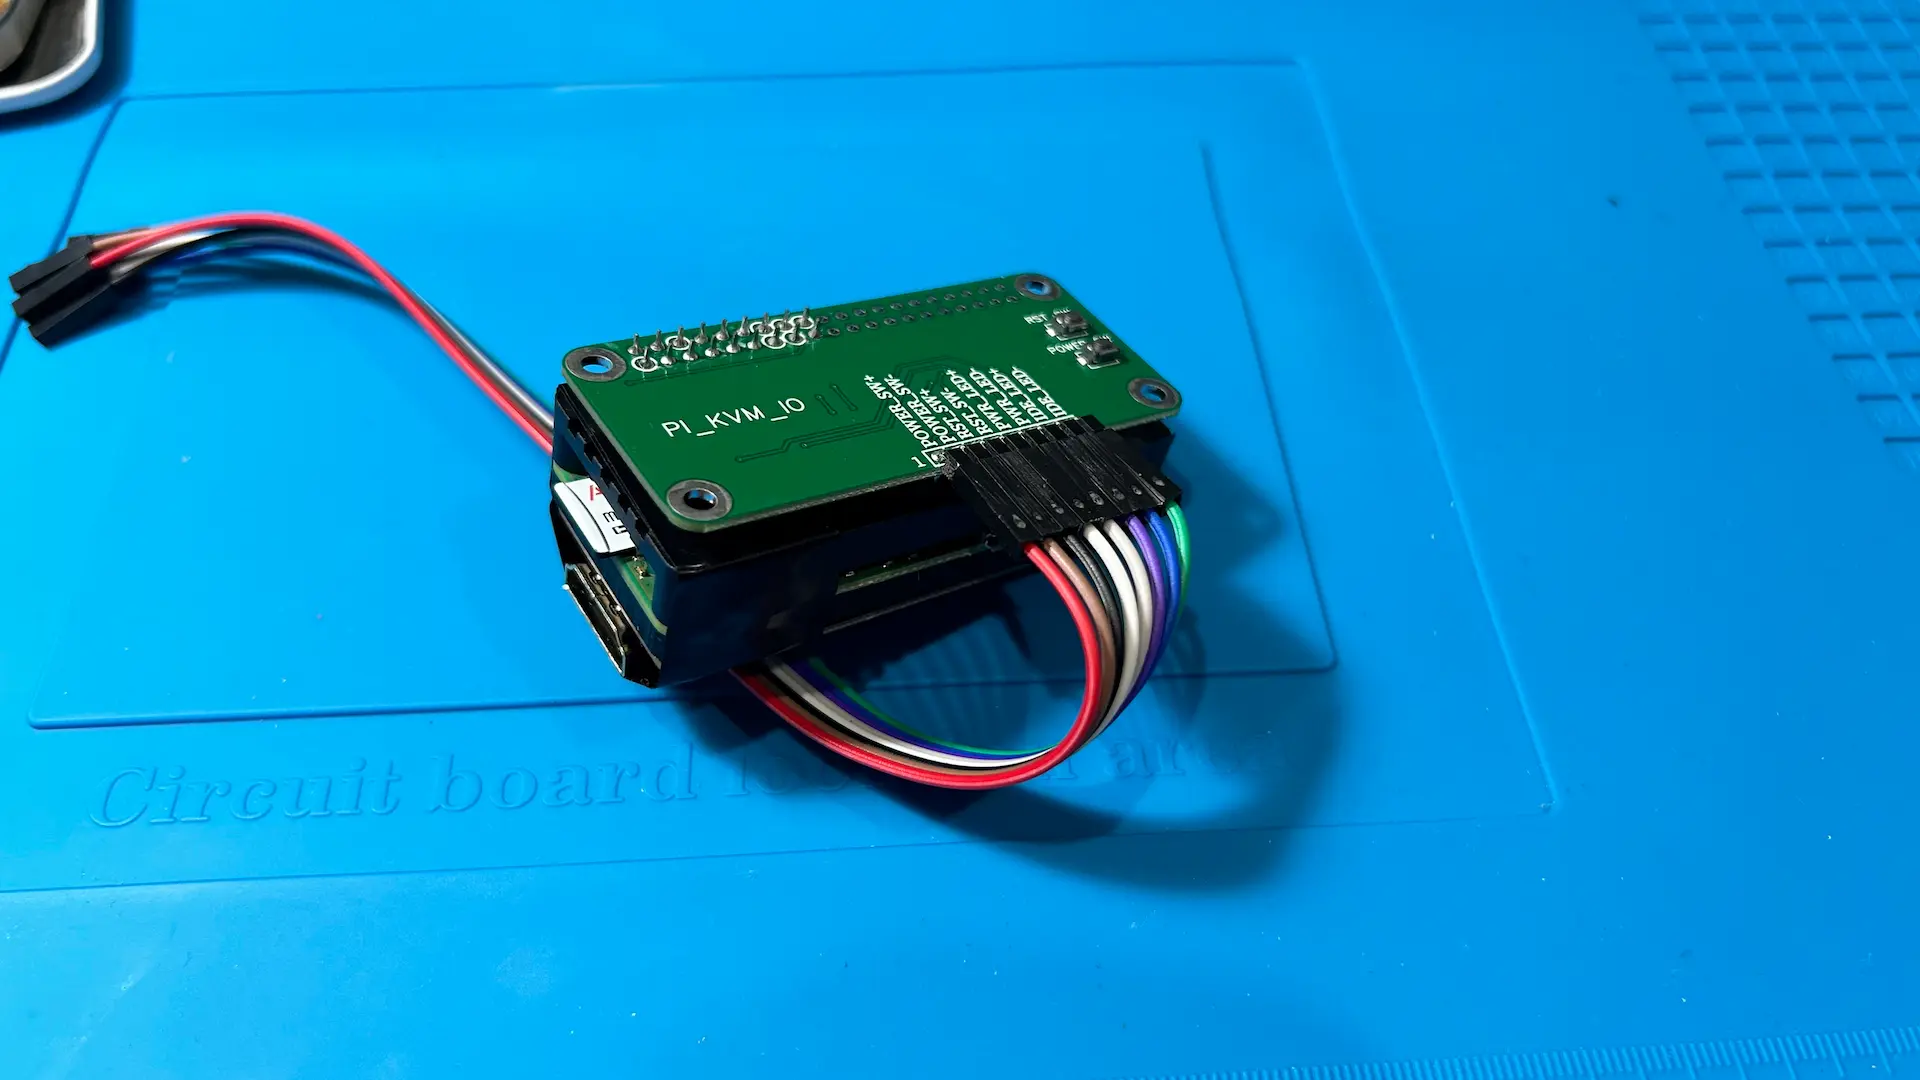
There are 2 ways of connecting PiKVM to a server: using 2 PC USB ports (for data and power) or using an external power supply. Technically, the RPi Zero 2W may be powered using the same PC, but if the server doesn't have a standby USB power feature, the RPi will shut down along with the PC. So the best way is to use an external power supply.
Flushing and configuring PiKVM OS
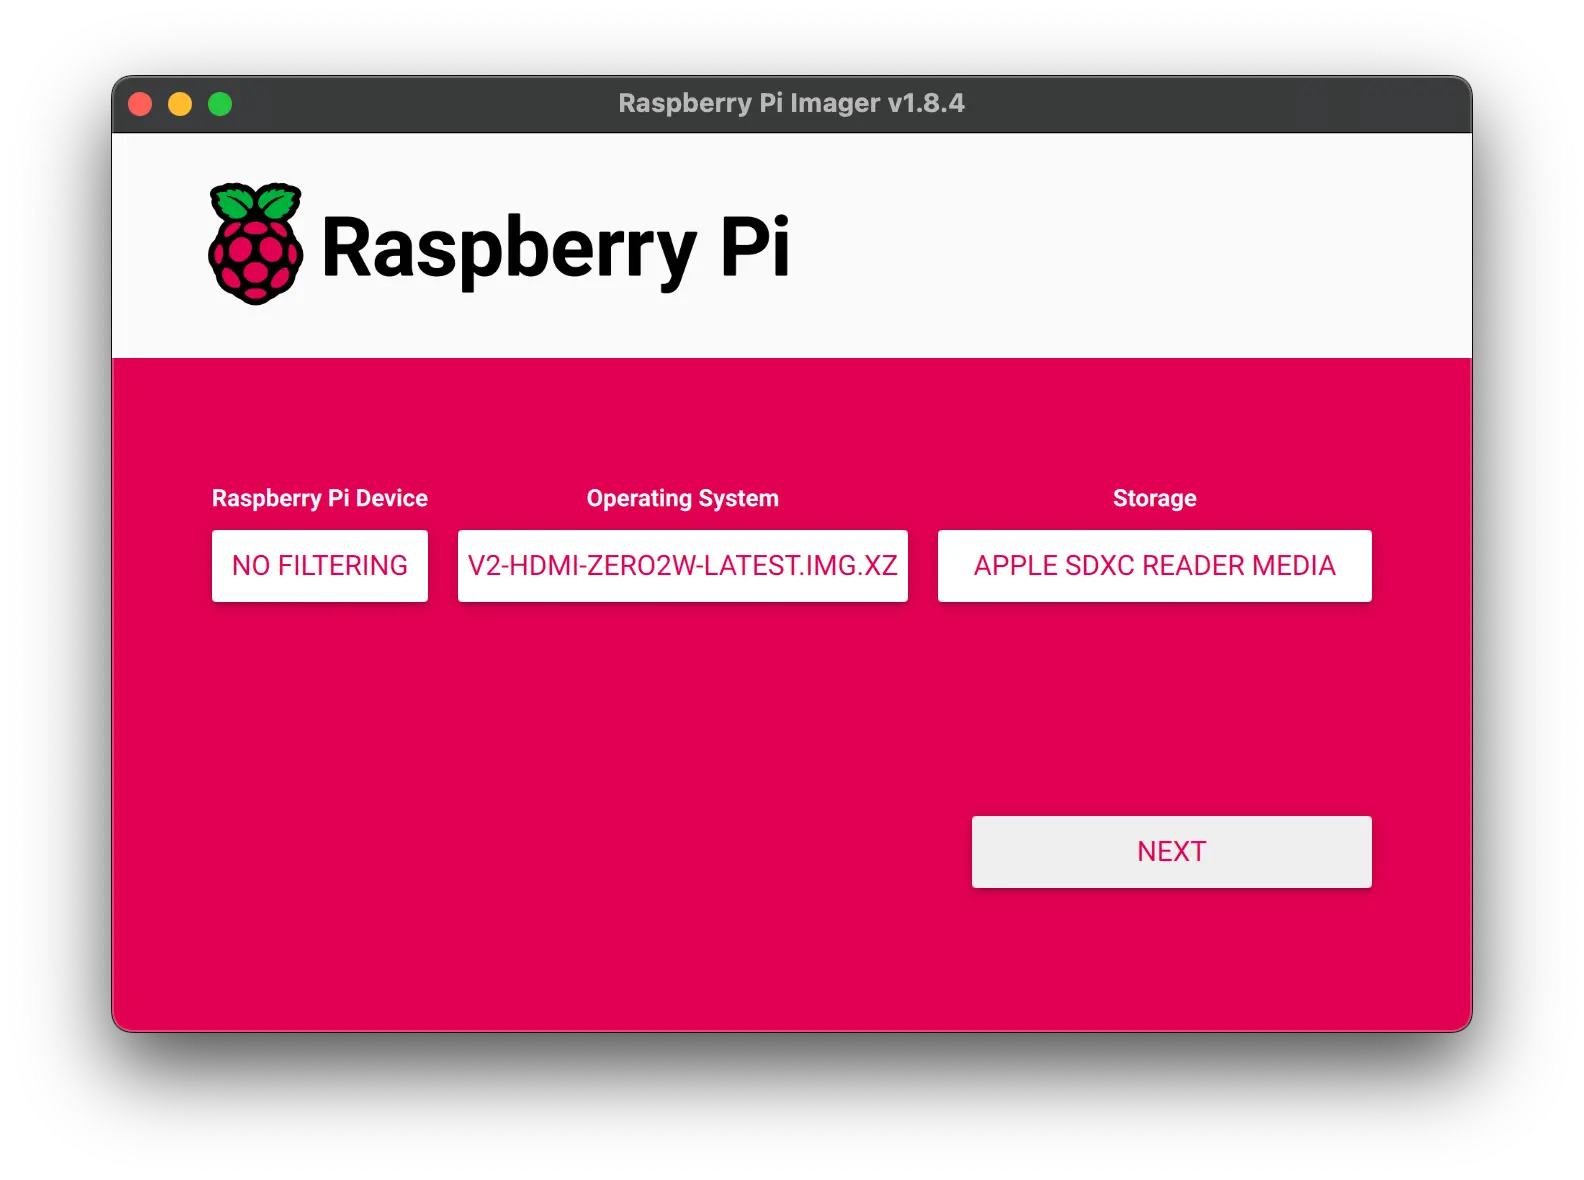
Following the instructions from the official documentation, let's download and install the OS. We are interested in the DIY V2 platform for the RPi Zero 2W:
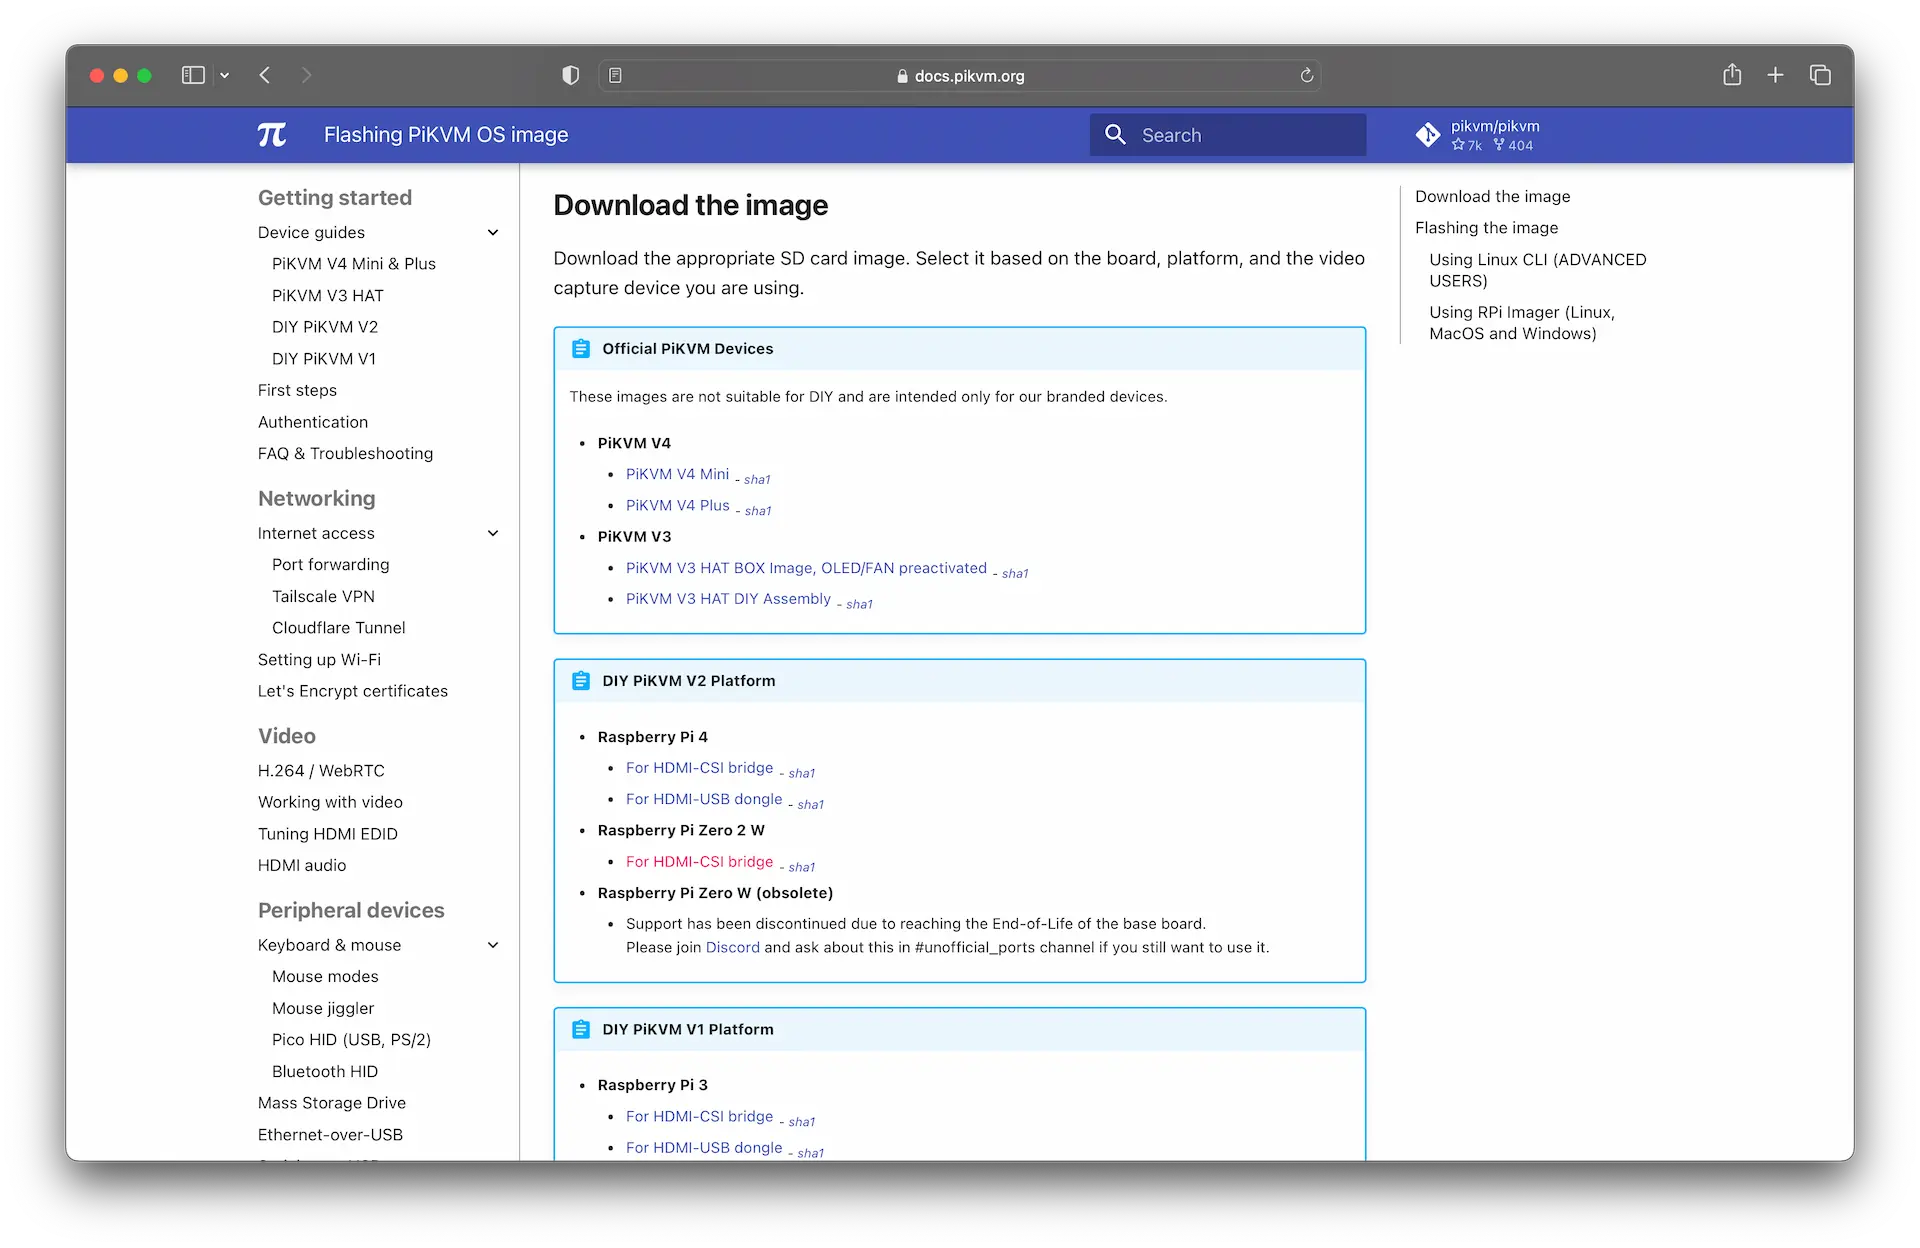
Insert the MicroSD card into a card reader, format it, and install the OS. To flush the image you'll need the Raspberry Pi Imager App:
Next, open the mounted MicroSD card and change the Wi-Fi SSID and password by updating the pikvm.txt file. You may also want to set a custom SSH port by updating the SSH_PORT variable.
WIFI_ESSID='mynet'
WIFI_PASSWD='p@s$$w0rd'
SSH_PORT=222
Once PiKVM is up and running don't forget to change the root and web interface passwords and update the timezone:
$ passwd
New password:
Retype new password:
passwd: password updated successfully

$ kvmd-htpasswd set admin
Password:
Repeat:

$ timedatectl set-timezone Europe/SamaraWiring up the display
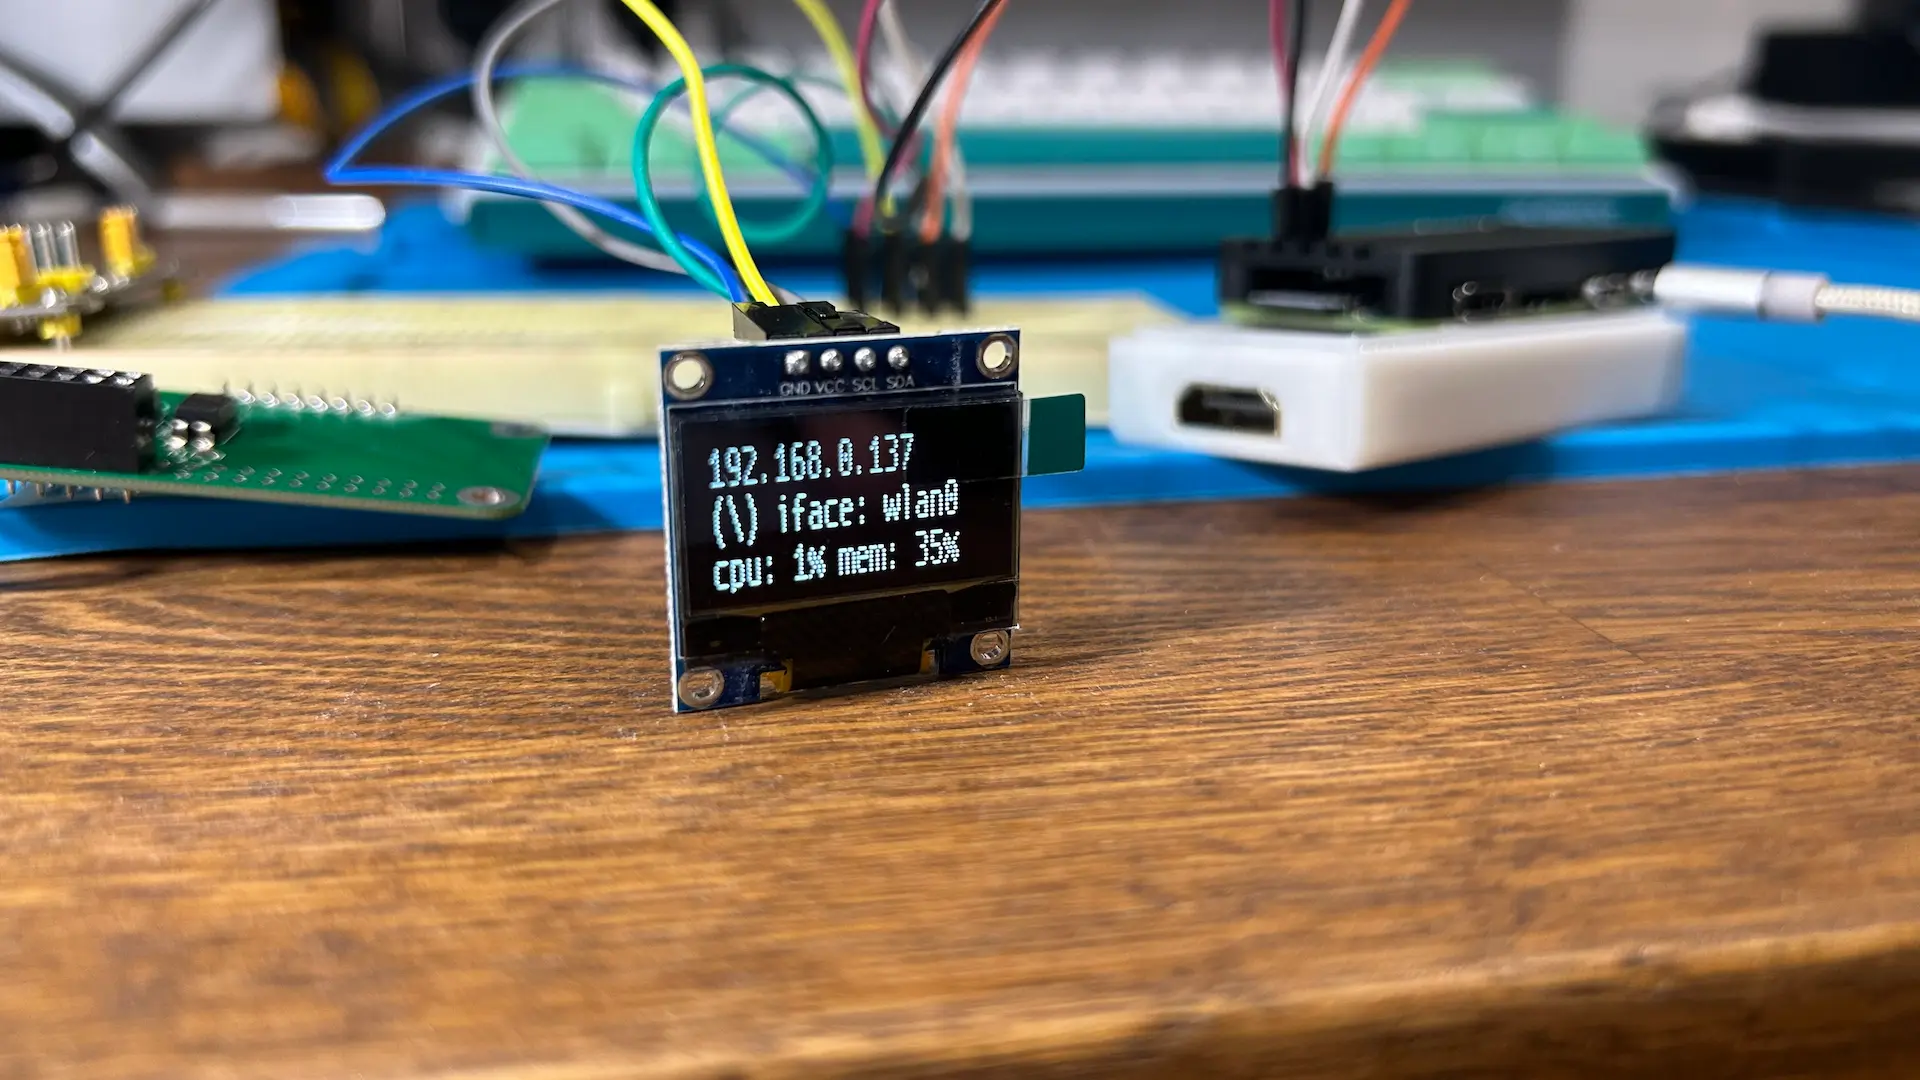
At this point, you already have a fully functioning device, and you could stop here and use it as is without adding a display, case, or anything else.
However, I wanted to go further and get the best I could out of it.
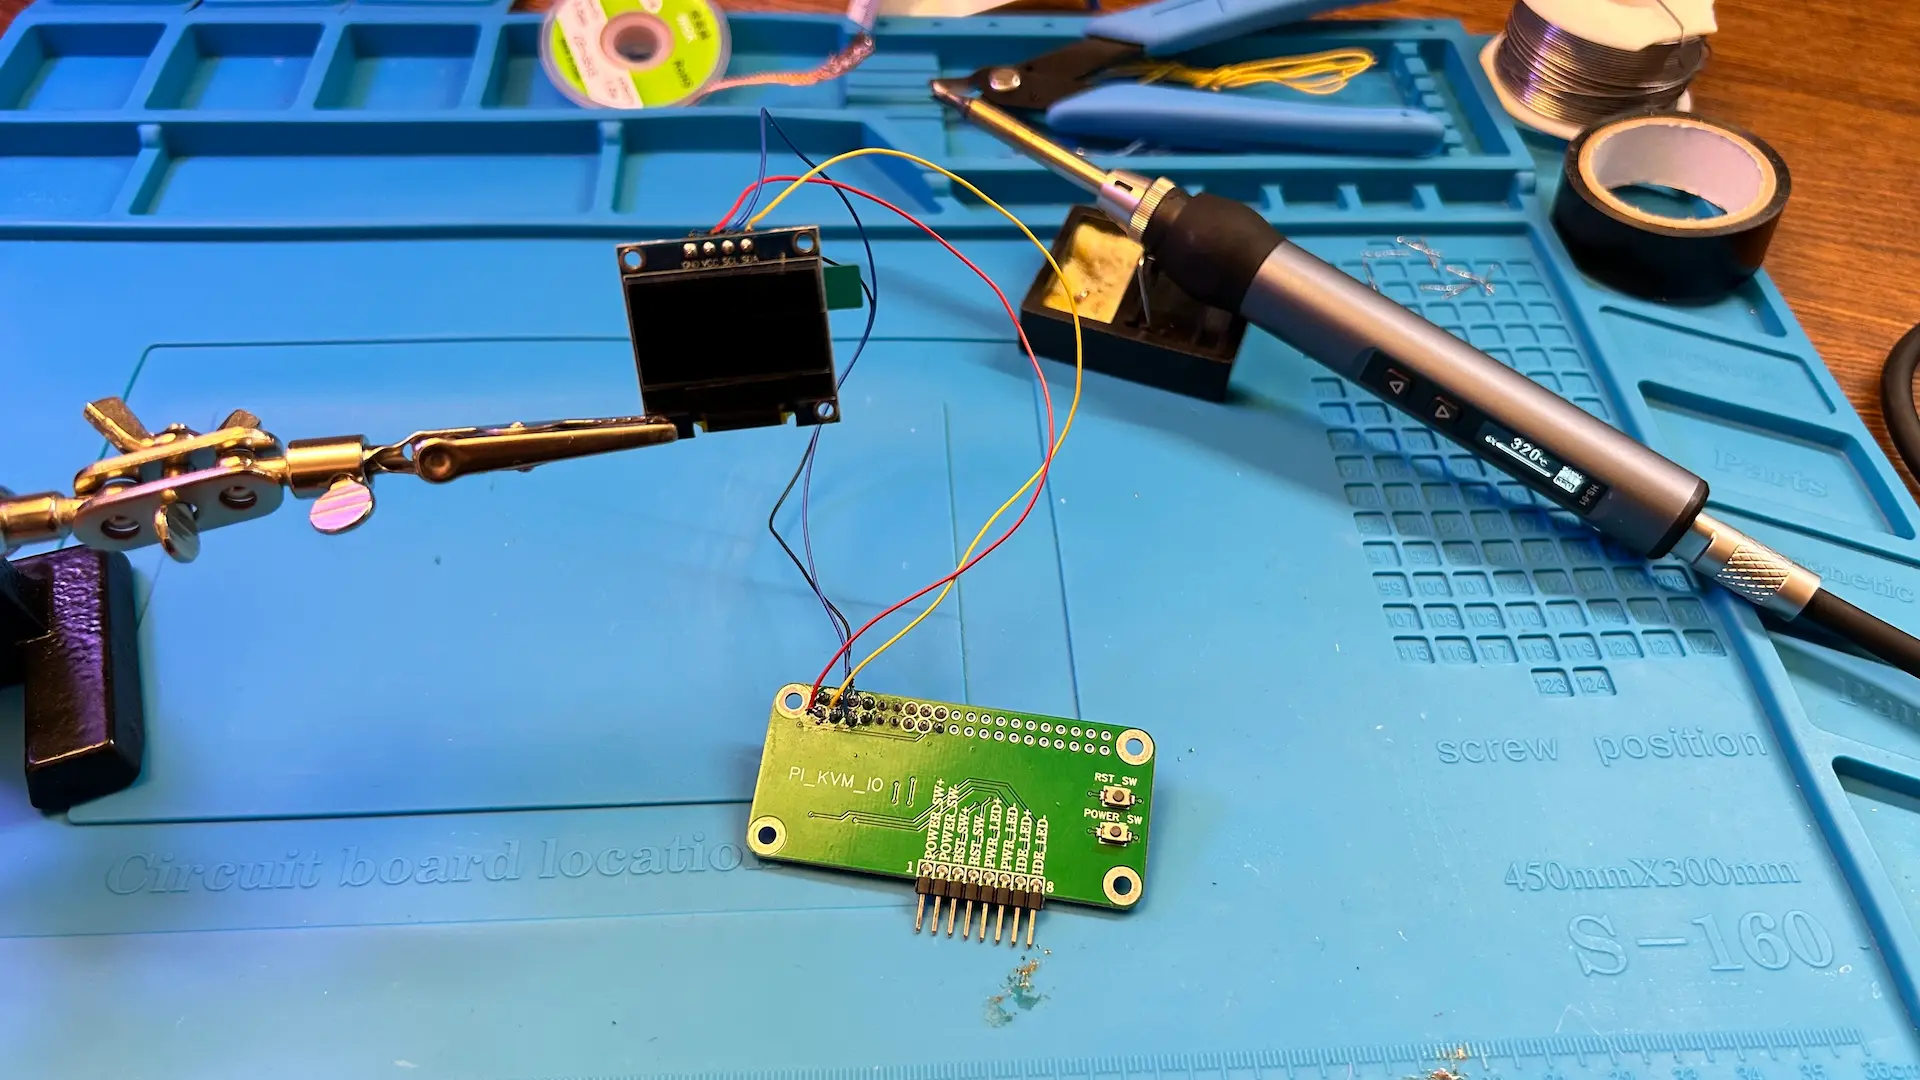
Luckily, I ordered a pair of 0.96" displays because one came in non-functioning, or maybe I accidentally broke it. The wiring diagram is as follows:
RPi            OLED
[1] 3.3V   <--> VCC [2]
[3] SDA    <--> SDA [4]
[5] SCL    <--> SCL [3]
[6] GND    <--> GND [1]
To turn off the display:
systemctl disable --now kvmd-oled kvmd-oled-reboot kvmd-oled-shutdown
kvmd-oled --height=32 --interval=0 --clear-on-exit --text=x
To turn it back on:
systemctl enable --now kvmd-oled kvmd-oled-reboot kvmd-oled-shutdownTo rotate the display if needed:
mkdir -p /etc/systemd/system/kvmd-oled.service.d
echo '[Service]
ExecStart=
ExecStart=/usr/bin/kvmd-oled --height=32 --clear-on-exit --rotate=2' >> /etc/systemd/system/kvmd-oled.service.d/override.conf
See more in the common questions section of the official docs.
3D Printing a housing case
There are plenty of awesome cases on Printables and Thingiverse, but most were designed for a shorter HDMI-to-CSI adapter, aren't meant to be used with an ATX controller board, and rarely include space for a display.
So I designed my own. It wasn't easy; I spent several days trying different placements for the components, tweaking the shape of the case, measuring all the holes and ports, and finally, I made it:
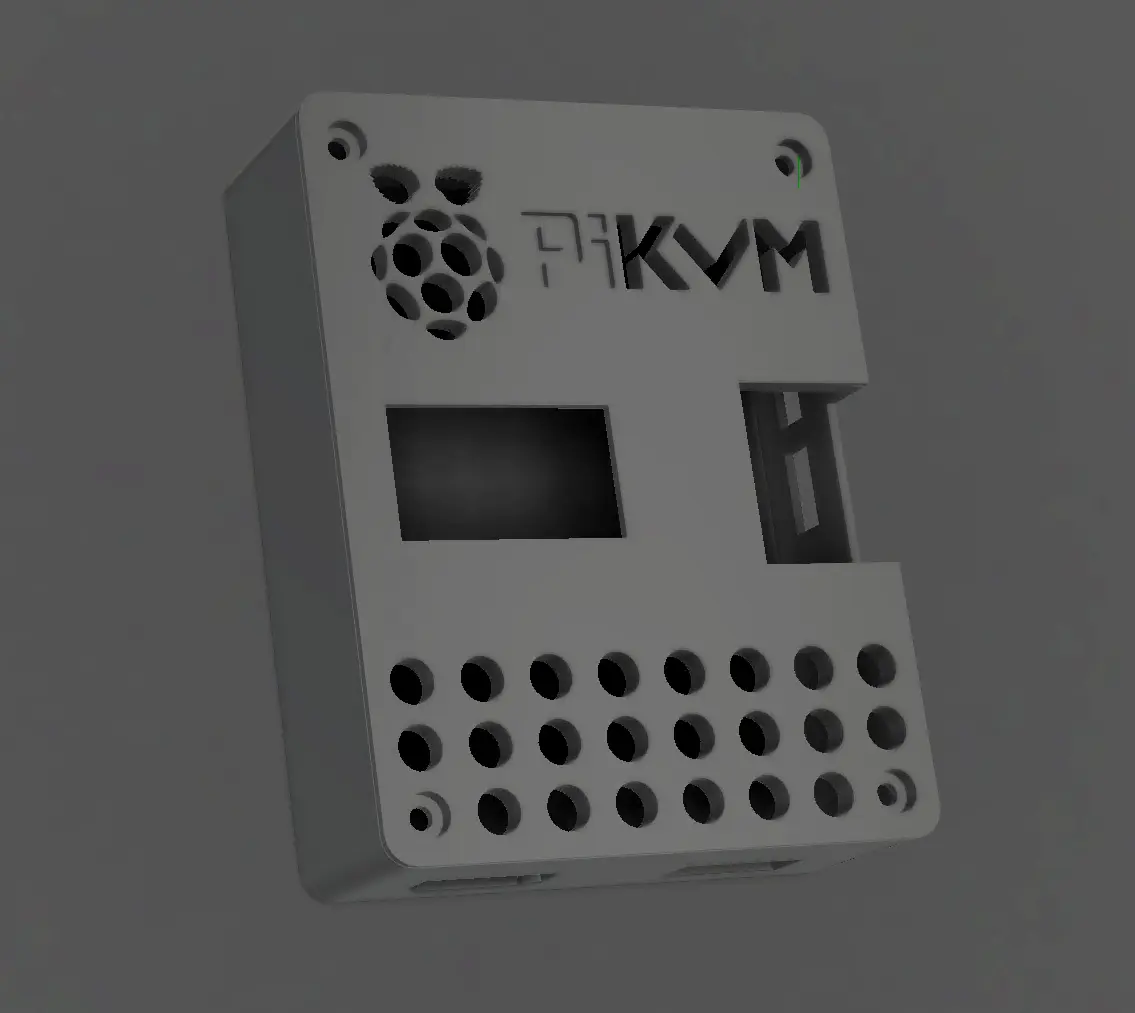
It's still not perfect. I plan to polish it with better hole alignment.

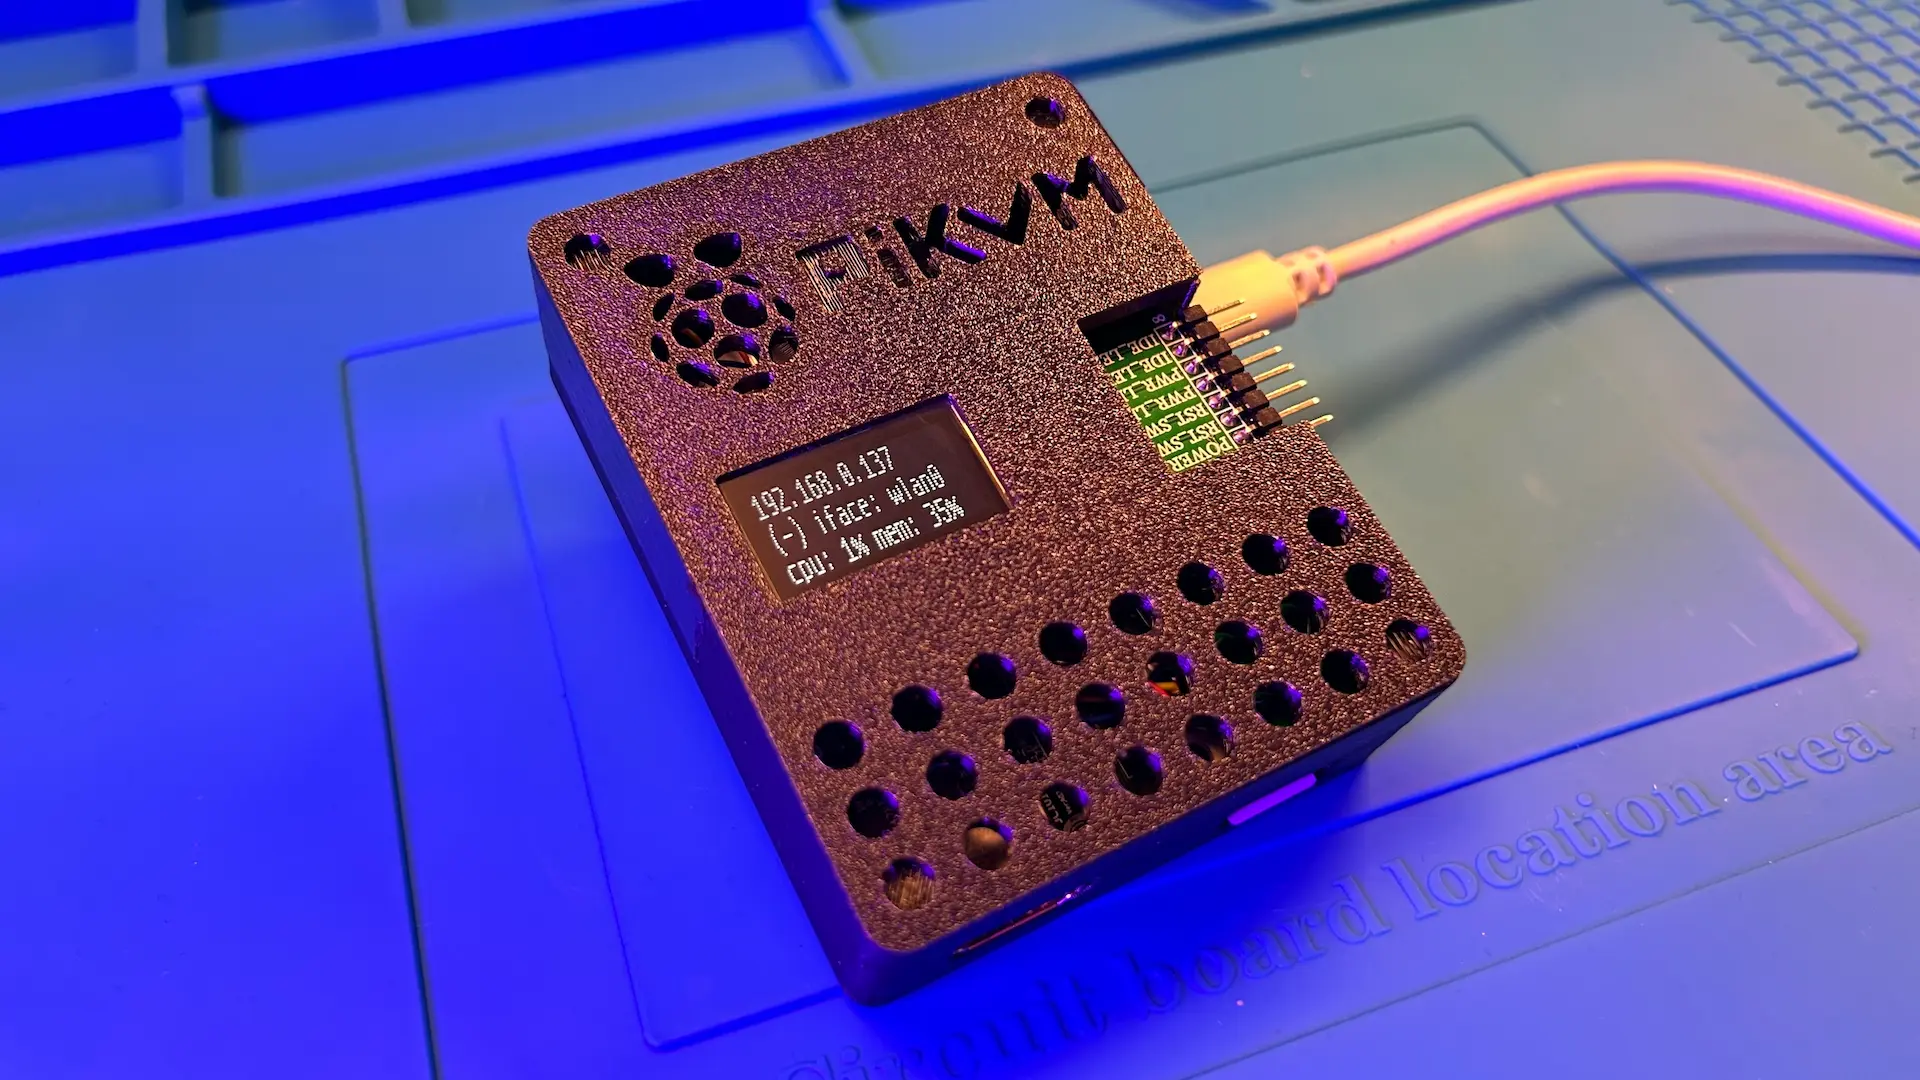
The display module is glued to the top of the case:
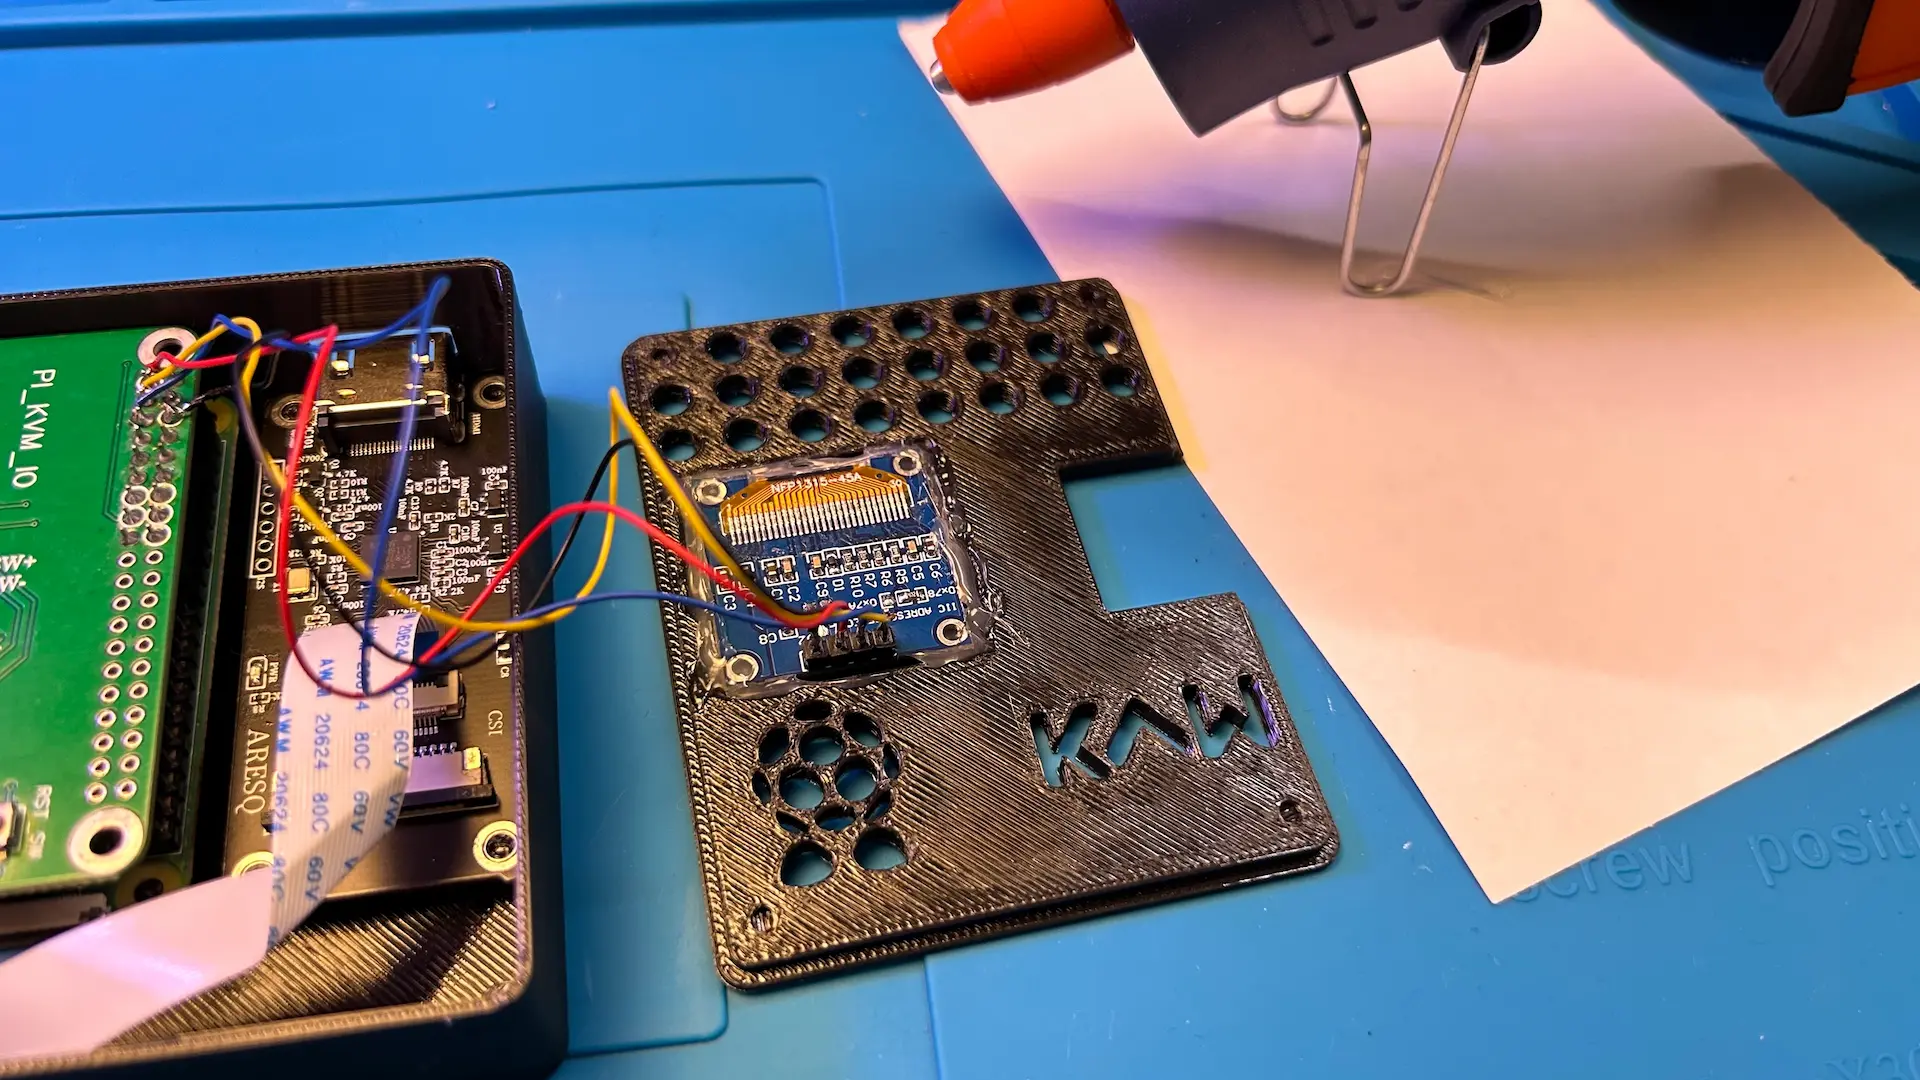
🚀 And here's the final look. It should be secured with 4x M2.5x20 screws across the edges, but I only had 16mm screws, so once again, tape came to the rescue.
Conclusion
As a result of this journey, I now have an interesting and incredibly useful device for my HomeLab and likely for other future projects. I don't know how long the Raspberry Pi Zero 2W will be officially supported, but I suppose at least a couple of years, which is more than enough.
Another thing I like about PiKVM is that it can also be connected to one of the ezCoo KVM switches, allowing control of up to four PCs at once.
And of course, it's possible to make the PiKVM instance accessible from the internet, along with obtaining a proper Let's Encrypt certificate and setting up Two-factor authentication.
Hope this helps you!
Troubleshooting
Be aware that when connecting an RPi data cable to a PC USB port, in the case of an external power supply, the PC may get back-powered through the USB. There are several ways to fix this, but they all involve blocking the USB power line using different methods:
- Buy a USB power blocker like this one from PortaPow
- Build your own power blocker adapter
- Print a simple pin isolator for USB-A male
- Or just cut the line, or cover it with tape or another dielectric material, which is what I did