![Voron Trident 350 [VT.1997]: Build Log](/_astro/cover.BW6y2xOl.jpg)
Why Build a Voron?
I'd been 3D printing for several years before the journey began, but I hit a wall - I wanted speed, quality and a machine I knew inside out. With no compromises, fully customizable, upgradable and with a strong community around it. A machine that will last for years and will be a joy to use and tinker with.
Diving into additive technologies and particularly 3D printing, I owe several prebuilt models but was always fascinated by Voron family printers and community around it. It's not always clear what exactly is a Voron as nowadays there are several official builds and plenty of non-official projects, clones and successors that people call Vorons.
To conclude it shortly:
Voron is a family of 3D printers that are open-source, community-driven and what's most important - designed to be built from off-the-shelf parts.
There was a speech on YT by Nero about which printers could belong to this family. I agree with him, so I will not repeat it here.
Building something from scratch is not for everyone, let's be honest. It requires a lot of time, patience, sometimes enthusiasm and desire to learn new things. But for me it's a great way to become closer to the technology and implement all the ideas I have in mind. Plus, it's fun! 😄
I wouldn't recommend this path for anyone who just starts with 3D printing and wants to have results quickly. Buying something like Prusa, Creality, Bambu Lab or any other reliable brand is a much better choice in this case.
Open-Source is so diverse
Usually I think about Open Source in terms of software development, but it also has a whole hidden world of hardware projects. IoT devices, 3D printers, CNC, Plastic Recicling machines and many more are available as open-source projects. Last thing I built was a PiKVM, which is also an open-source hardware project.
So what does it mean to be an OSH project? It means that the design files, schematics, and other documentation are available for anyone to use, modify, and distribute. Such projects usually are built using an off-the-shelf approach, allowing you to buy all the parts from different suppliers without the need to manufacture them.
OSH or OSHW stands for Open Source Hardware, which refers to hardware designs that are made publicly available.
Why I Chose the Voron Trident
There are 2 main builds of Voron at the moment I started this project: 2.4 and Trident. They are both CoreXY printers, both follow similar design principles and even share some mechanical parts. The main difference is a way of Z axis (vertical) movement: 2.4 has a fixed bed and moving (also called "flying") gantry, while Trident has a moving bed and fixed gantry similar to most mass-market printers. Both have their pros and cons, but I decided to go with Trident because it's a bit easier to build and maintain.
I saw debates about self-sourcing vs kits in the community, and I think that both approaches have their pros and cons, but in my particular case buying parts on my own was a better choice and I indeed saved some money plus got exactly the parts I wanted to use instead of the ones included in the kit.
There are many vendors that sell pre-made kits for Voron printers (LDO, Siboor, Formbot, etc), which include all the parts you need to build it, including the frame, electronics, fasteners and sometimes even printed parts or CNC milled components. In my place kits were quite pricy and I already had some electronics lying around. Another point against kits is the fact that they often are assembled around an official BOM and latest printer revision, while I wanted to apply some upgrades from the community.
| Feature | LDO (or other) Kit | Self-Sourcing |
|---|---|---|
| 💸 Cost | Higher (but fixed) | Potentially Lower (but variable) |
| ⏱️ Time | Faster (everything included) | Very Slow (months of sourcing) |
| 🛠️ Assembly | Guided | Self-Guided |
| 🛒 Sourcing Effort | Minimal | Significant |
| 🧑🔧 Skill Level Required | Beginner to Intermediate | Intermediate to Advanced |
| 🧩 Learning Experience | Moderate | Extensive |
| 📚 Documentation | Comprehensive | Requires Research |
Official builds are available in several sizes: 250, 300 and 350, indicating the size of the printing bed or build volume. My choice was 350, which is the largest one and in my opinion makes sense to build if bothering to build a printer from scratch.
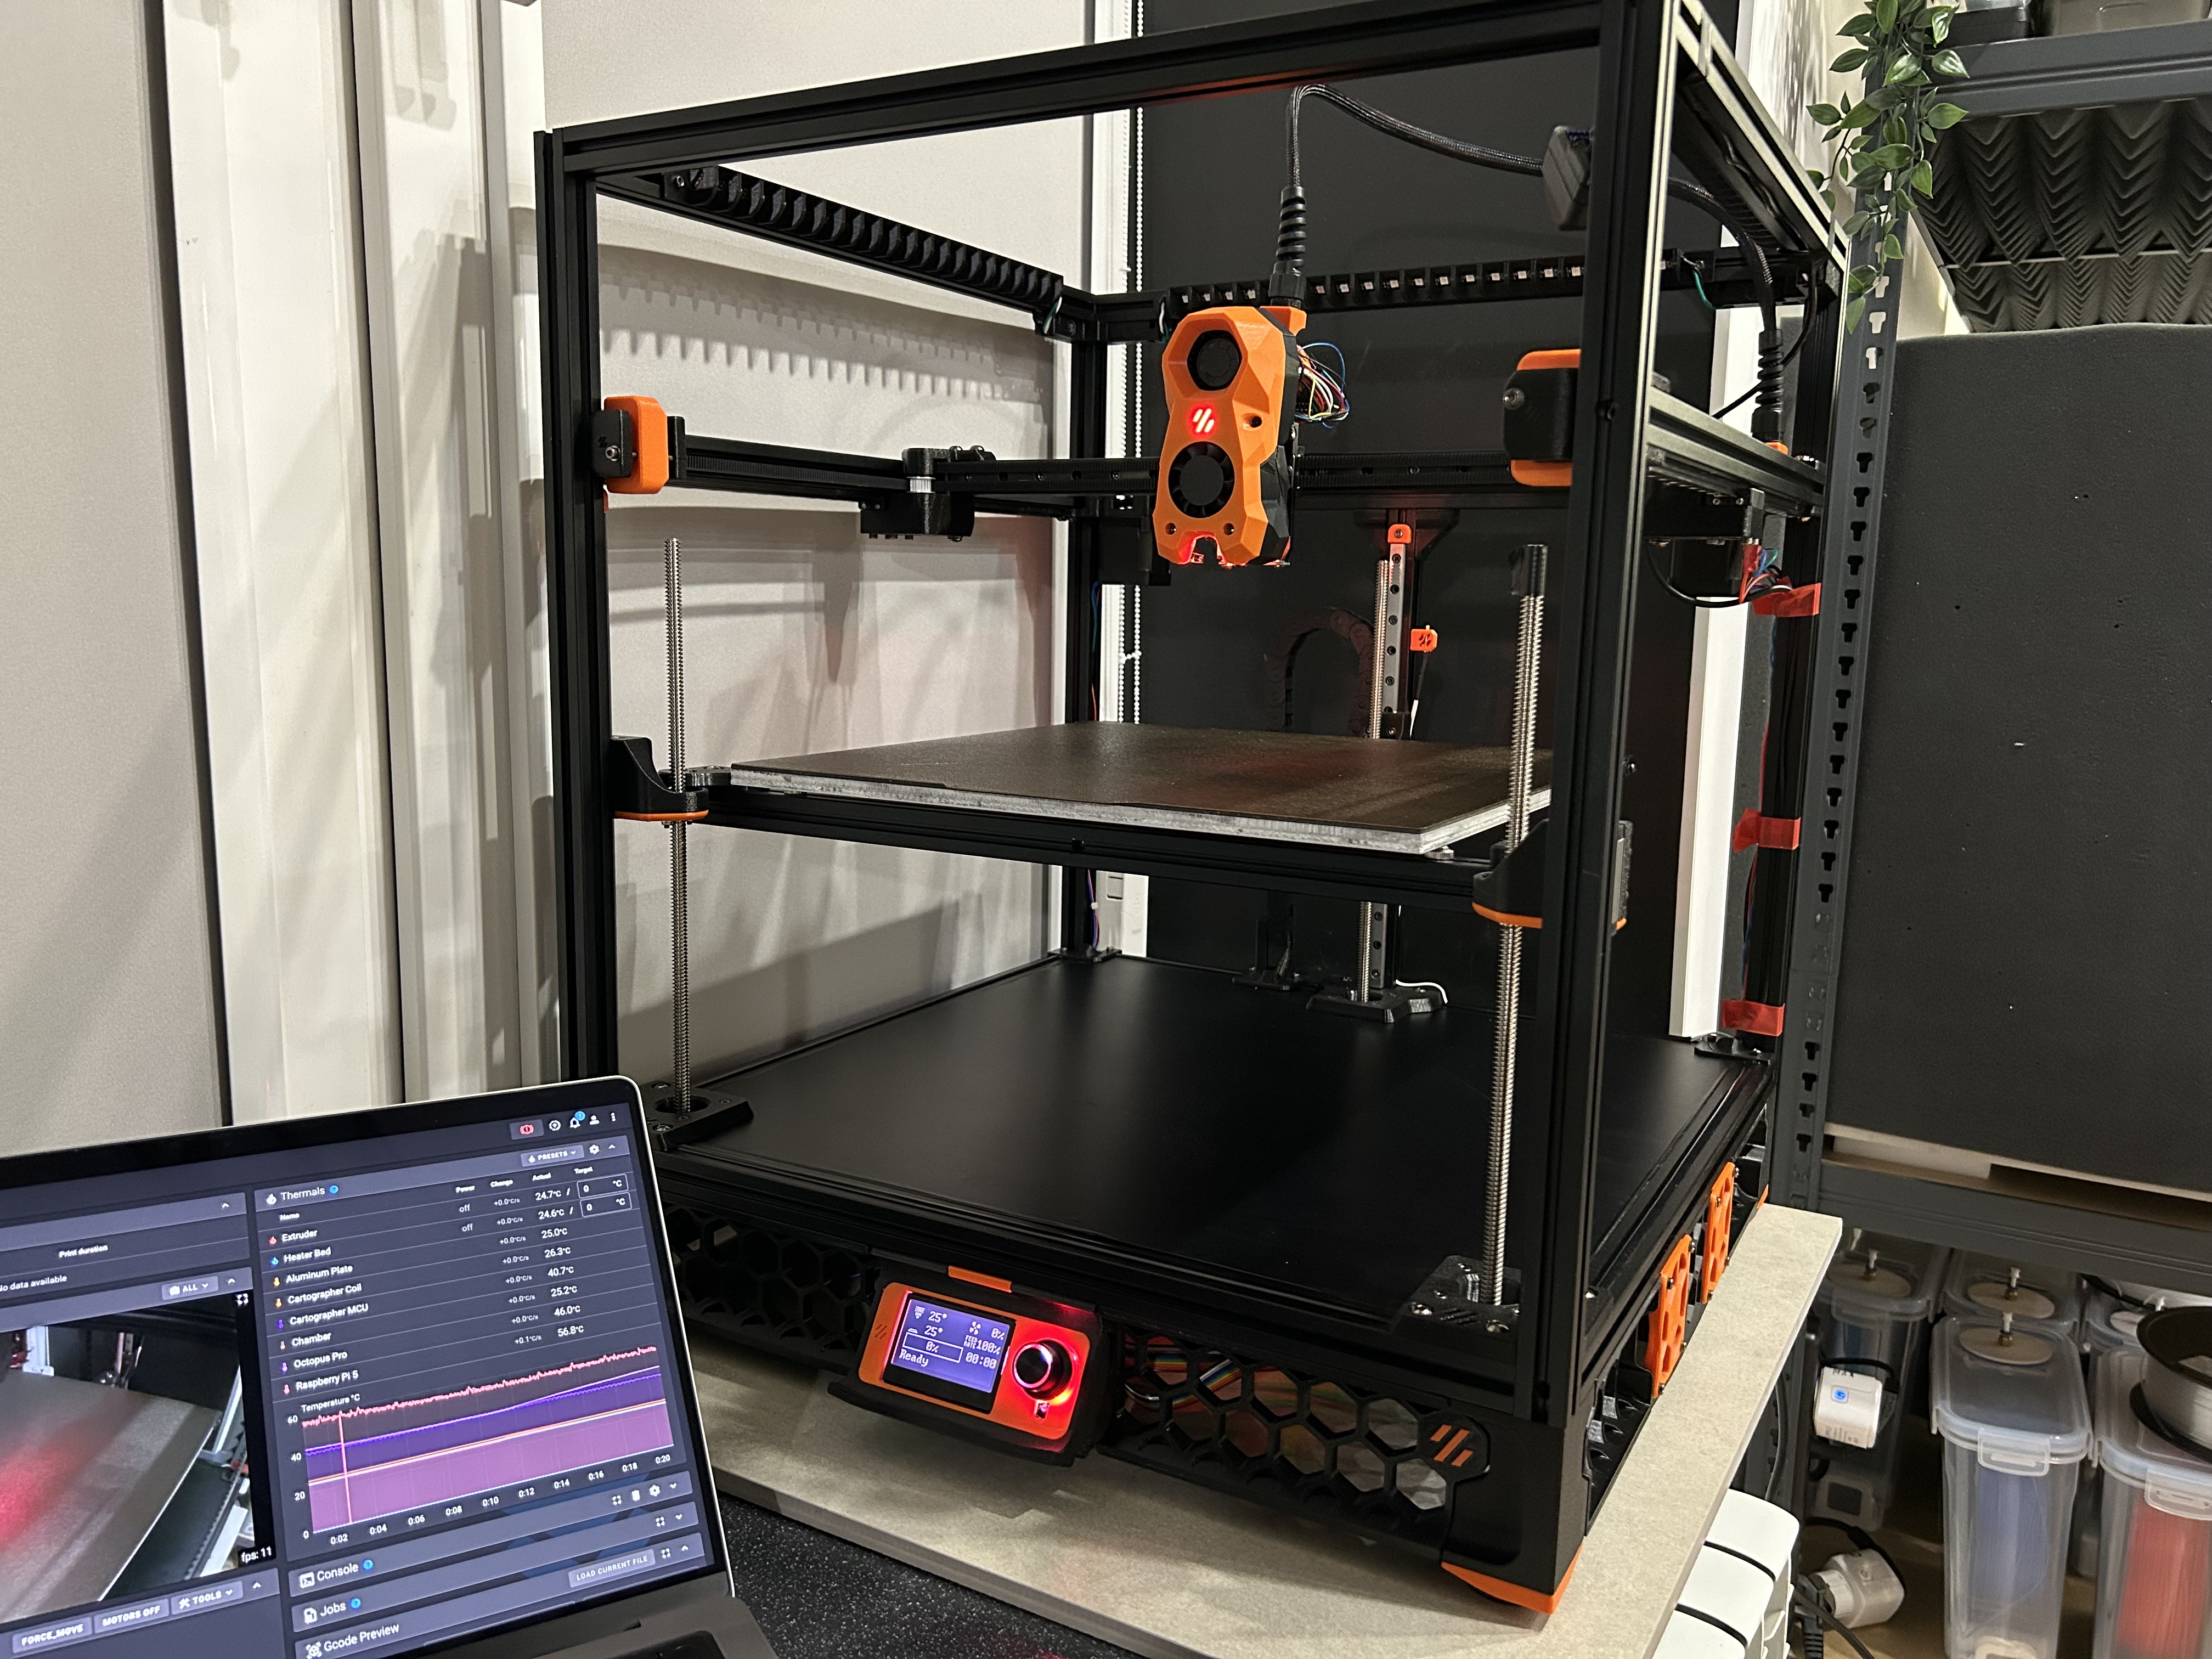
VT.1997: The Build Log
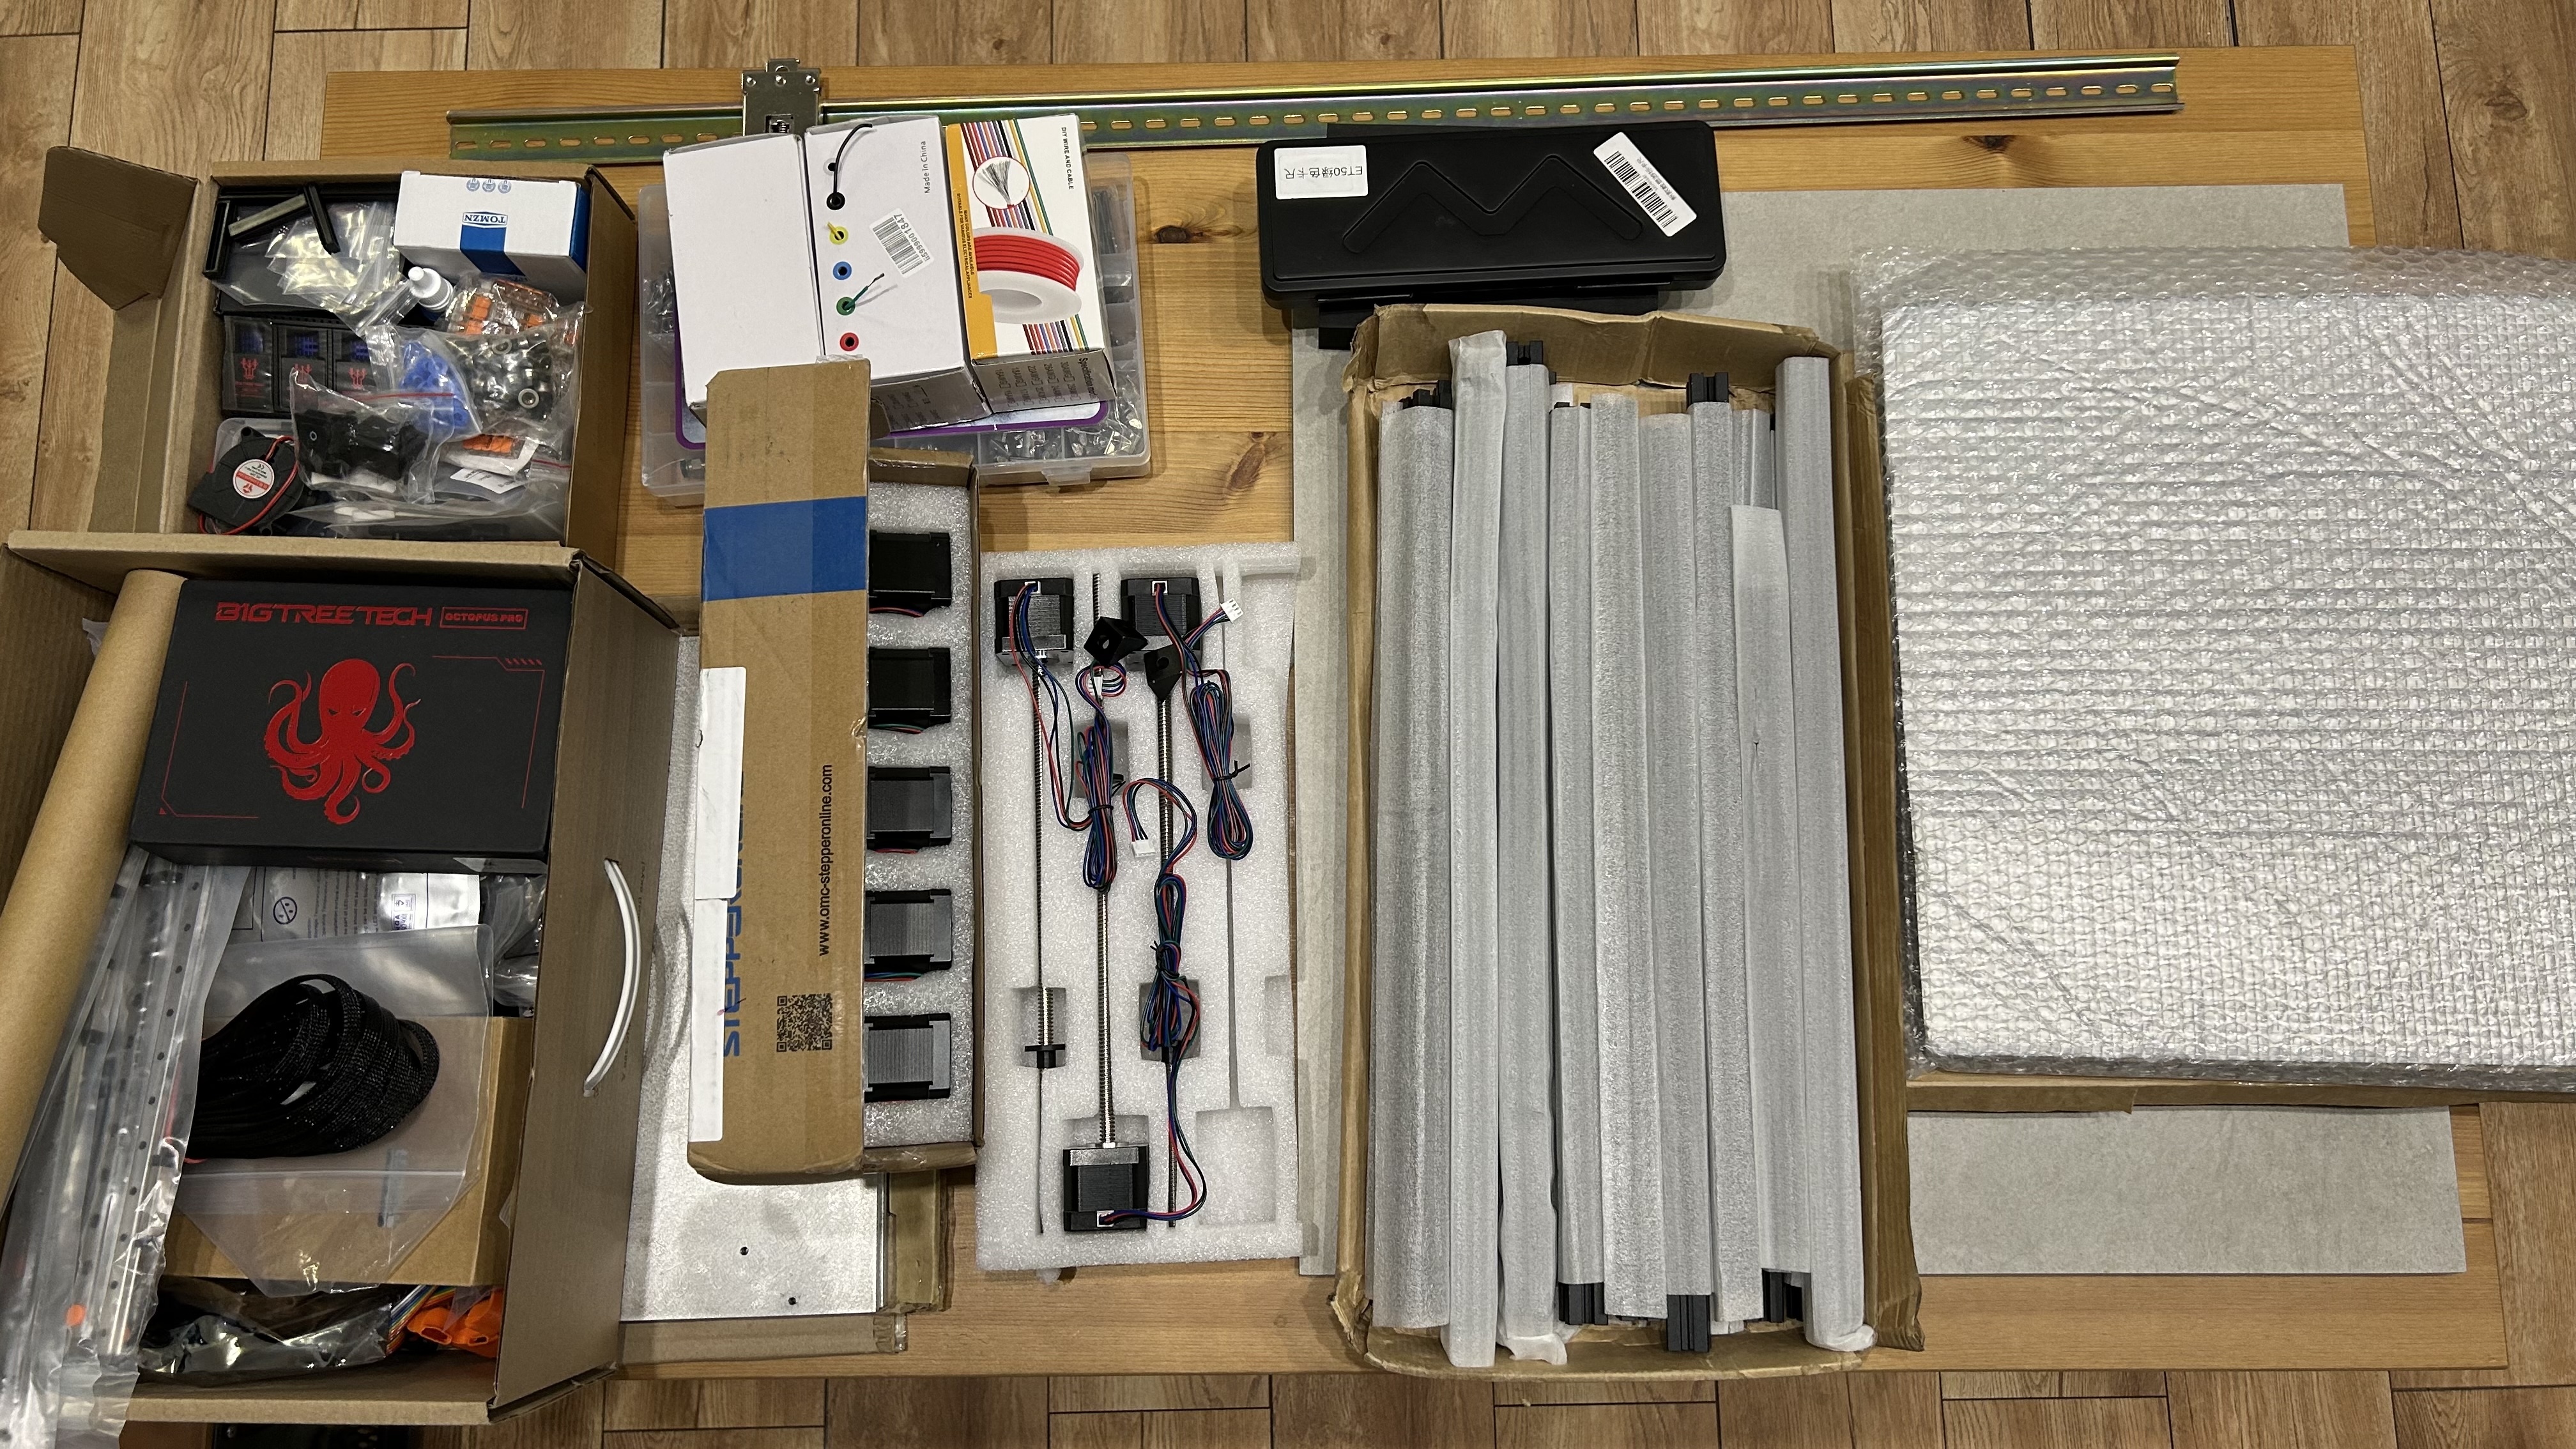
I started with the official BOM and then added some parts I wanted to use. The BOM is quite extensive and includes everything from the frame to the electronics, so it took me some time to go through it. I also had to make some decisions on type of hotend, extruder, and other components.
Some parts were purchased separately, but some, like fasteners I got as a full set. It would be a waste of time to pick and order every single screw.
Pulleys, belts, bearings, acrylic sheets, wiring, connectors and other small parts were ordered from various local and AliExpress suppliers.
Part 1: Building the Frame and Gantry
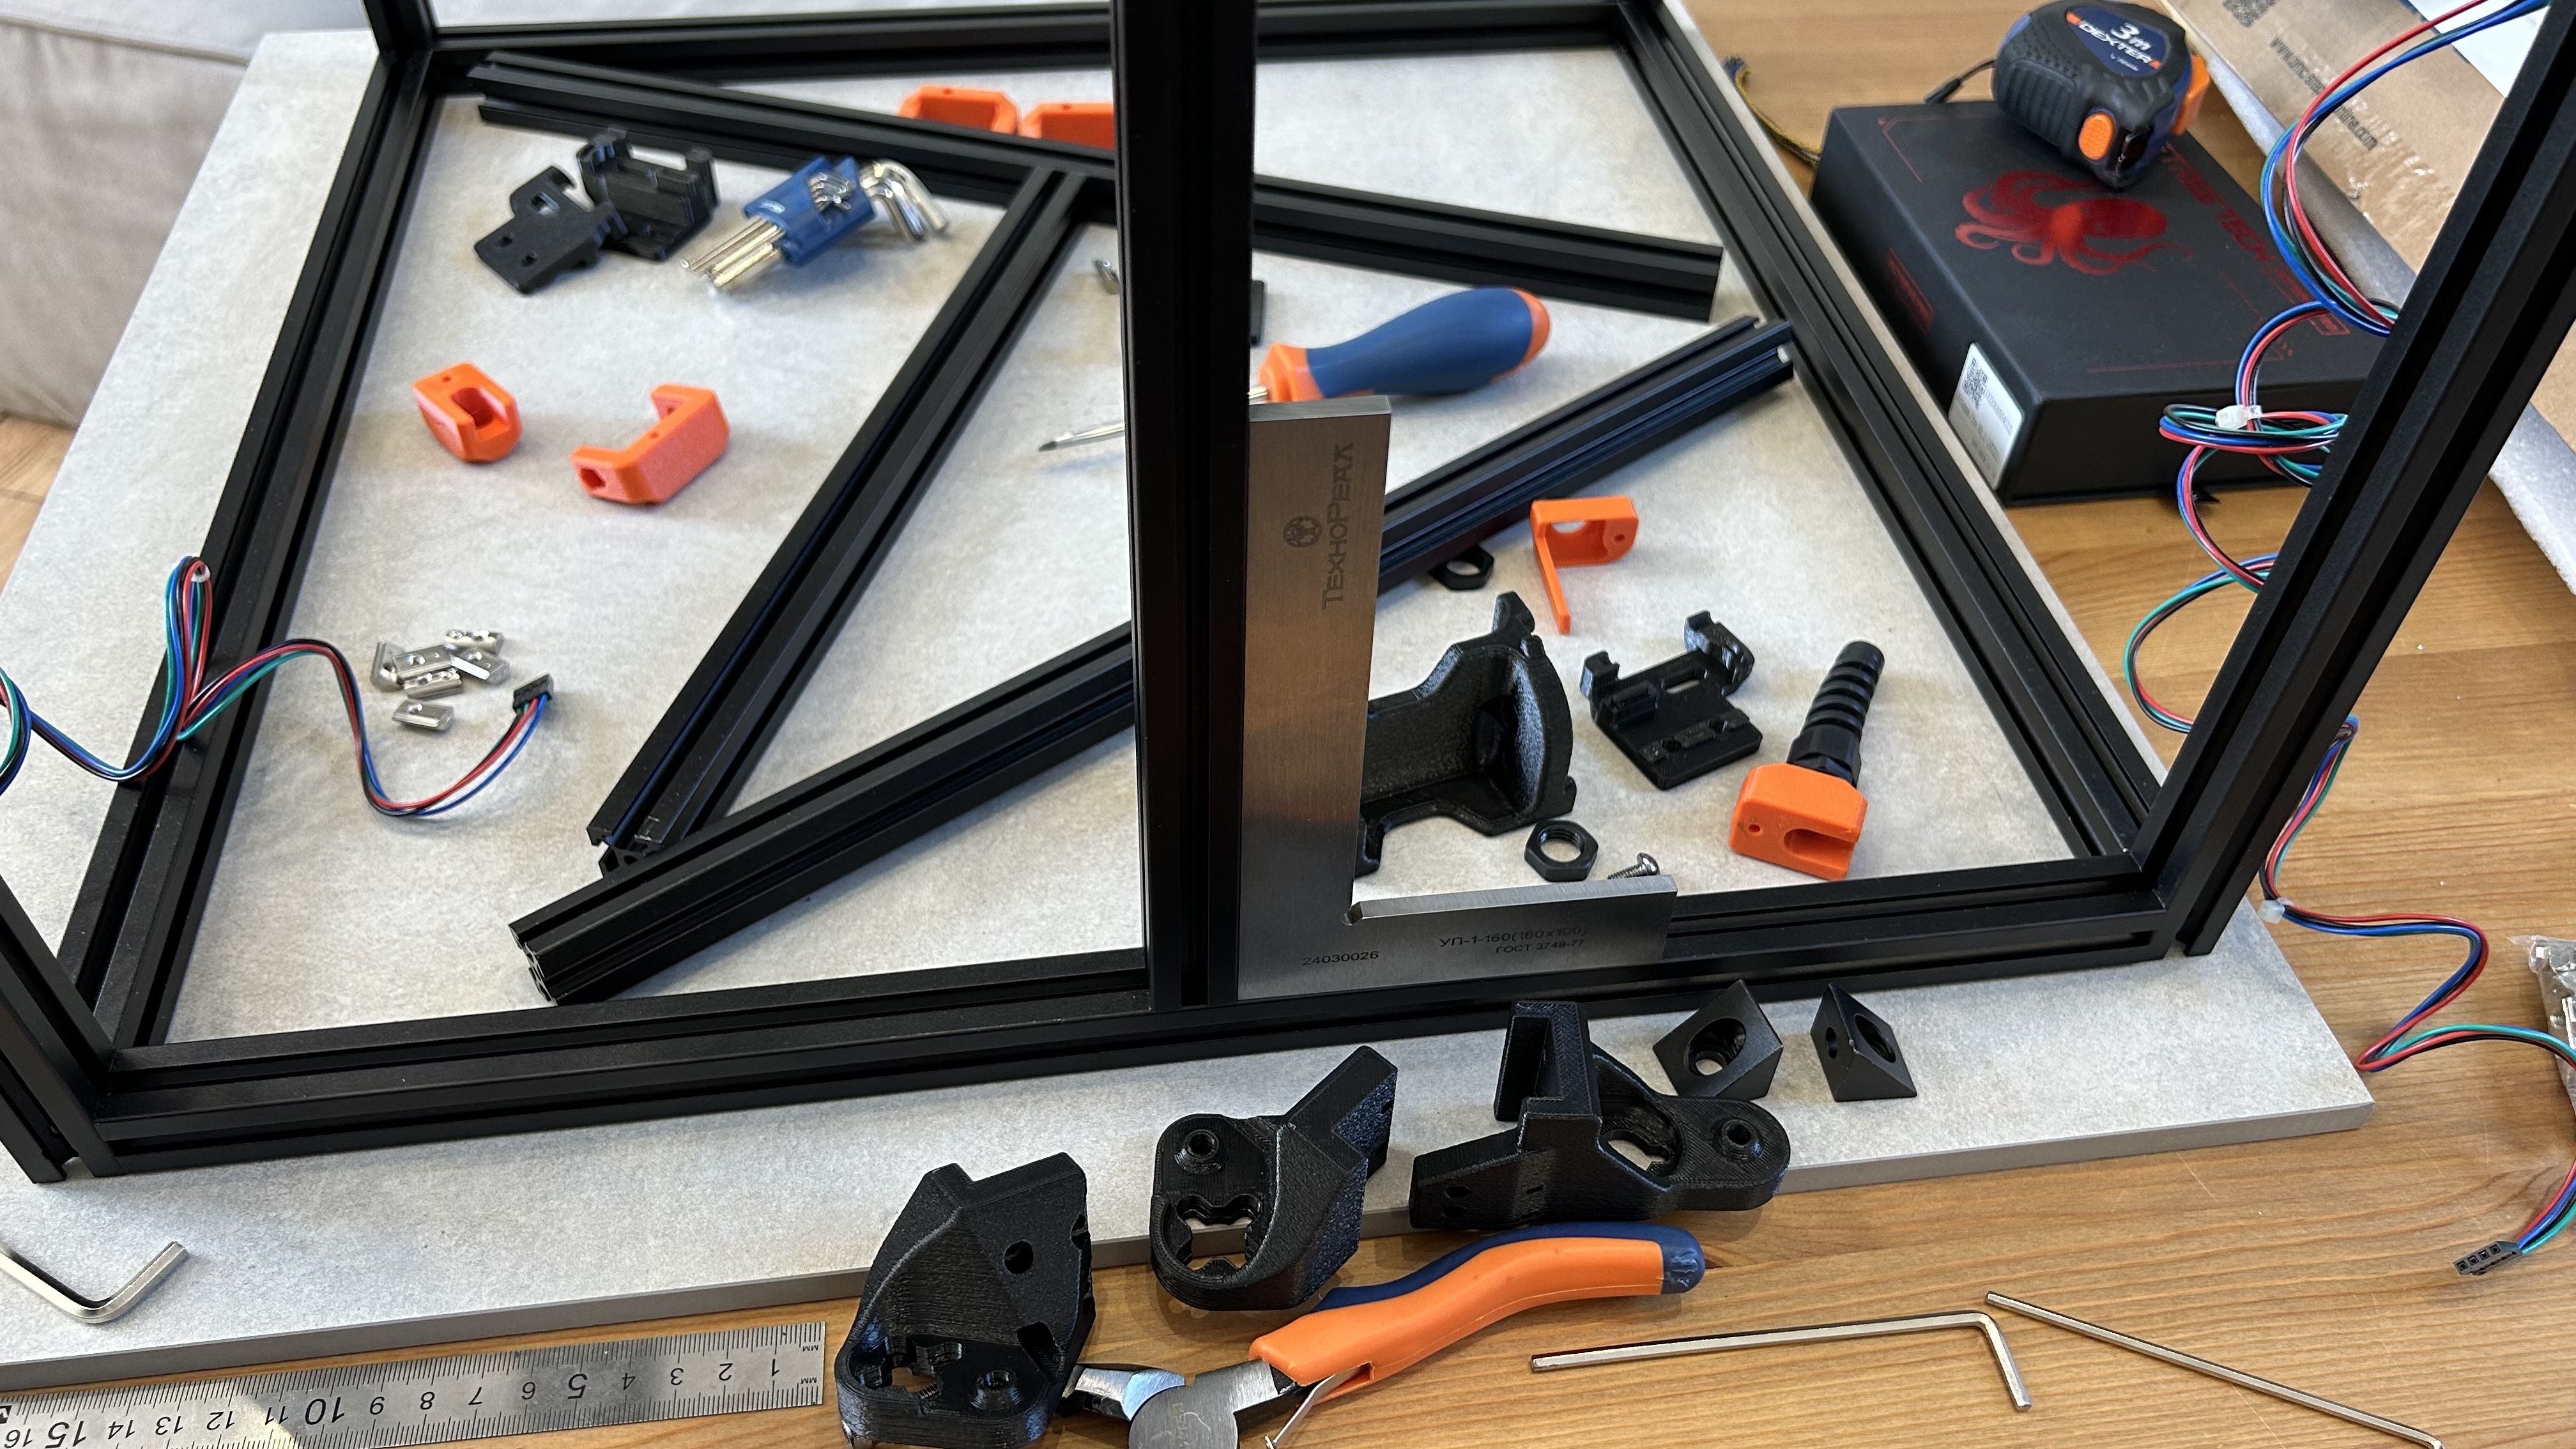
Do not fully tighten the frame screws until the very end of the assembly. Use flat surface and follow Ellis' gantry squaring instructions.
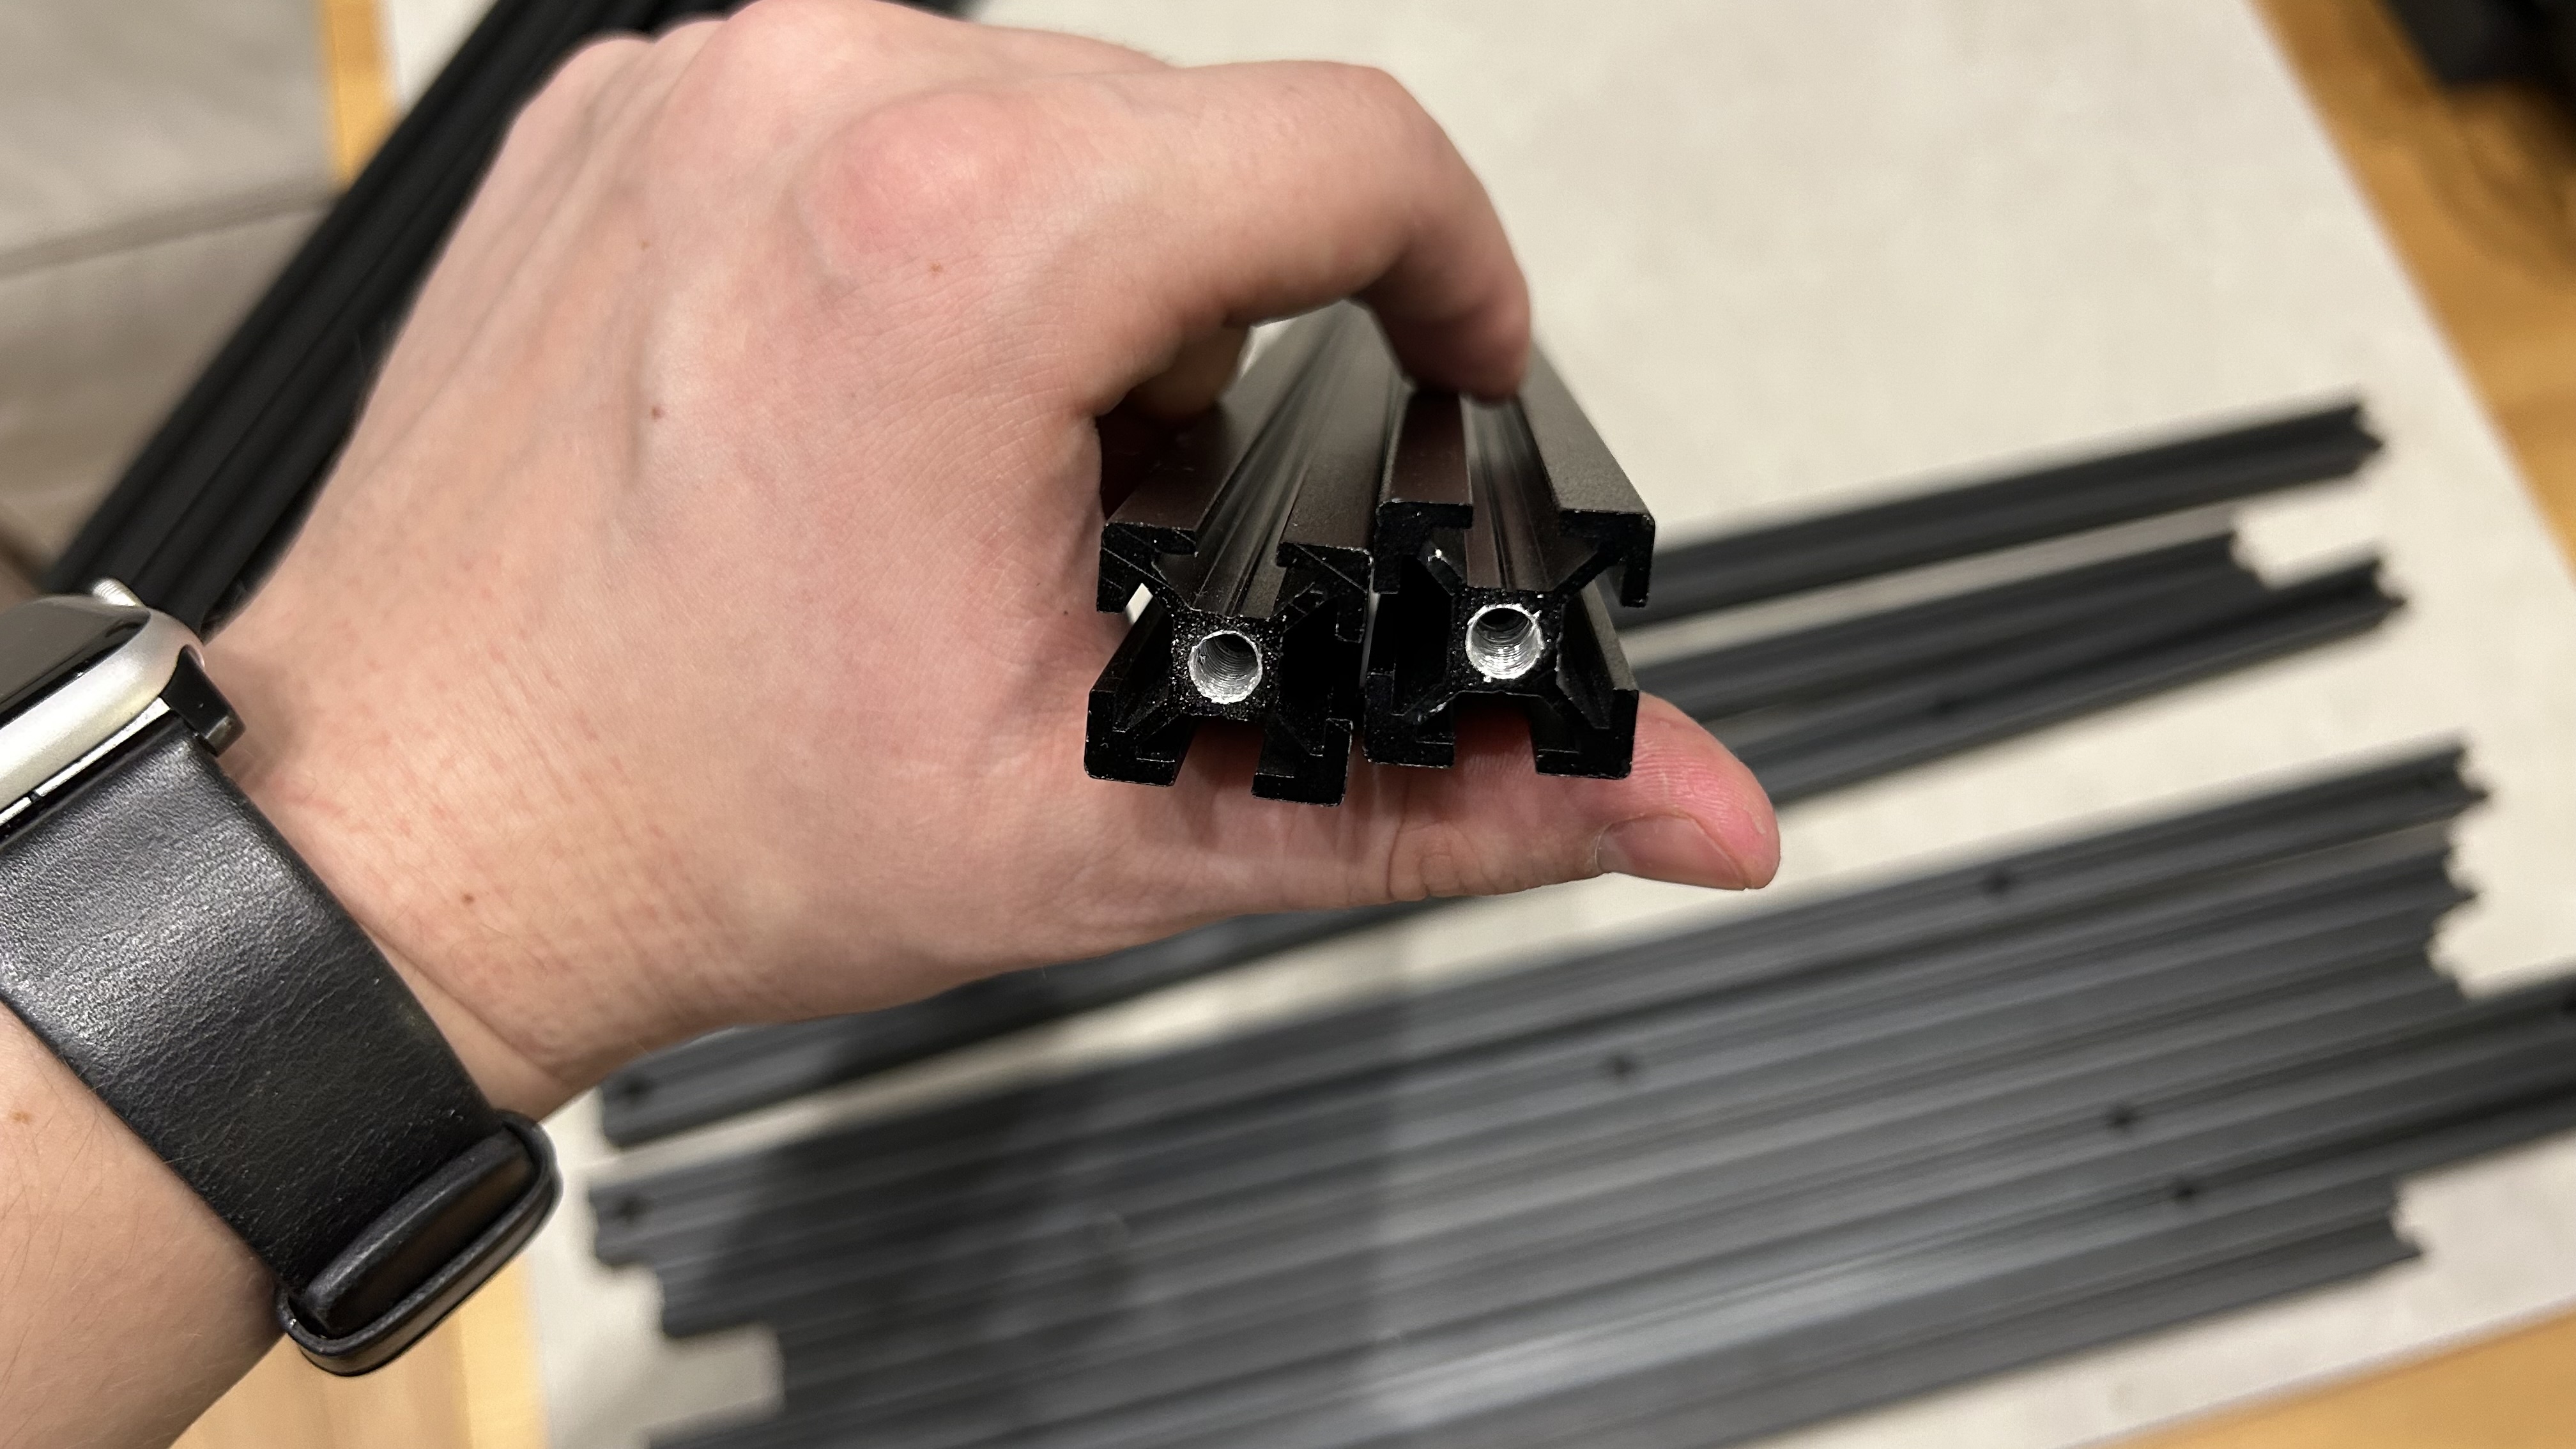
The extrusions I ordered on AliExpress were already cut to size, drilled and threaded, but the issue was in the length of the threads - they were too short and not enough to hold the frame together. It was the very first issue of many I faced during the build. To fix it I bought a tap tool and manually extended the threads on almost all the extrusions. Not an easy task to be honest.
Motion parts:
- Integrated leadscrew NEMA 17 stepper motors for Z axis from Siboor
- Leadshine motors for X and Y axis (initially I used OMC 17HS19-2004S1)
- RDBB & KGT chinese linear rails (quite budget-friendly option)
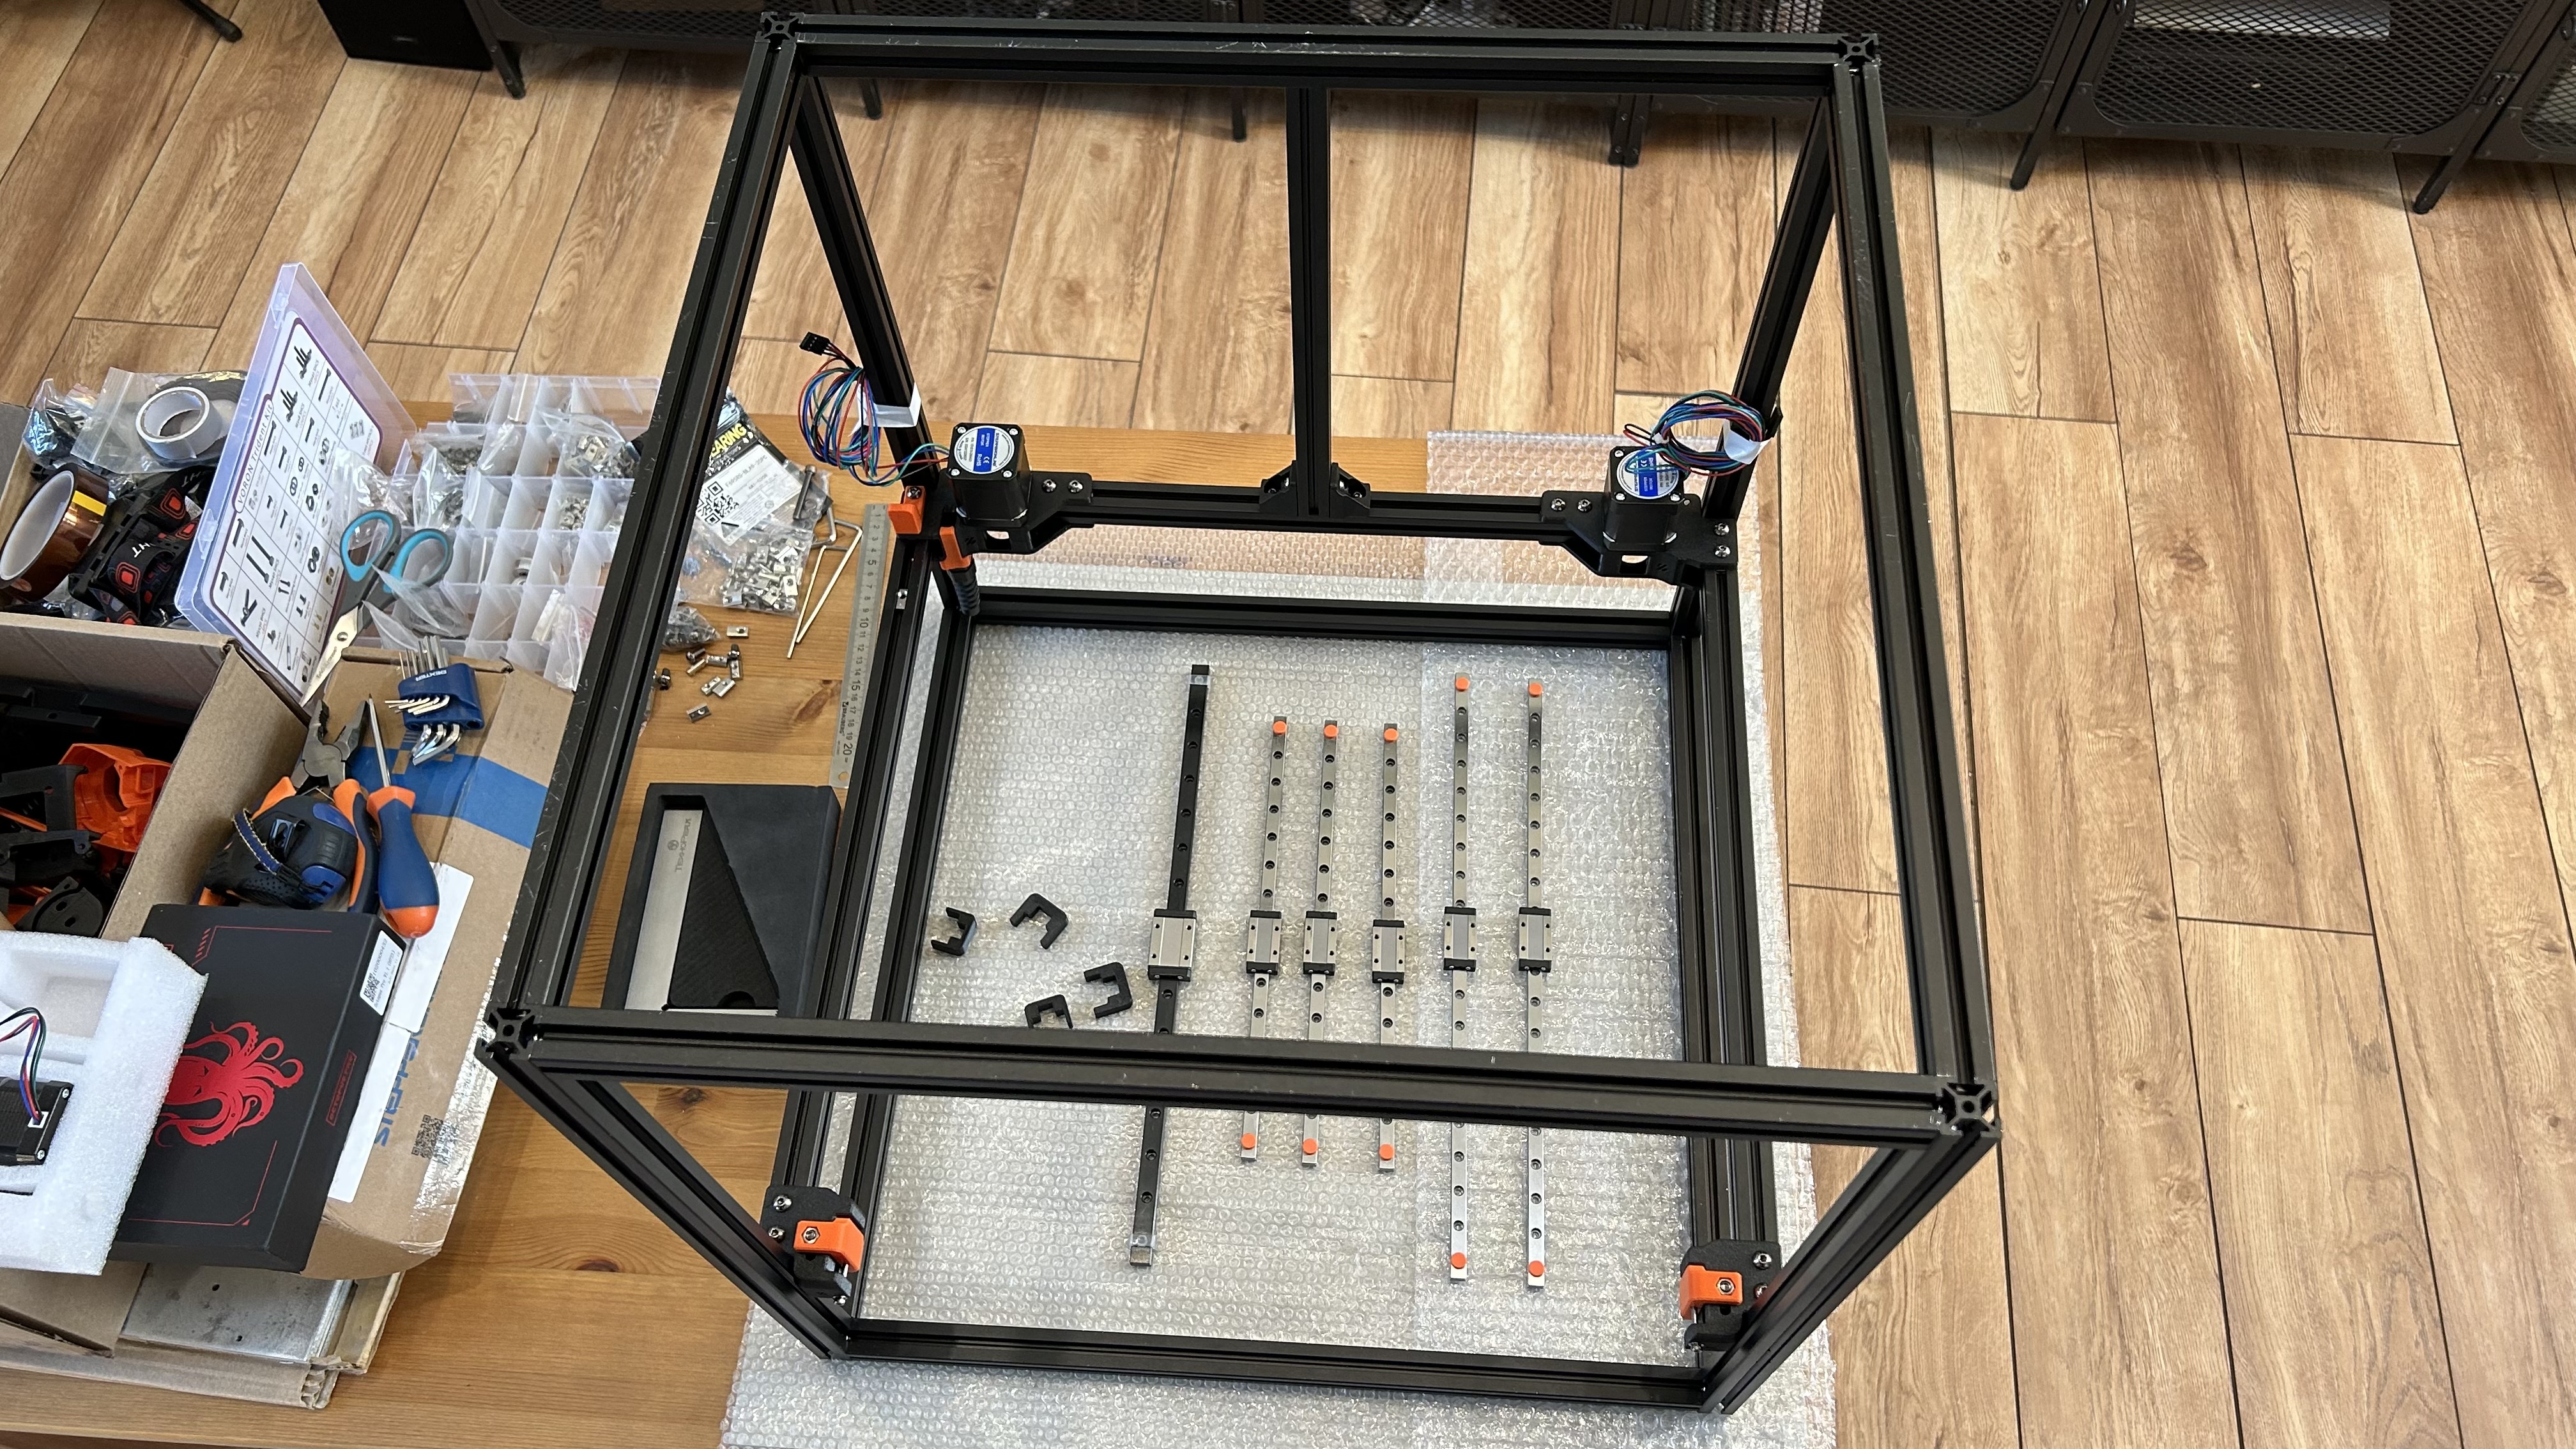
Annodized extrusions are easy to scratch, so be careful when handling them. I used a large piece of bubble wrap. Additionally frame was reinforced using CNC aluminum corner brackets on all corners for better rigidity.
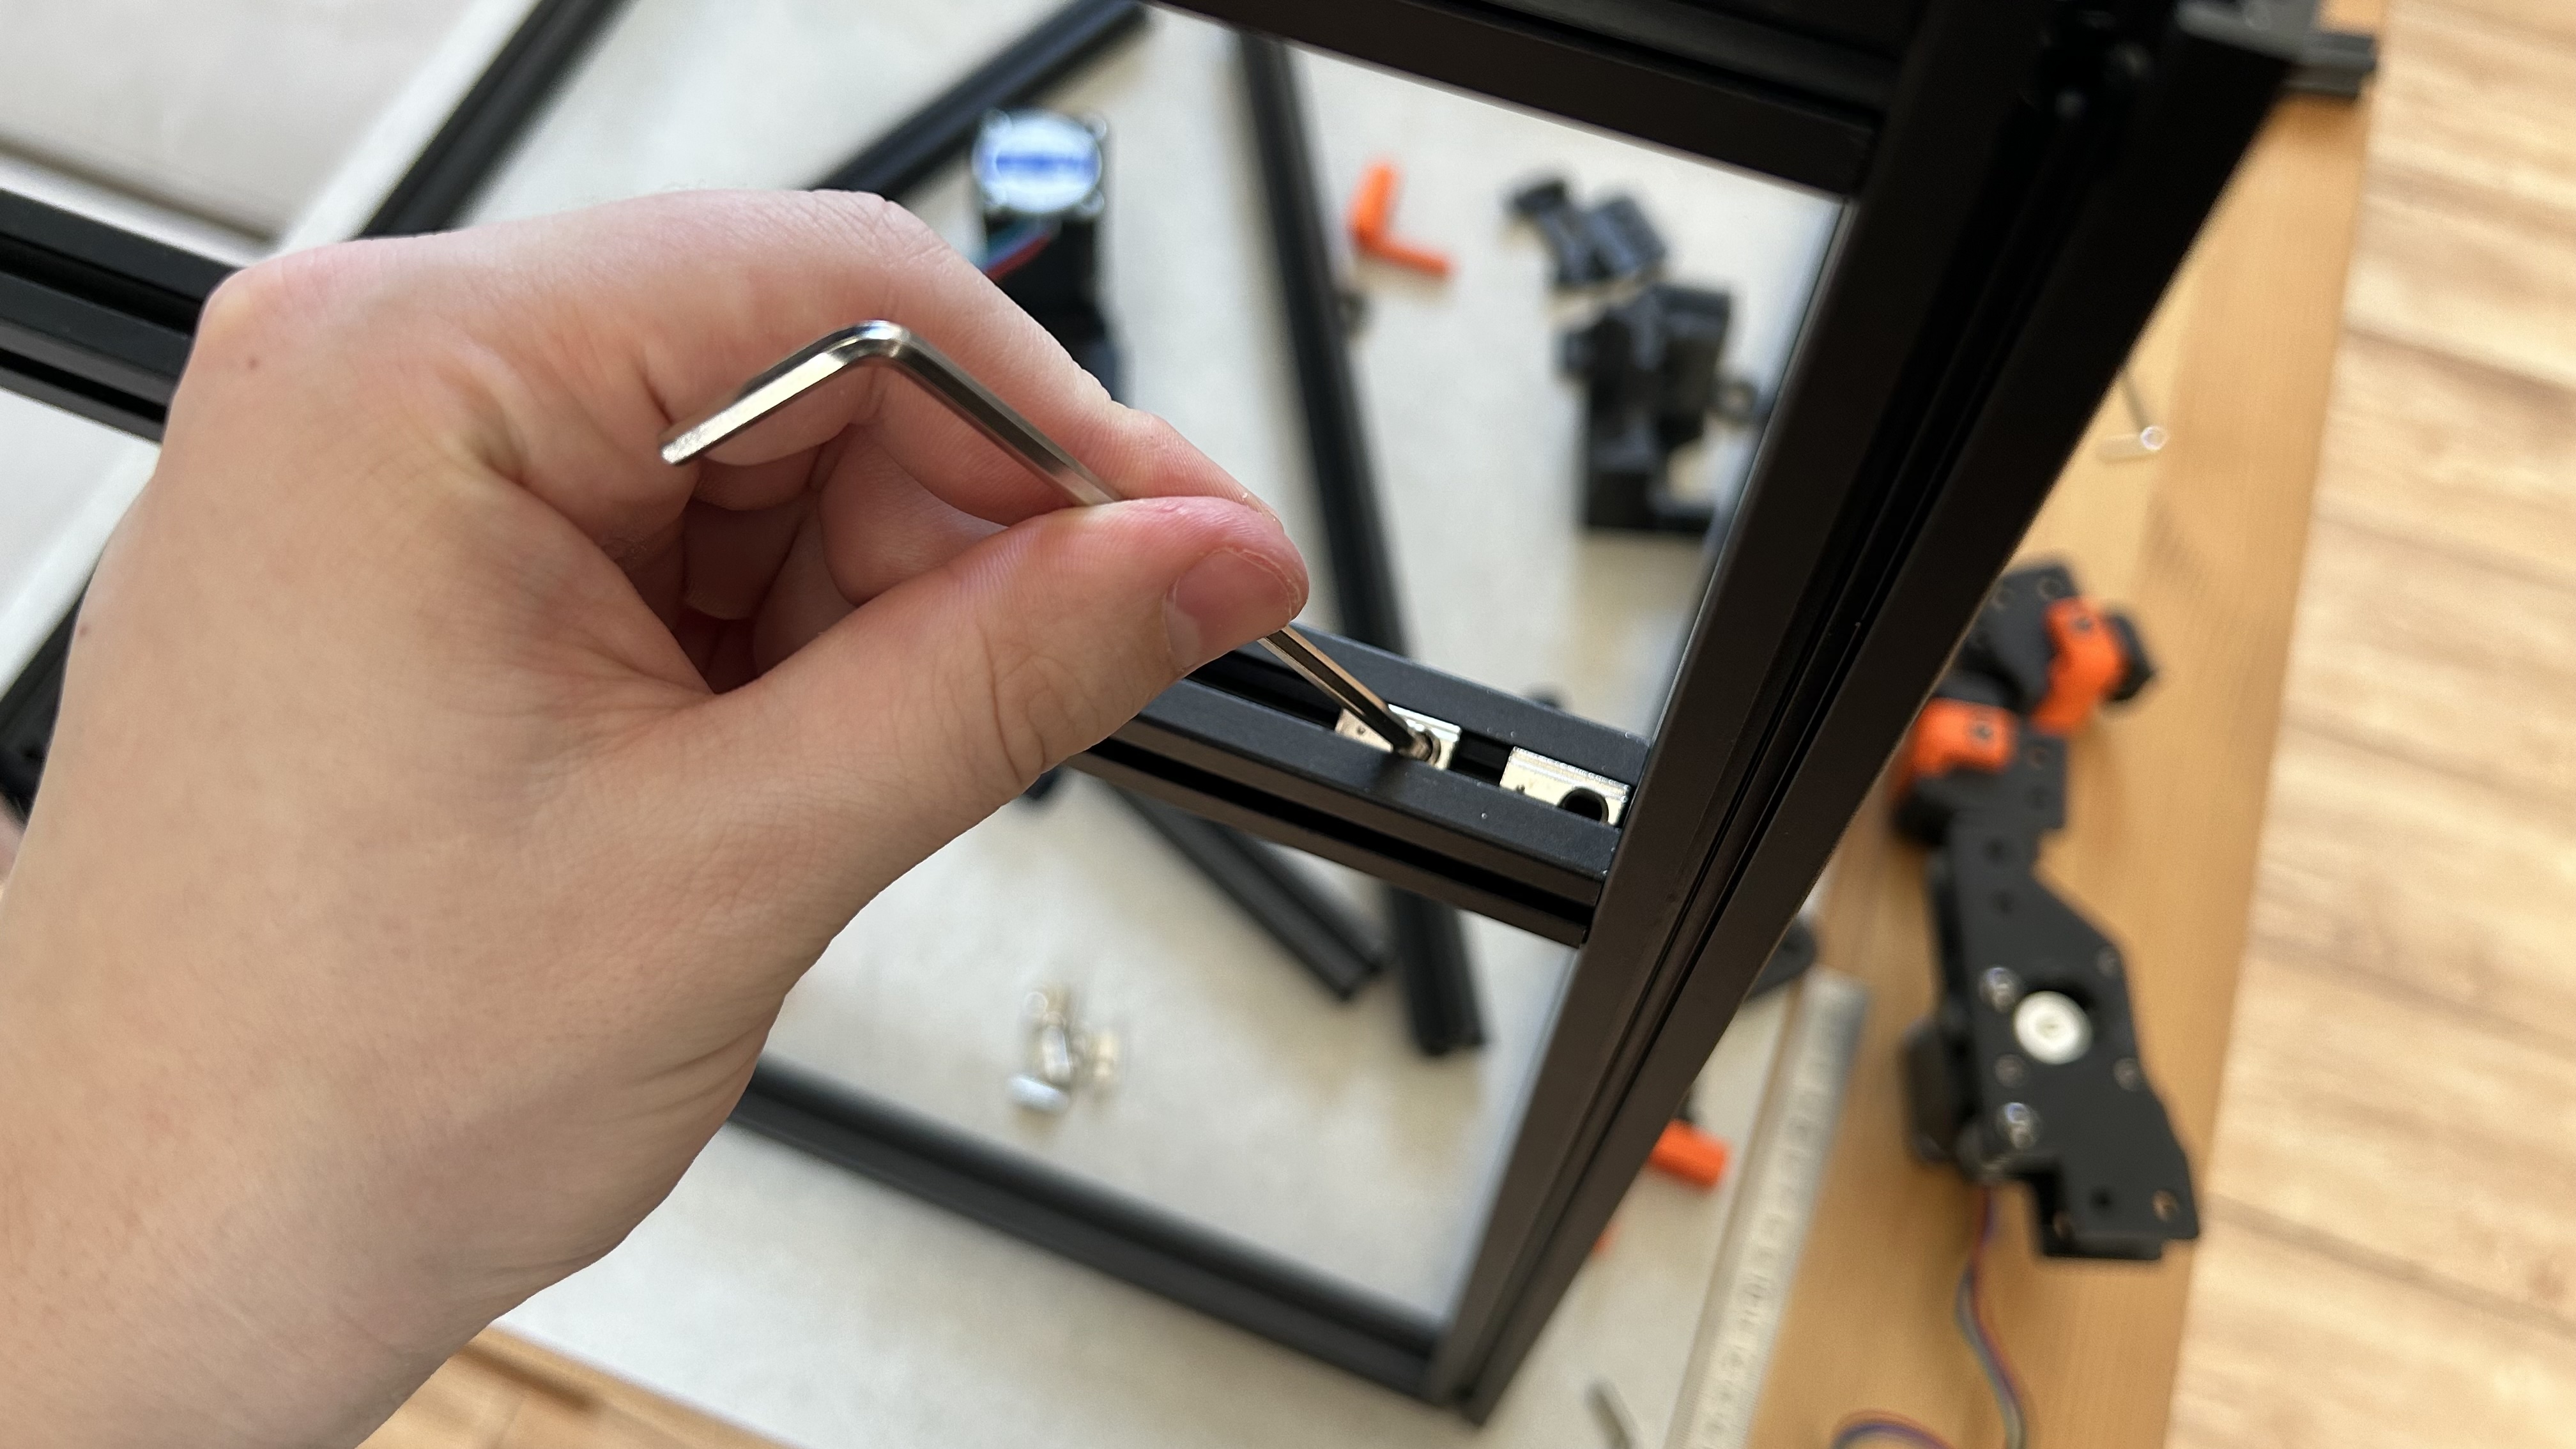
Tip: Ball nuts can be installed directly into extrusion (like on the picture) by applying some force. It could scratch some type of profiles, but sometimes it's the only way to do it if you don't want to disassemble the frame.
It's not stated in the official guide, but I found it useful.
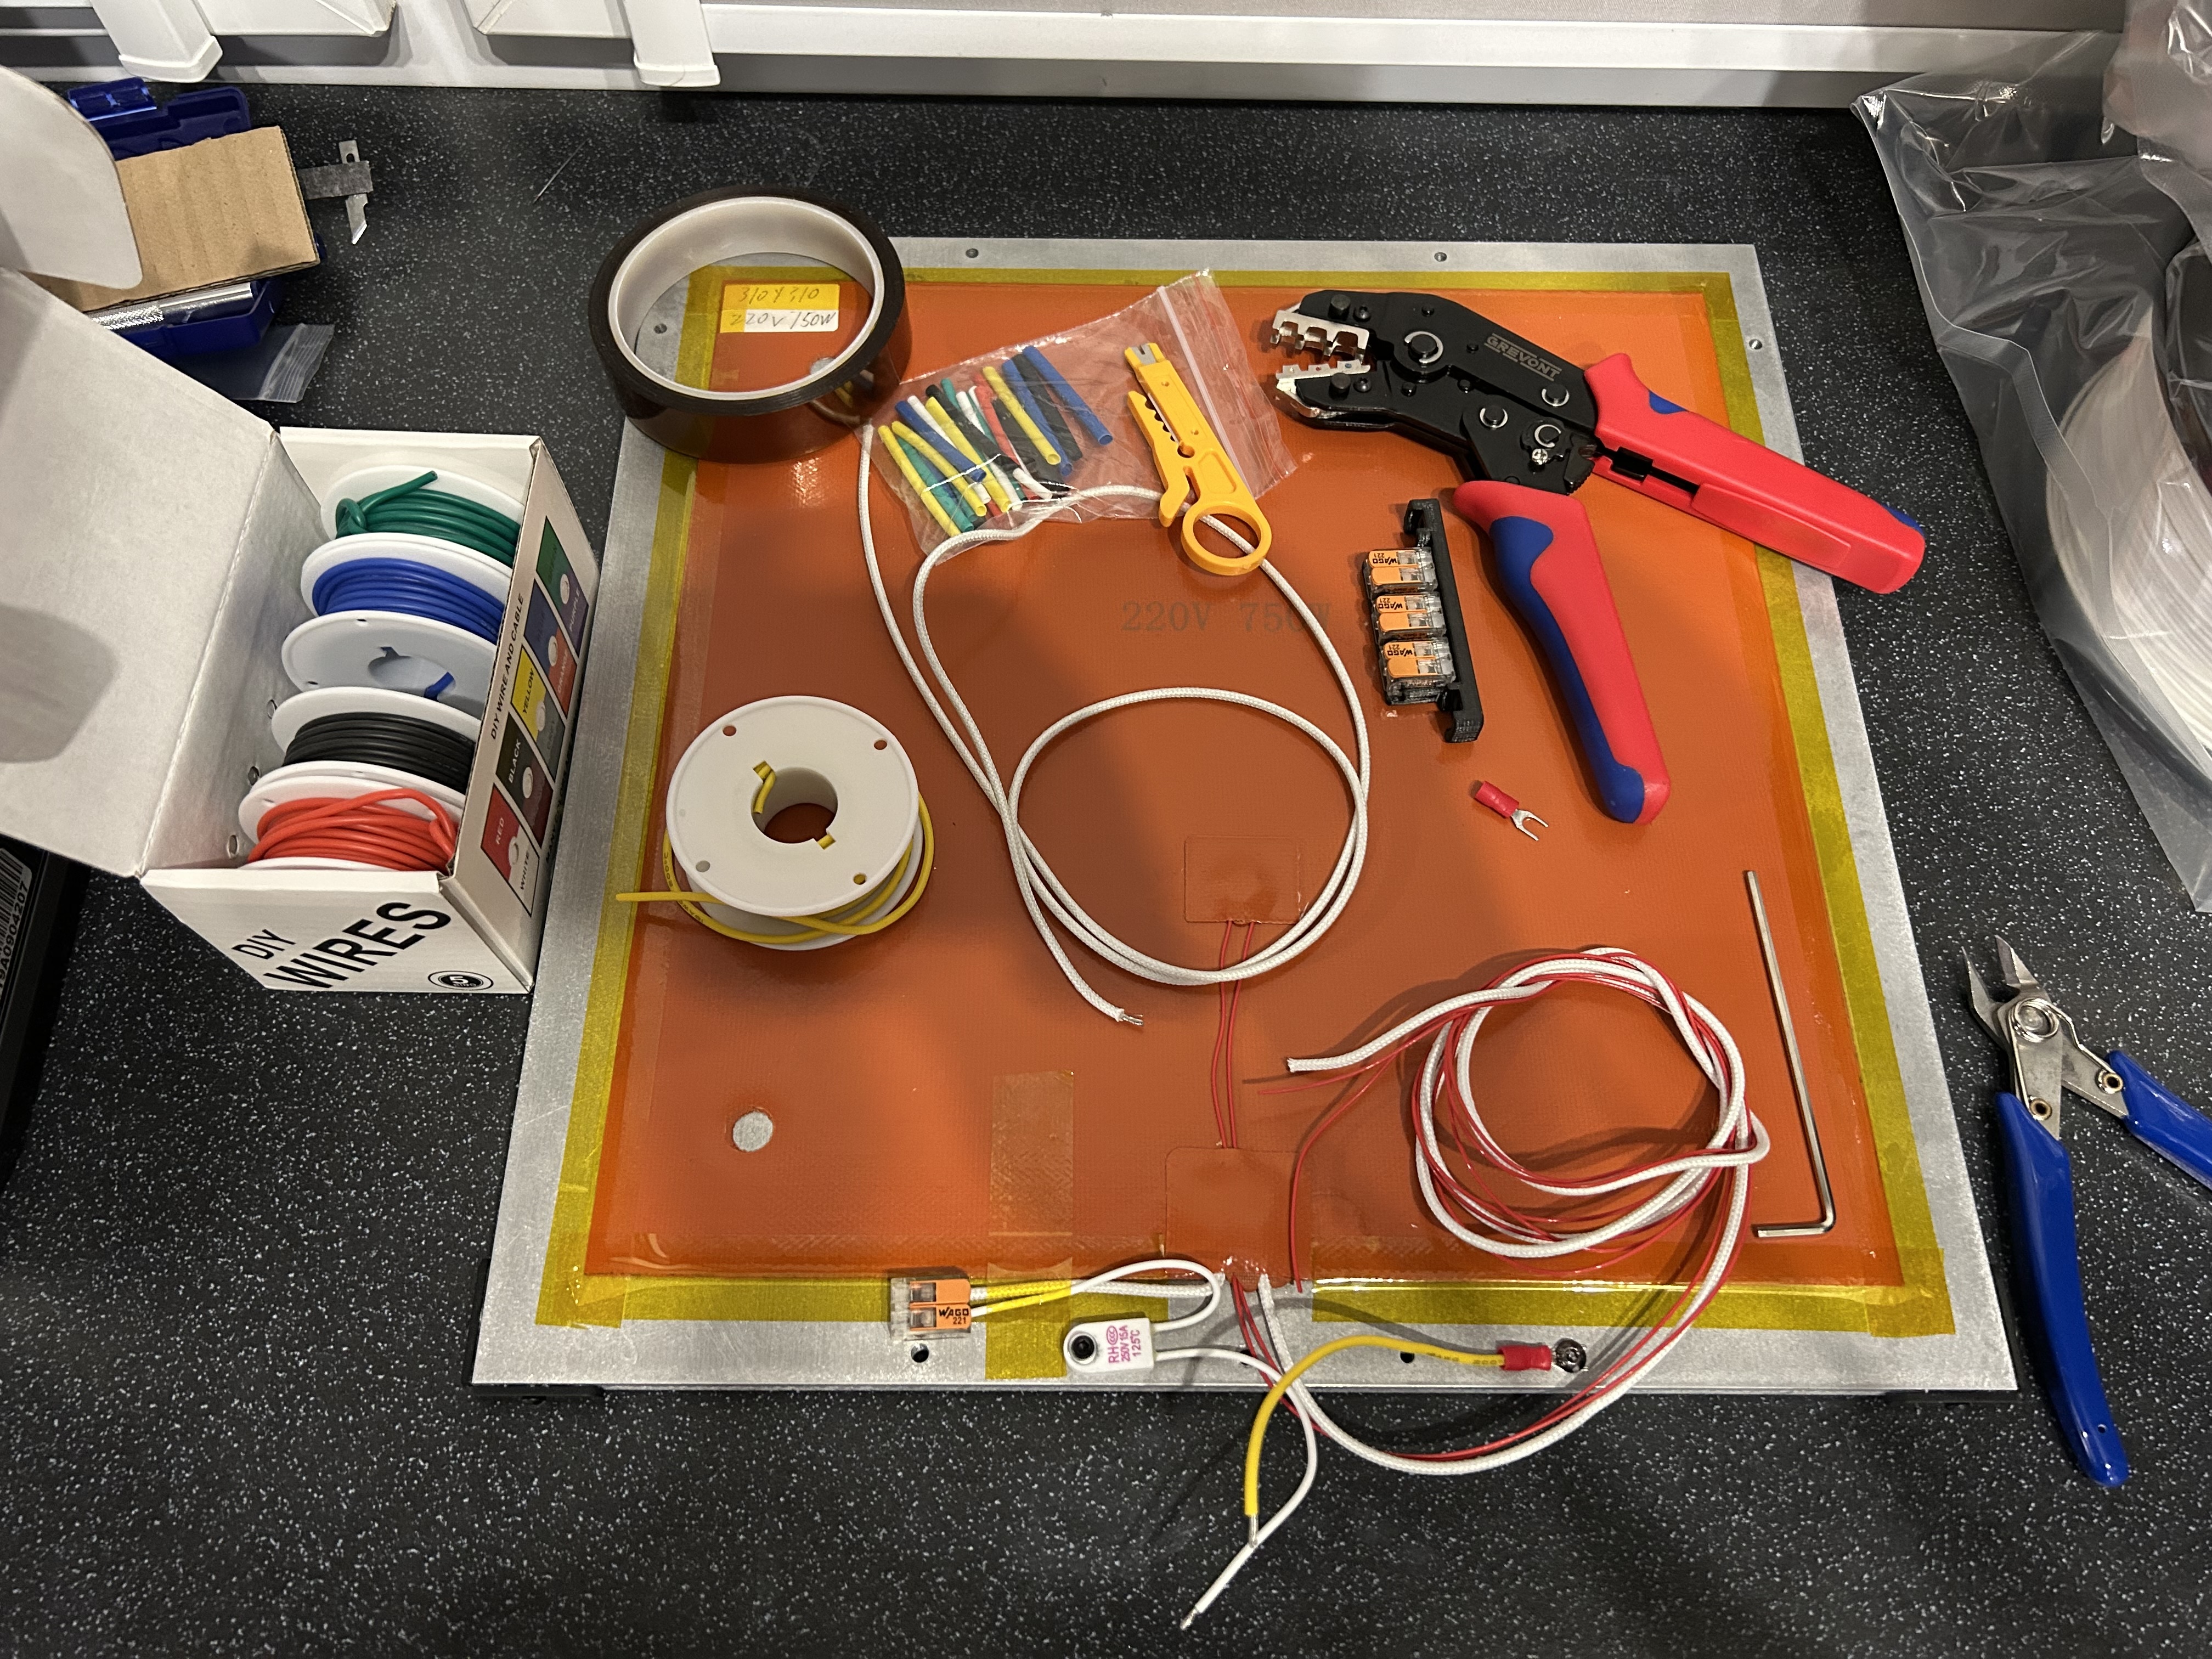
I decided to additionally fix the heating pad by perimeter using Kapton tape to avoid any issues with delamination over time. Saw this trick somewhere in the community and it makes sense.
The 8mm aluminum bed (it's rather just a drilled piece of aluminum) was ordered from locals. Heating pad is a generic 220V 310x310mm one. It should be better to use a one manufactured specifically for Voron beds, as it has cutouts for thermistor and mounting holes, but I wanted to save some money.
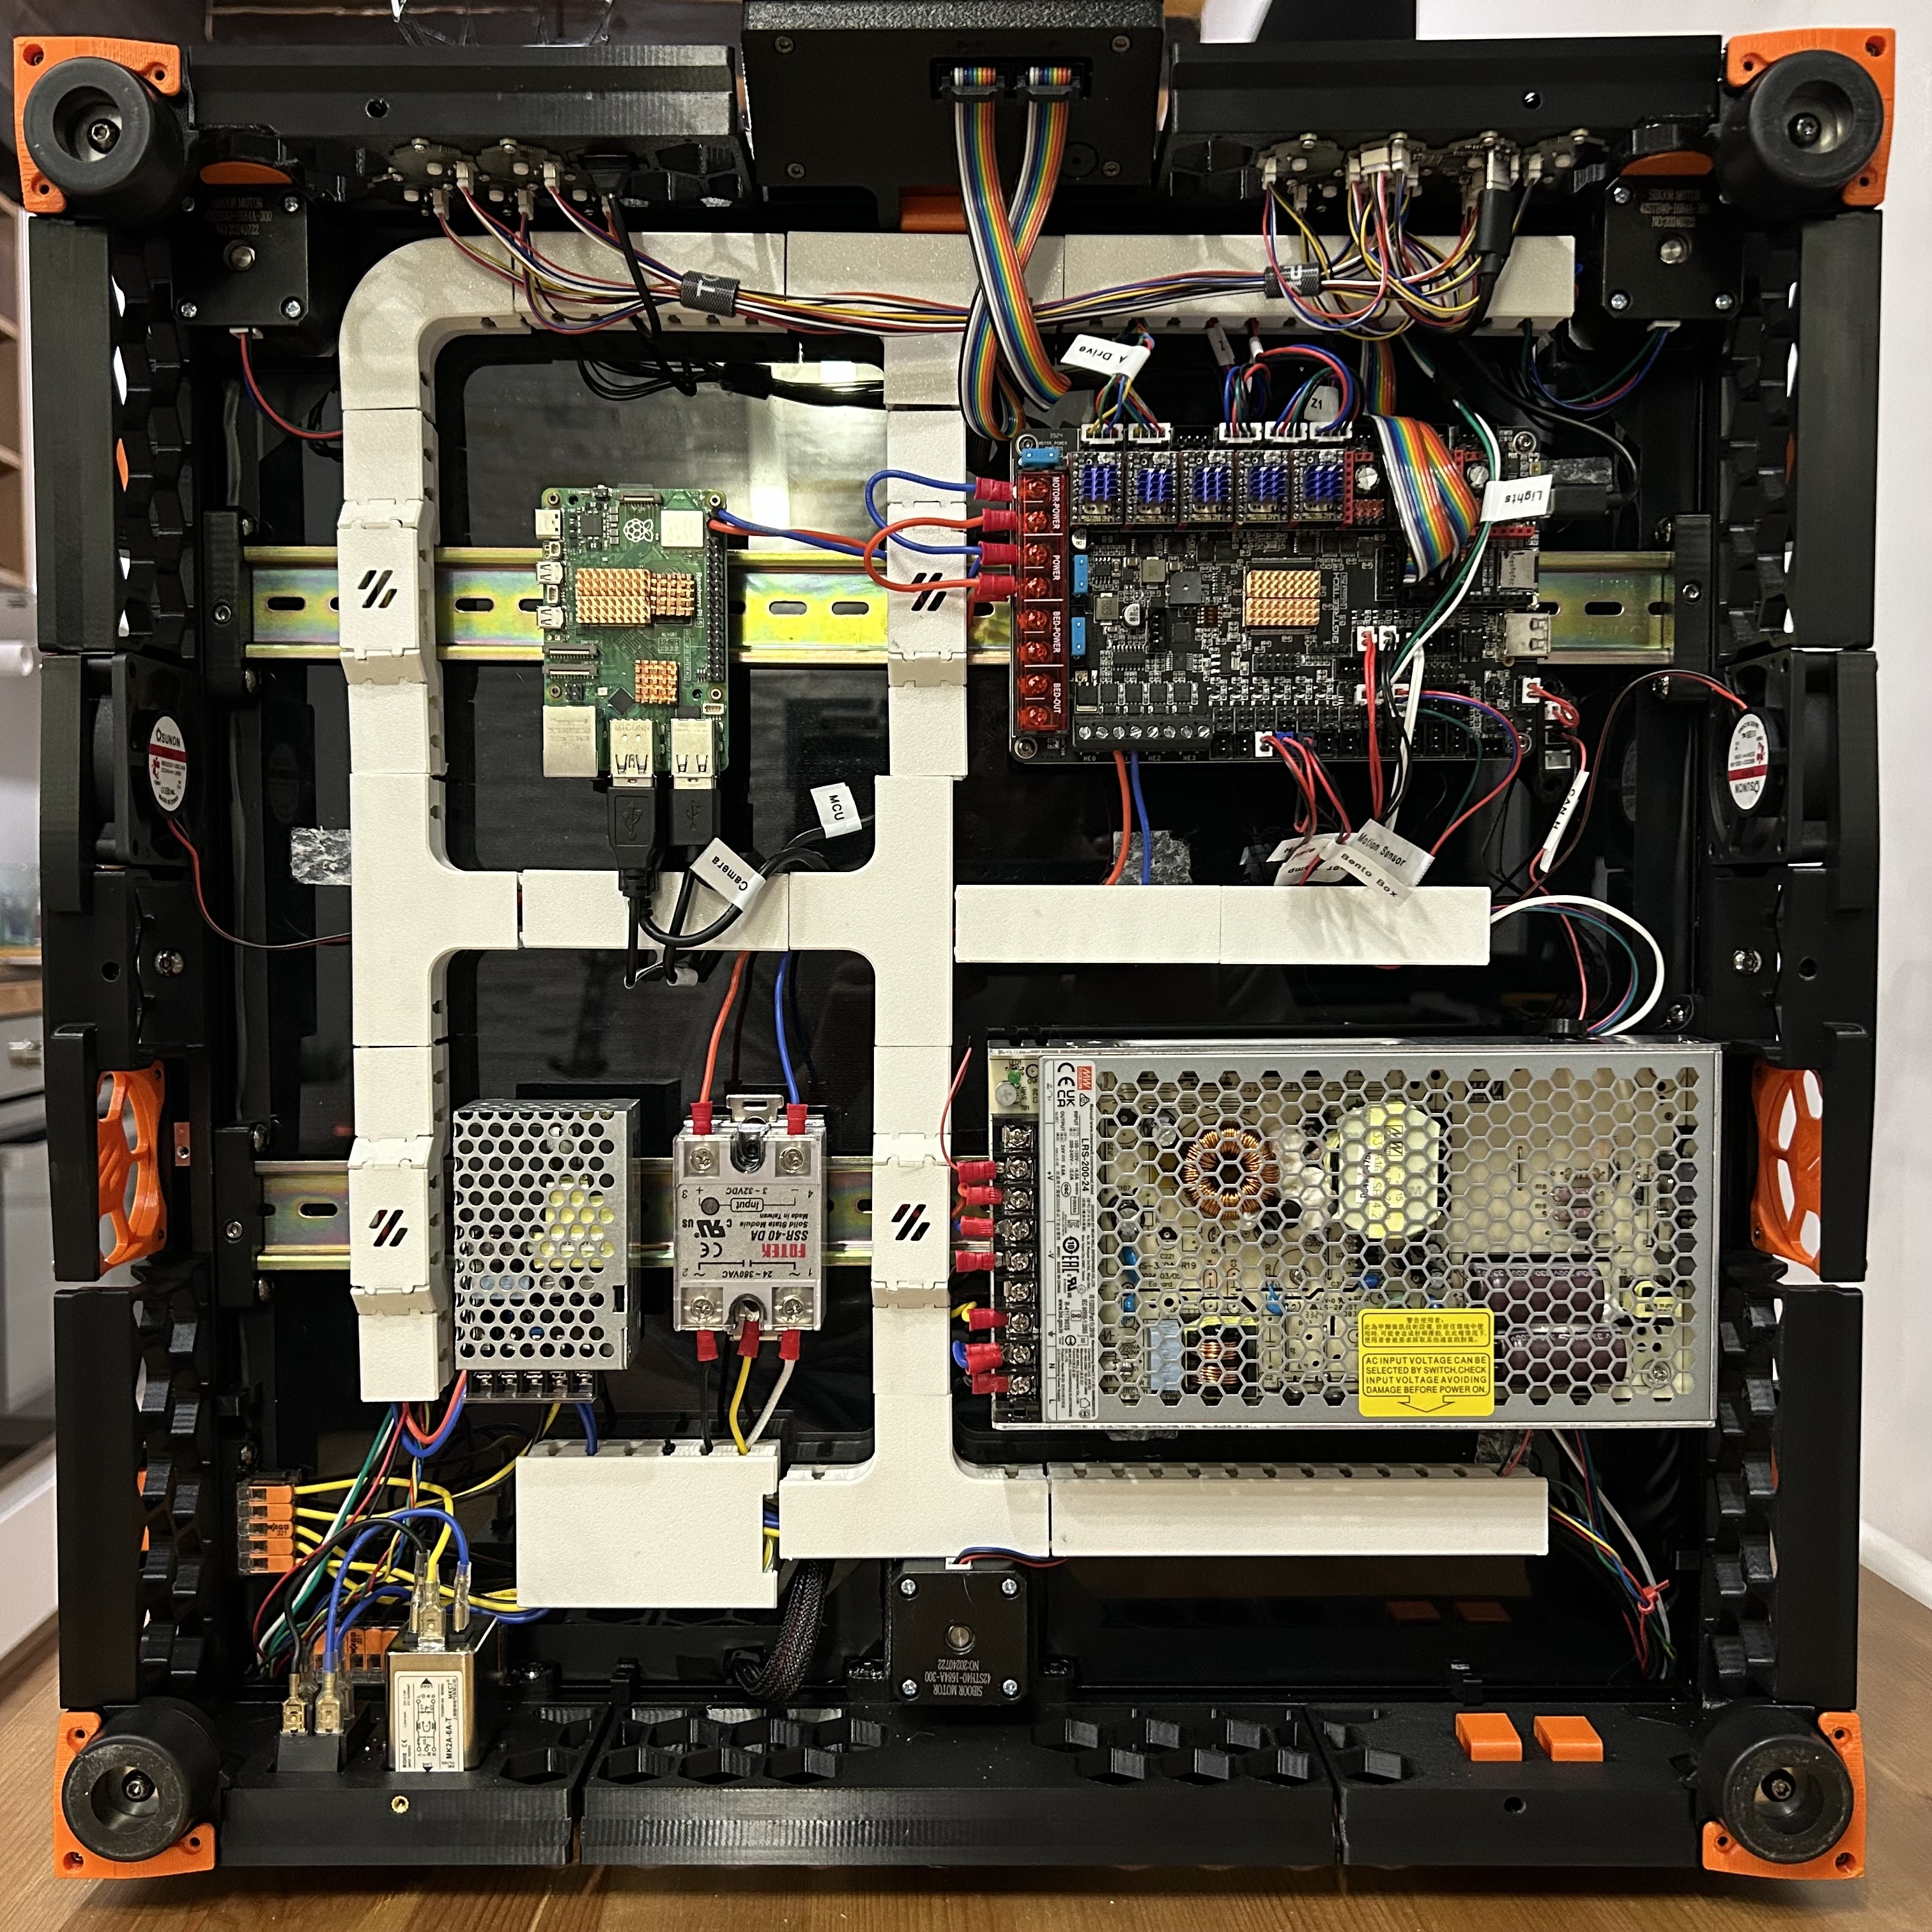
Part 2: The Dreaded wiring
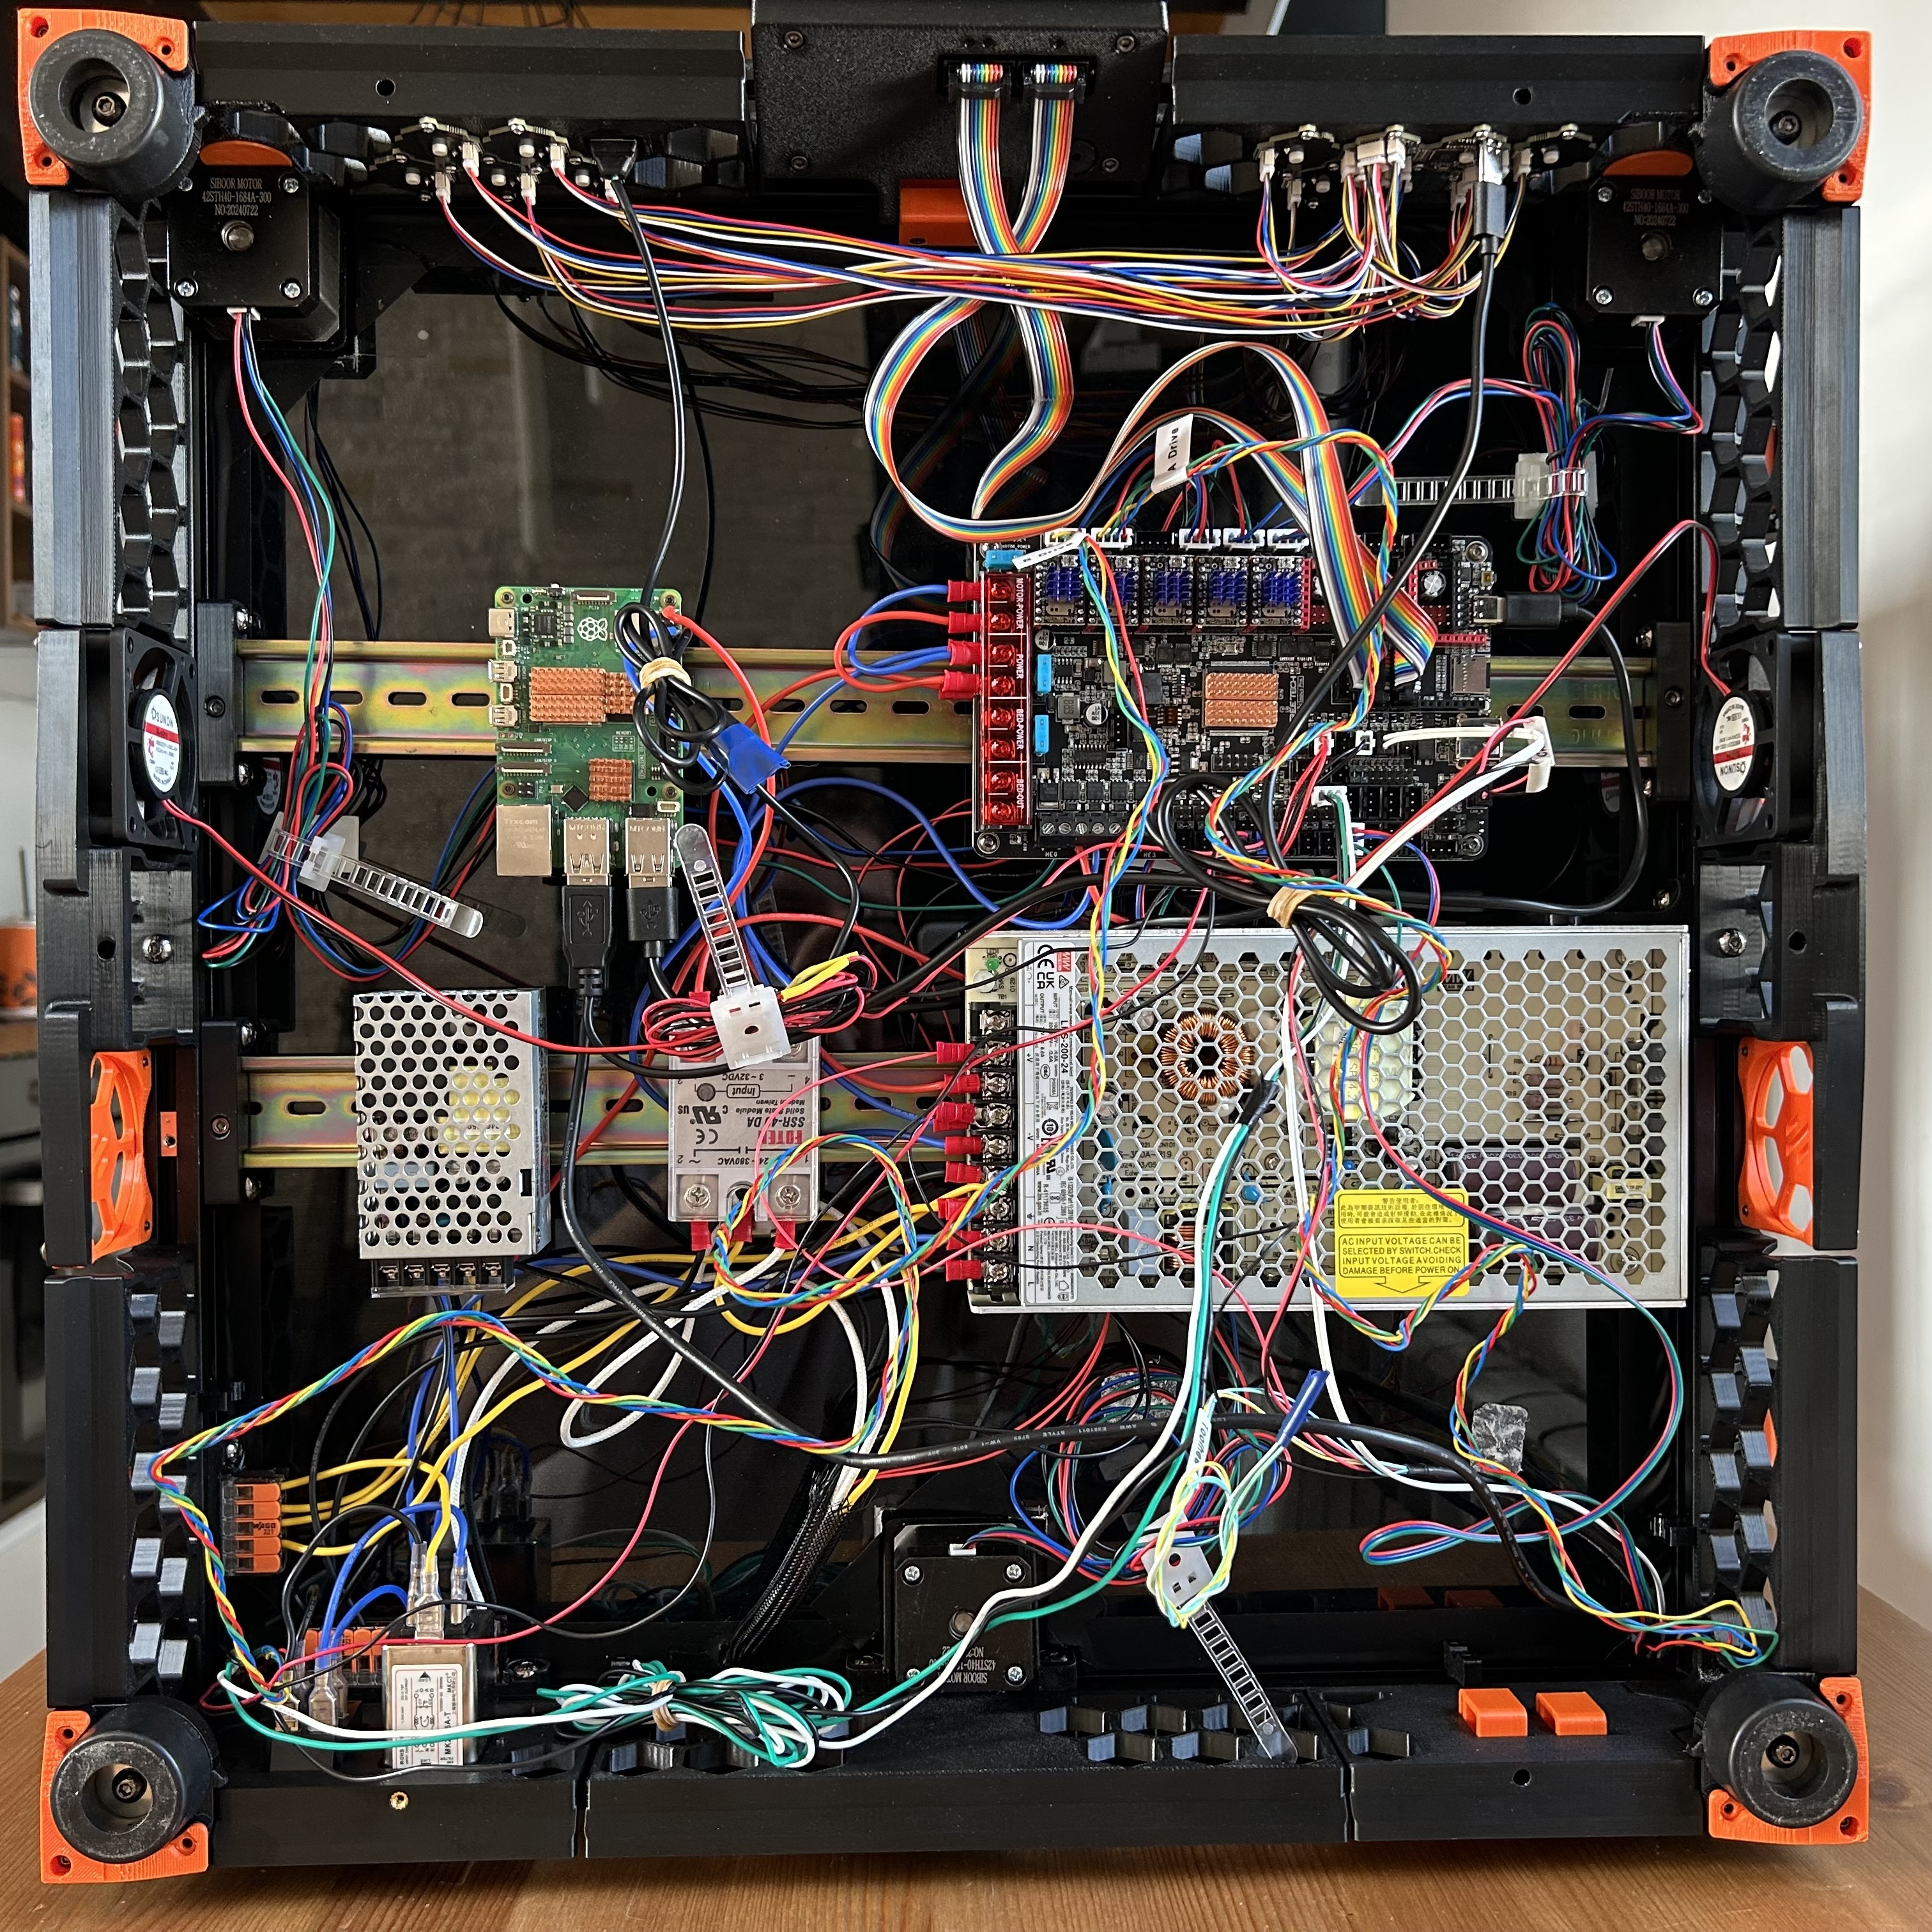
Be careful with wiring and make sure you understand what you are doing.
Electronics is the most diverse part of the build, as there are many options available, but I wanted to use the latest and greatest:
- Mean Well LRS 200-24 power supply
- Mean Well RS-25-5 power supply for Raspberry Pi
- Raspberry Pi 5 8GB for the Klipper host
- Already had it, although it's a bit overkill and would rather go with 2GB version of Pi 4B or Orange Pi 3 LTS
- BTT Octopus Pro v1.1 main board
- BTT TMC2209 stepper drivers
- An SSR relay (40 DA) I had in the drawer
I used 18 AWG silicone wires for power lines and 22 AWG for everything else. WAGO connectors for easy wiring, a couple of Sunon fans for better cooling.
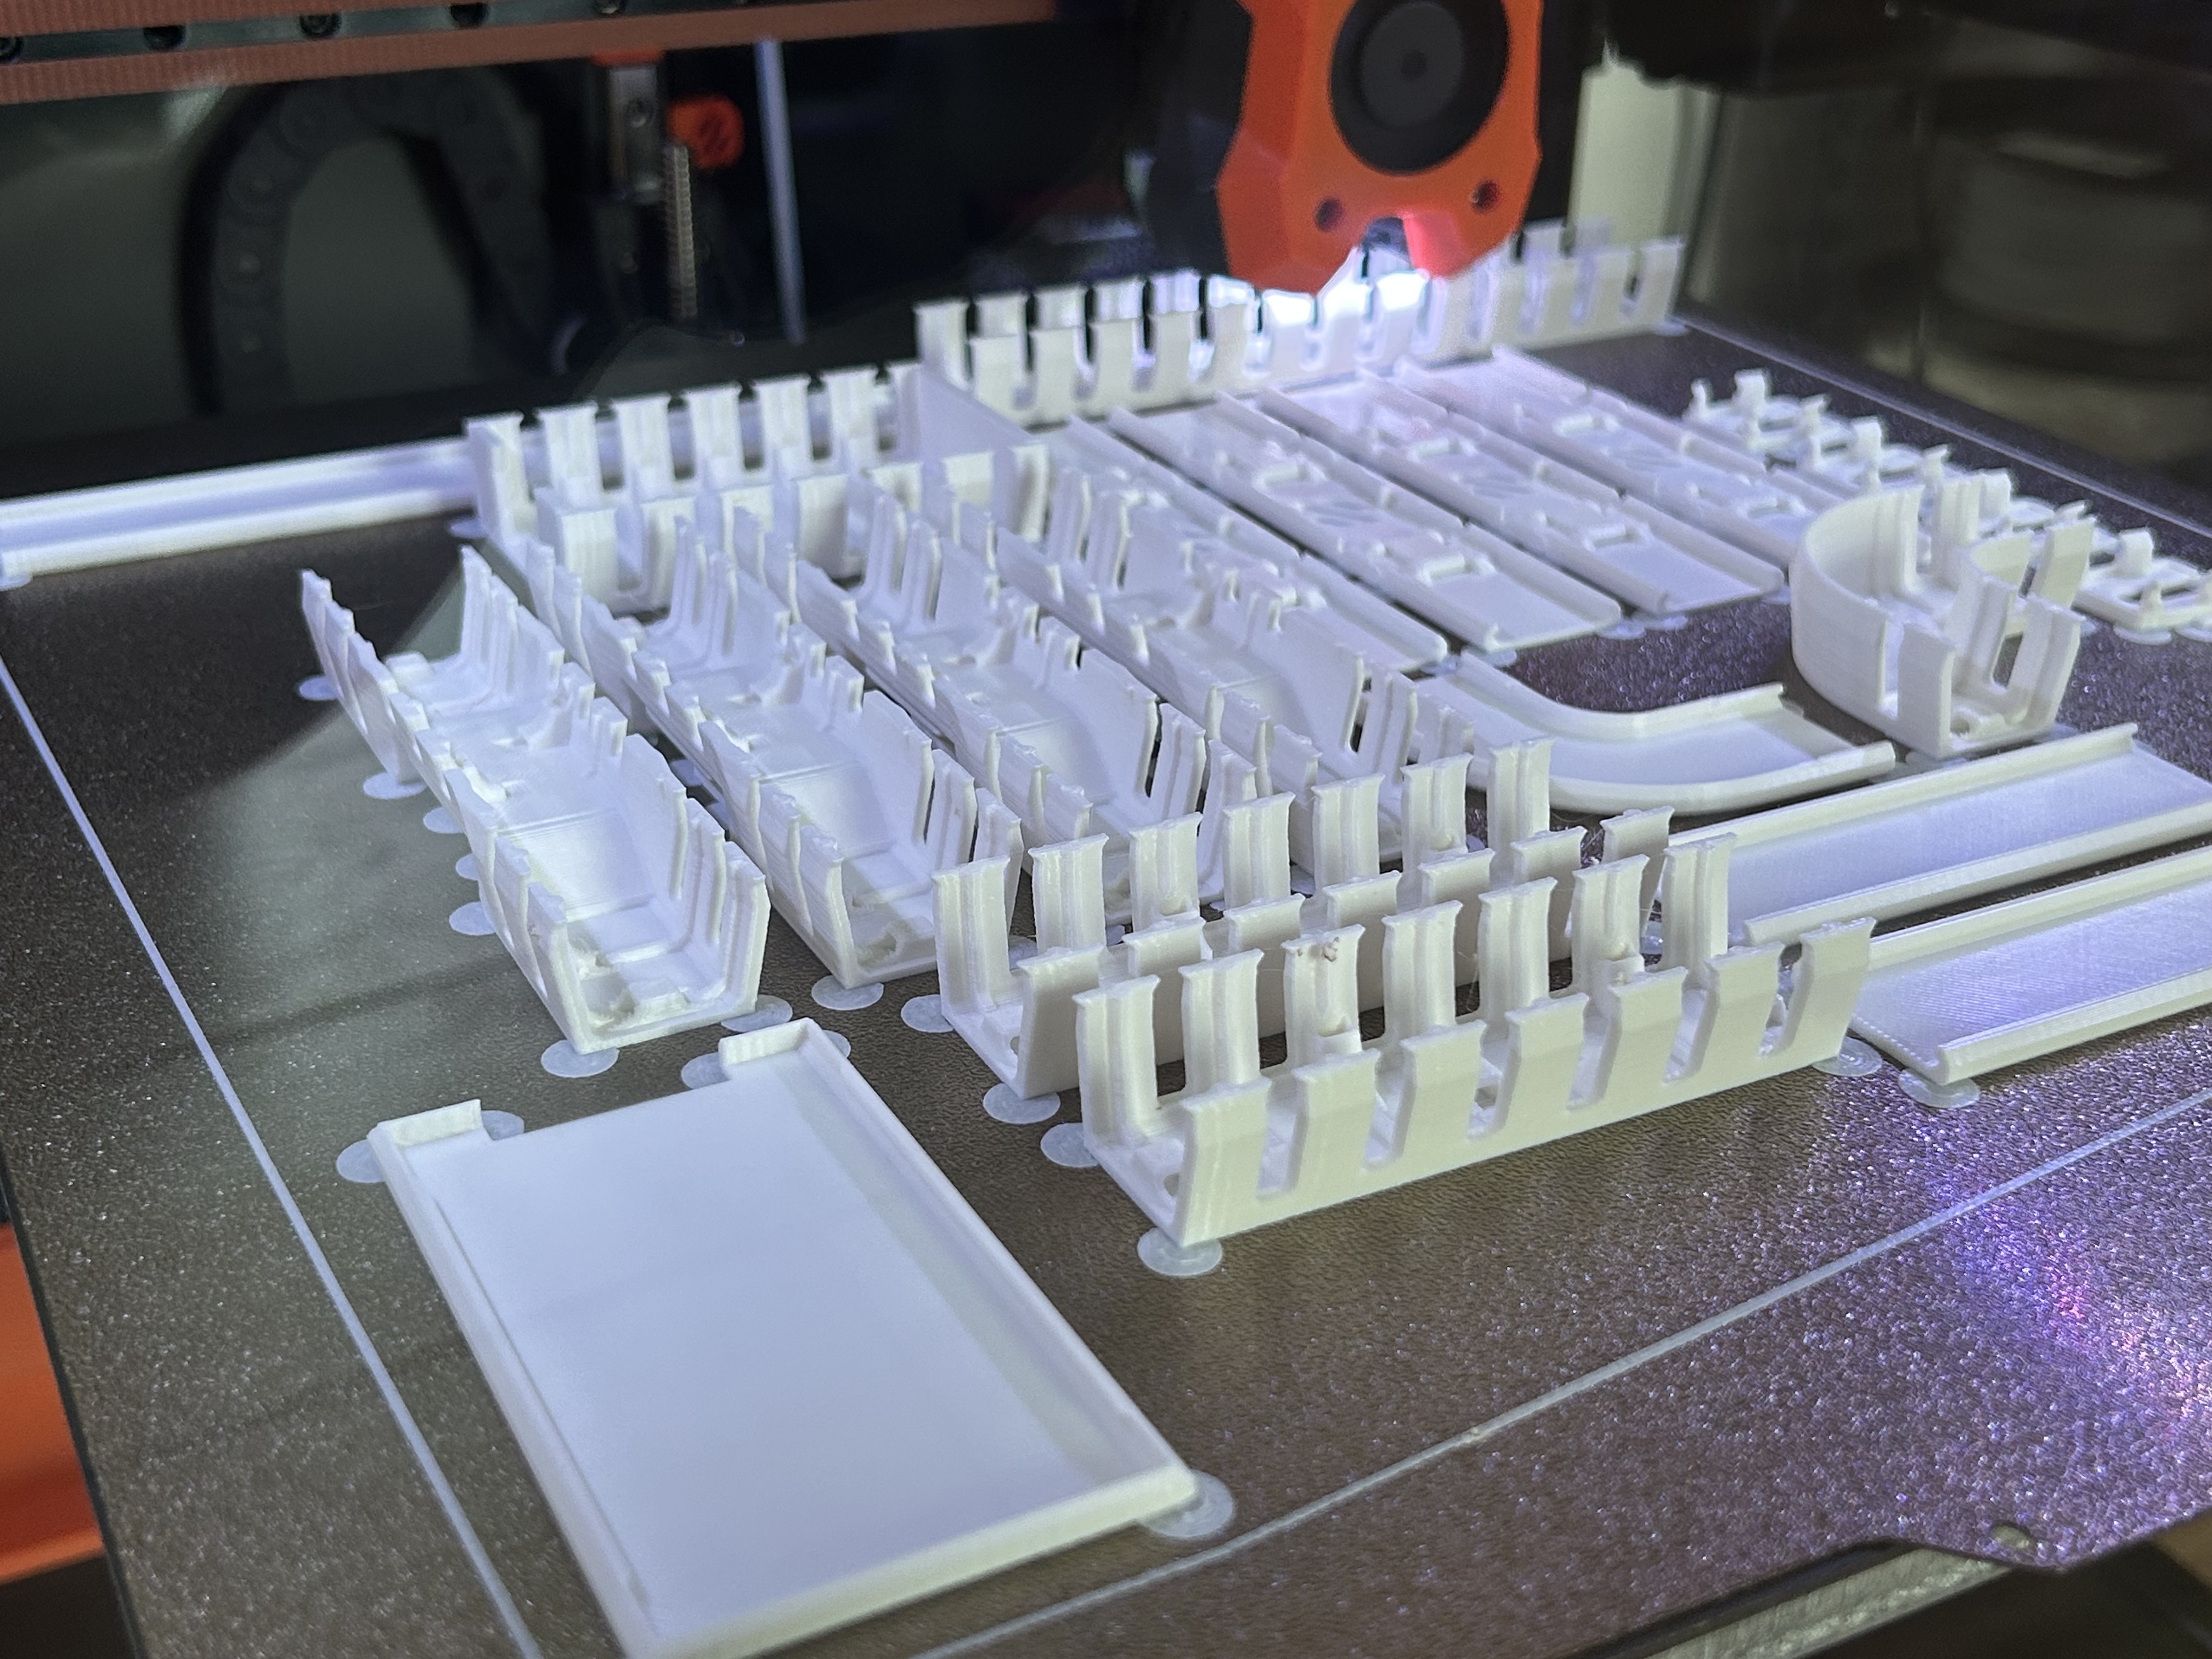
Later on I printed a nice cable management solution from Printables. Not the best cable management I've done but I'm happy with the result.
Part 3: Toolhead and Electronics Bay
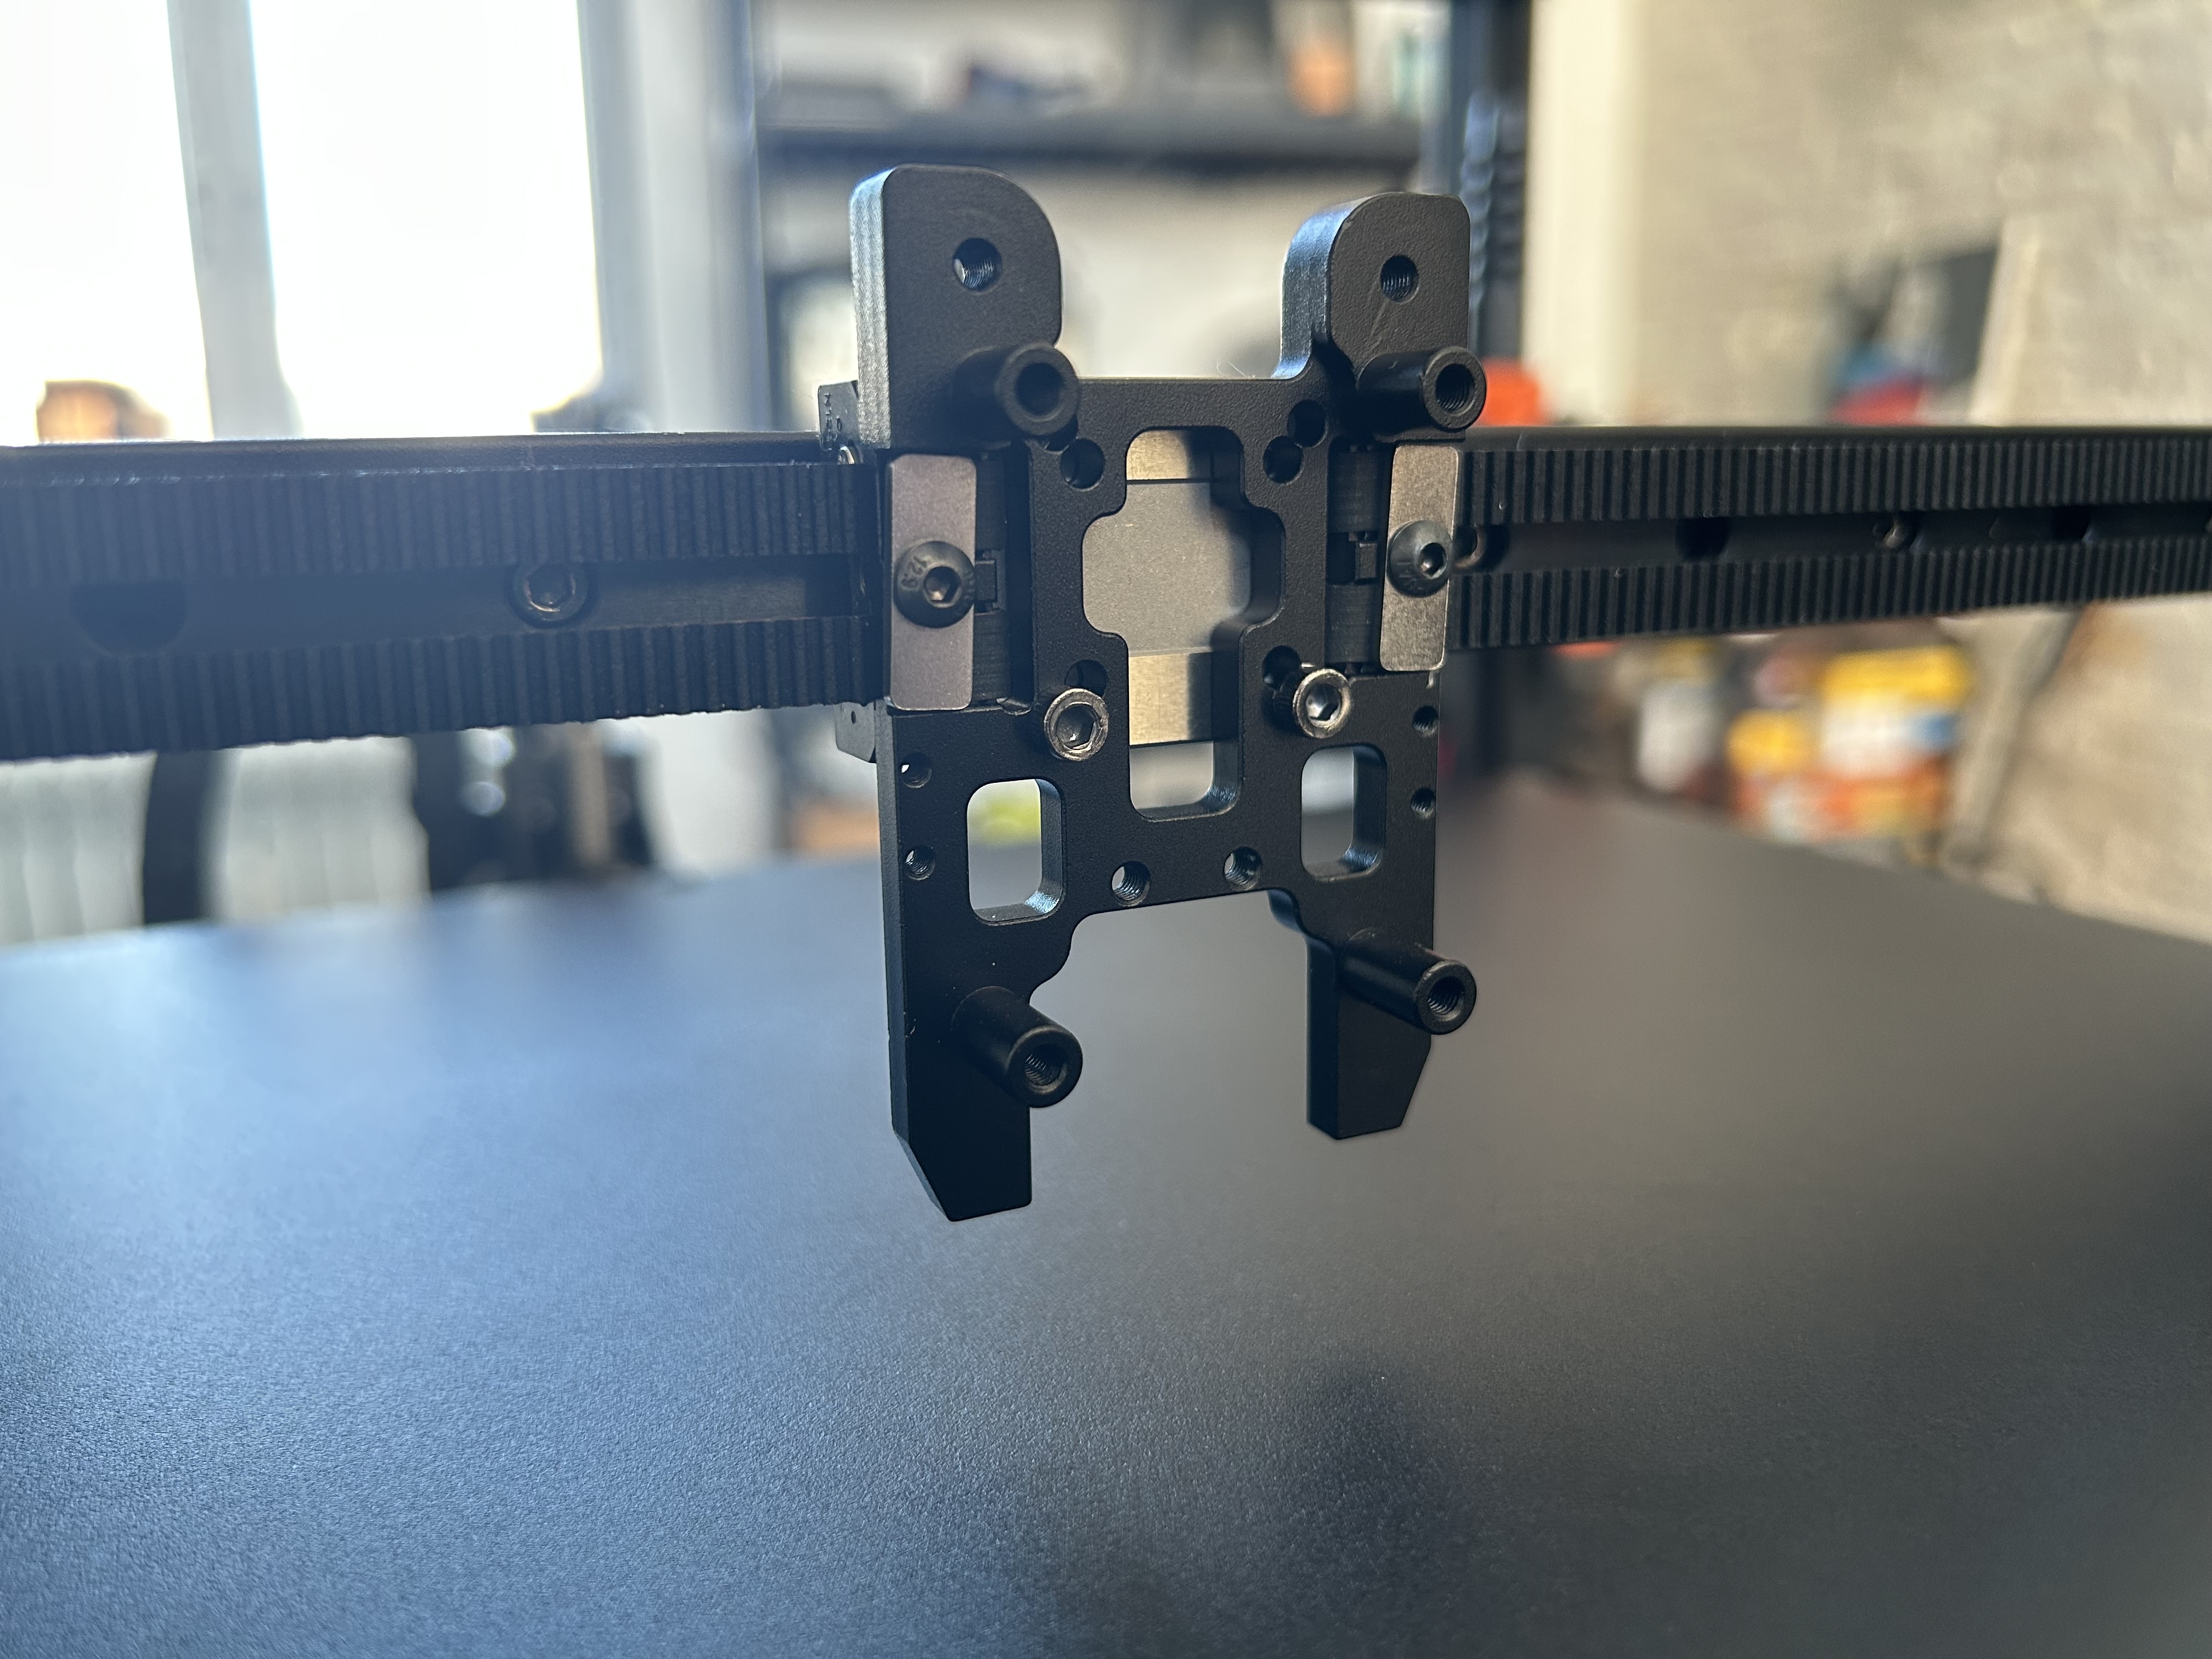
I like the idea to use CNC carriages if possible - they are more rigid and precise compared to 3D printed ones while still being lightweight and not that expensive. Mine is from Fysetc.
Toolhead (extruder + hotend) is the default Stealthburner (obviously not the best option, but a good start):
- EBB36 toolhead board
- CHC Pro hotend from Trianglelab (initially built with TZ 3.0, a Bambu clone)
- Clockwork 2 extruder with BMG gears from Trianglelab
- Sunon MagLev 5015 fan for part cooling
- Can Bus (umbilical) between Octopus and EBB36
- Cartographer probe for bed leveling and meshing
I'm not completely happy with Stealthburner, but it's a good starting point. My Input Shaper graphs show some resonance at around 50hz, which could be caused by the toolhead itself. Will consider upgrading to something better in the future.
At the moment I'm using a Filametrix mod with filament cutter. If you just start with your build, take a look at Dragon Burner or A4T toolheads with Crossbow filament cutter solution.
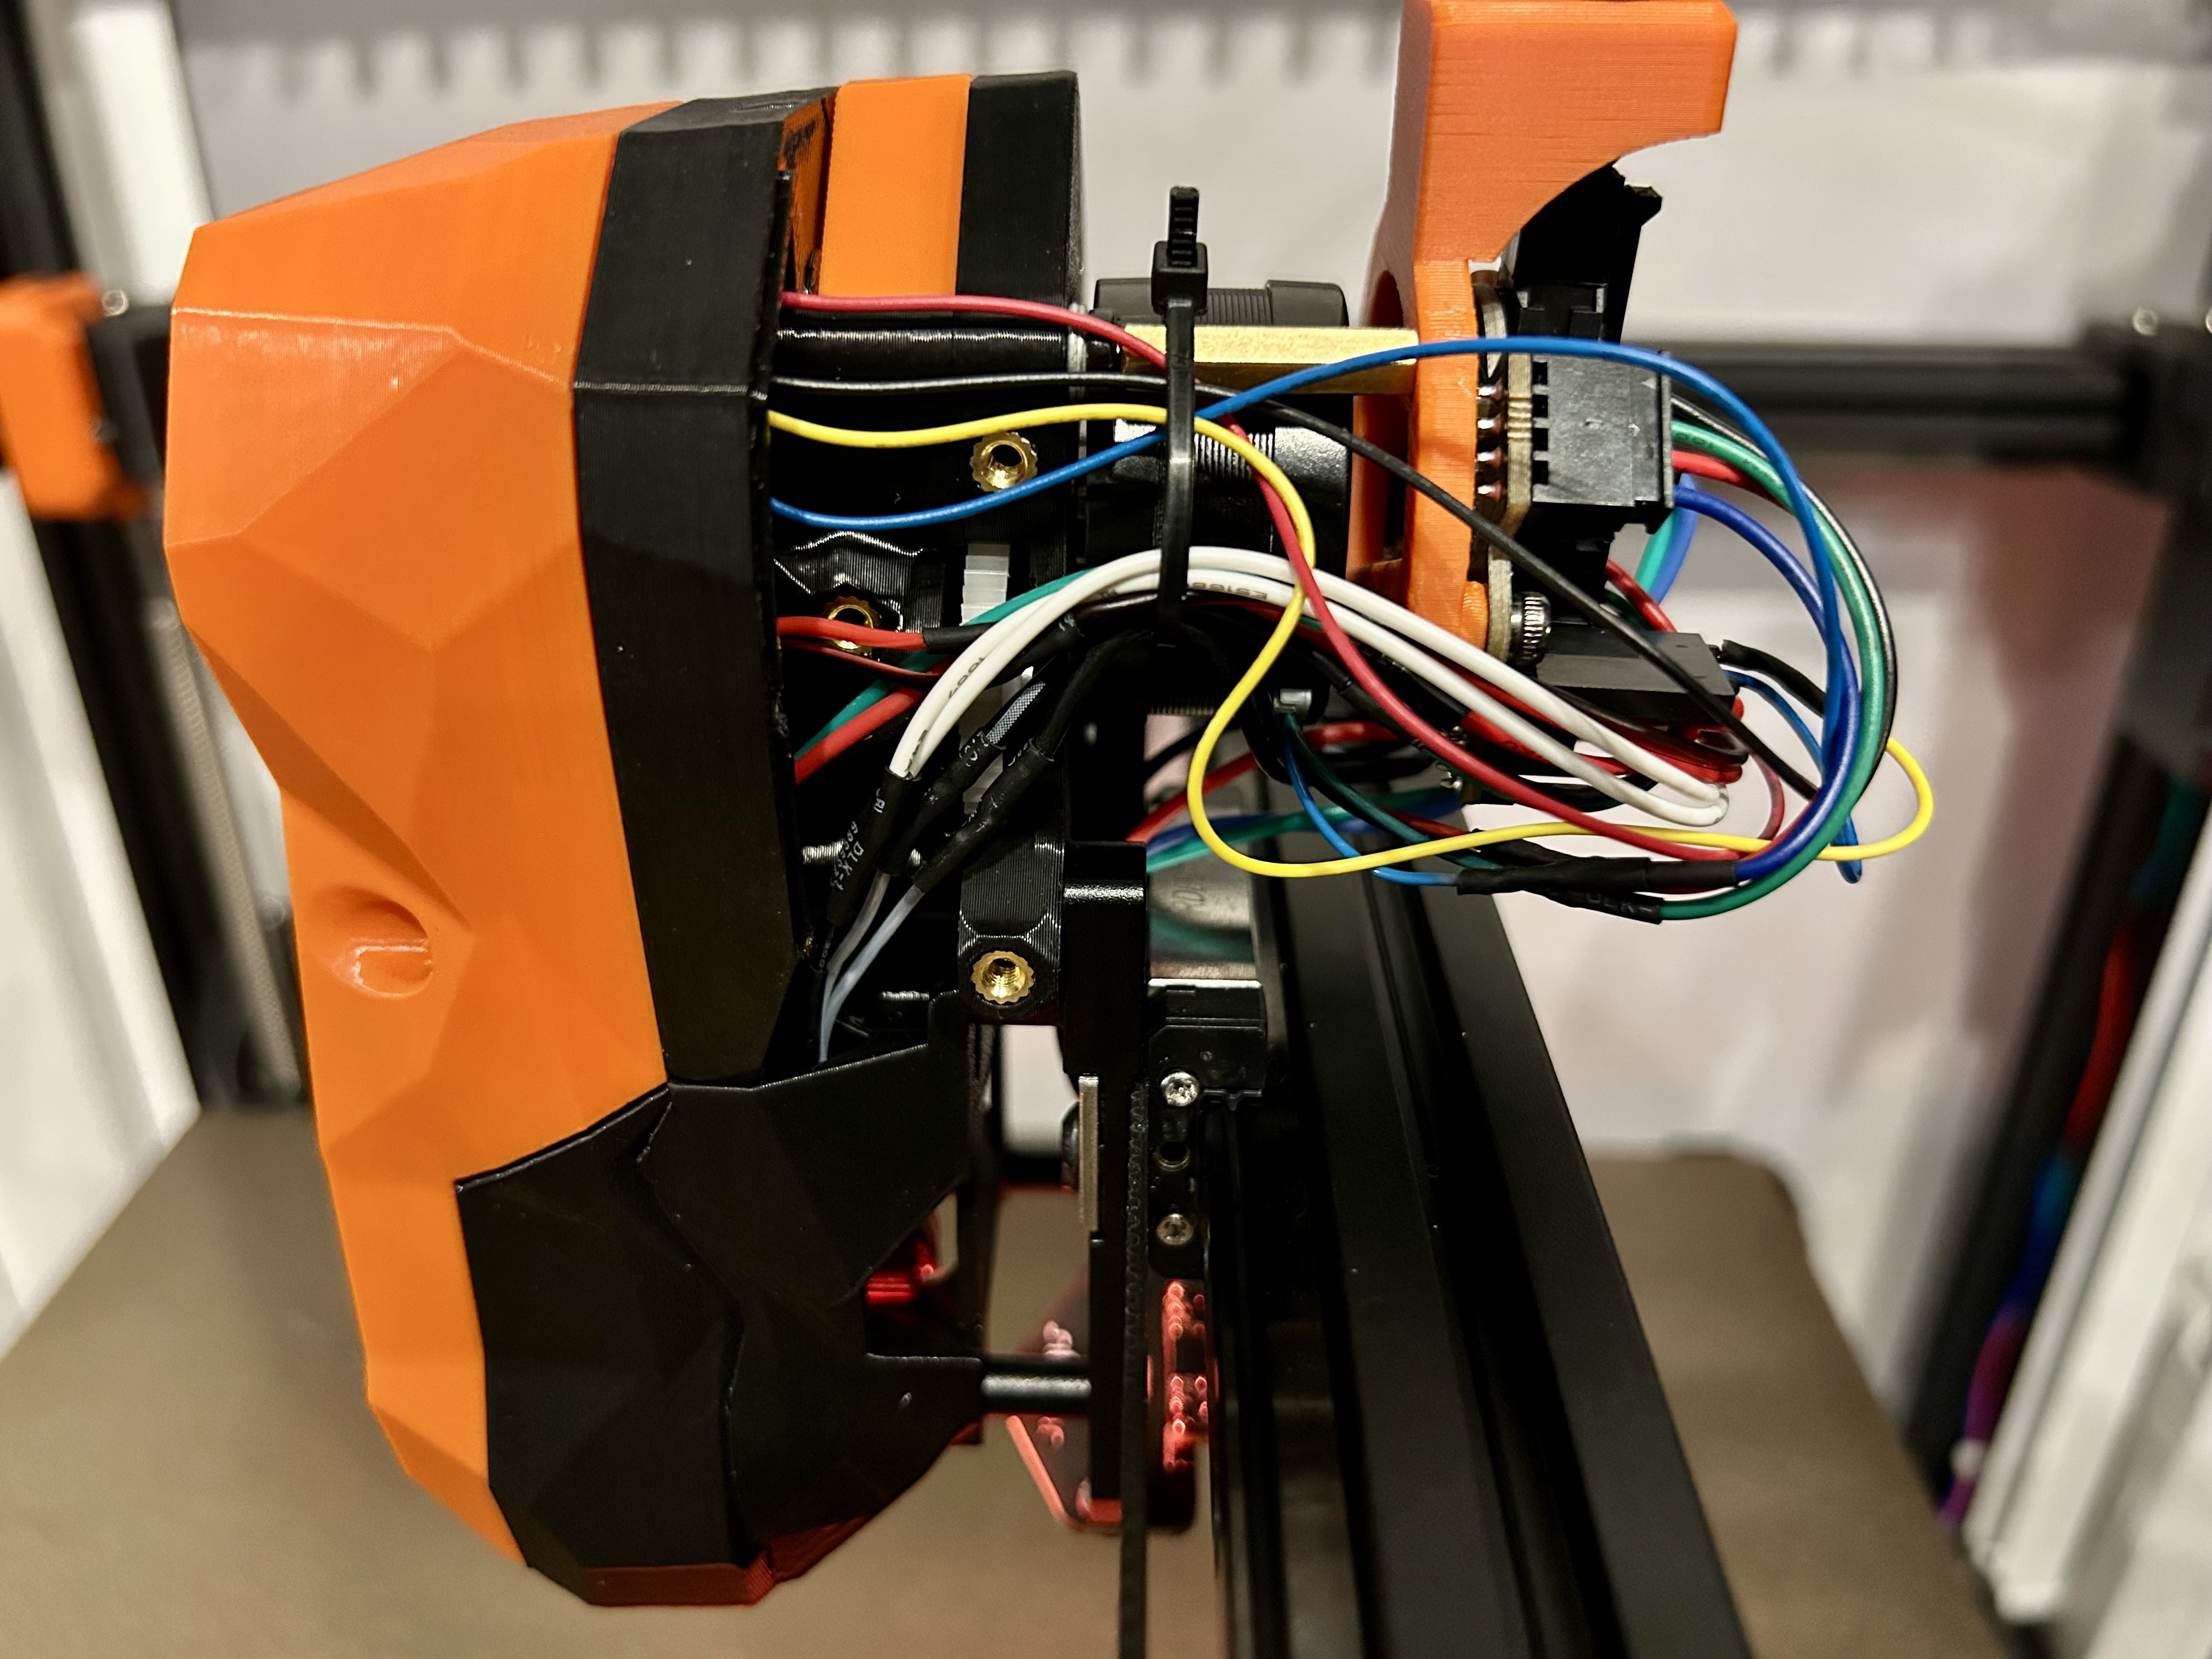
Not the worst wiring job I've done, but could be better. If you plan to stick with Stealthburner, consider buying pre-made wiring harness with an additional PCB for better cable management.
Initially for umbilical strain relief I bought a couple of PG7 connectors but was not happy with them at all. I used this EBB36 v1.2 CW2 mount with PUG, and later on switched to CW2 EBB36/NH36 PUG Mount from Esoterical.
Both models work great and use PUG connectors instead of PG7. Don't use PG7, just don't. It's a nightmare to work with and totally an overkill for 3D printer umbilicals.
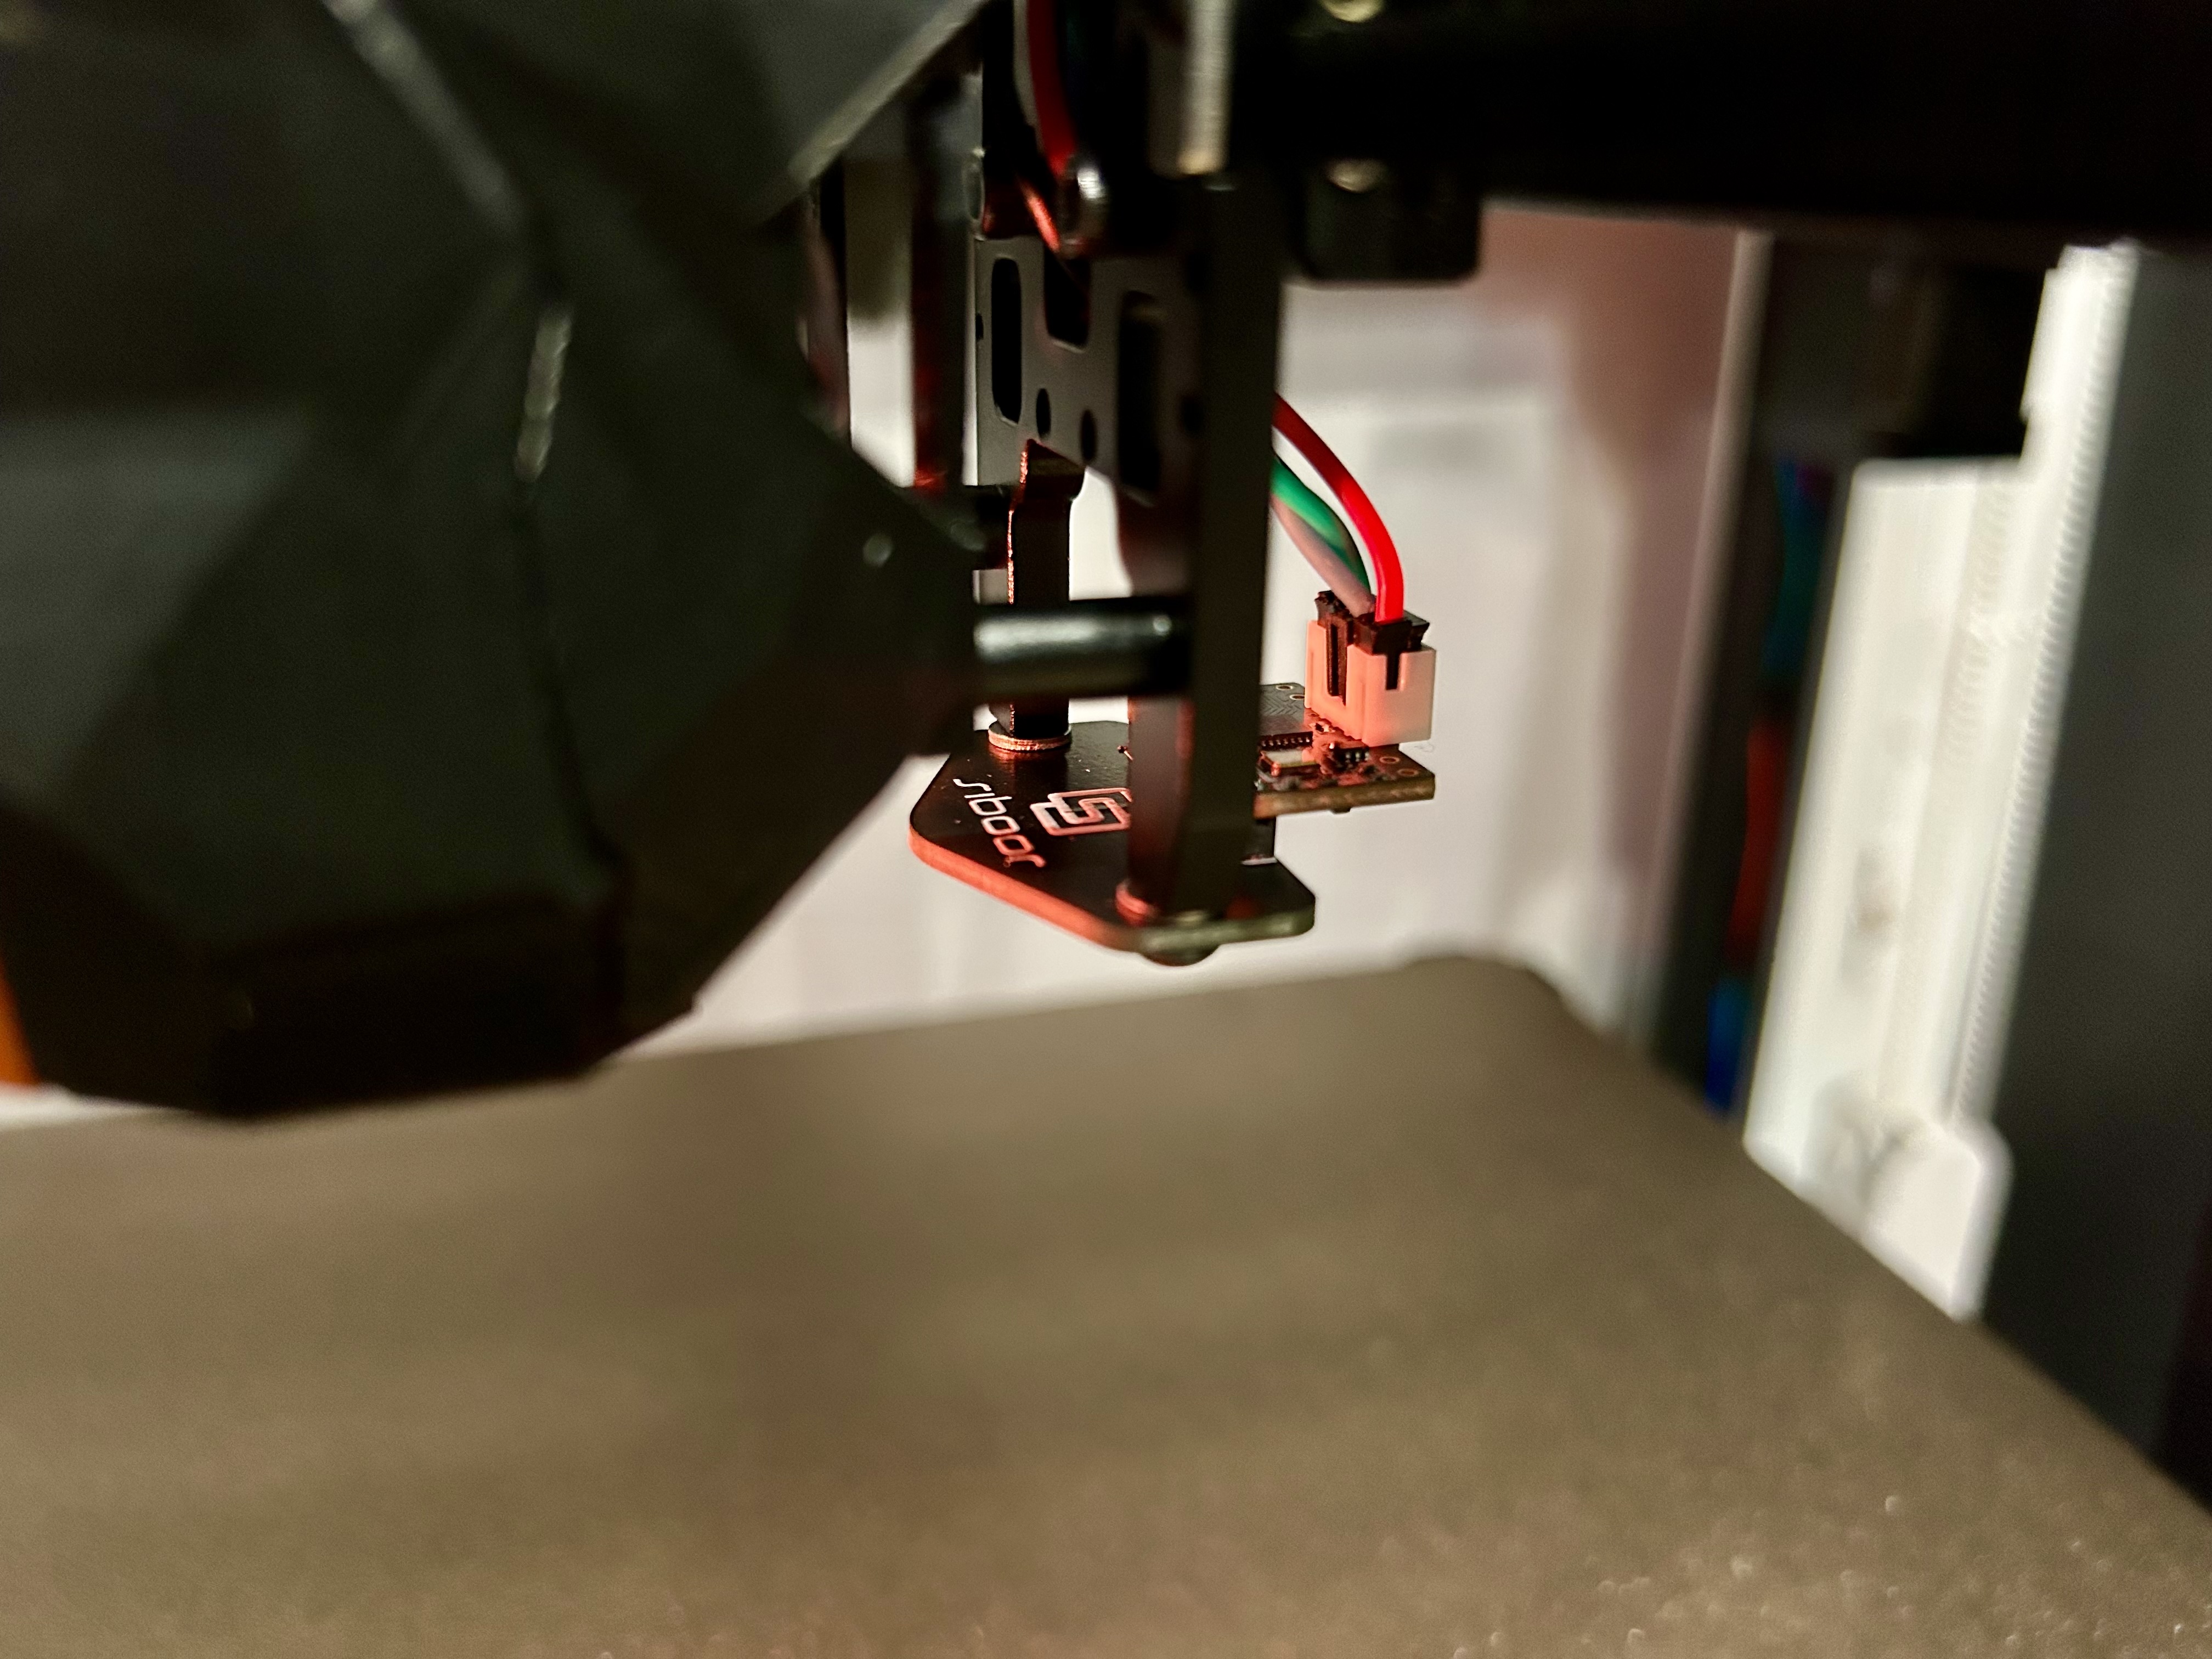
Starting from the beginning I knew I will use an Eddy current probe for bed leveling, as it's a great option for aluminum beds and considering bed size of 350x350mm it makes sense. Also, I already had Cartographer bought during 11.11 sales on AliExpress.
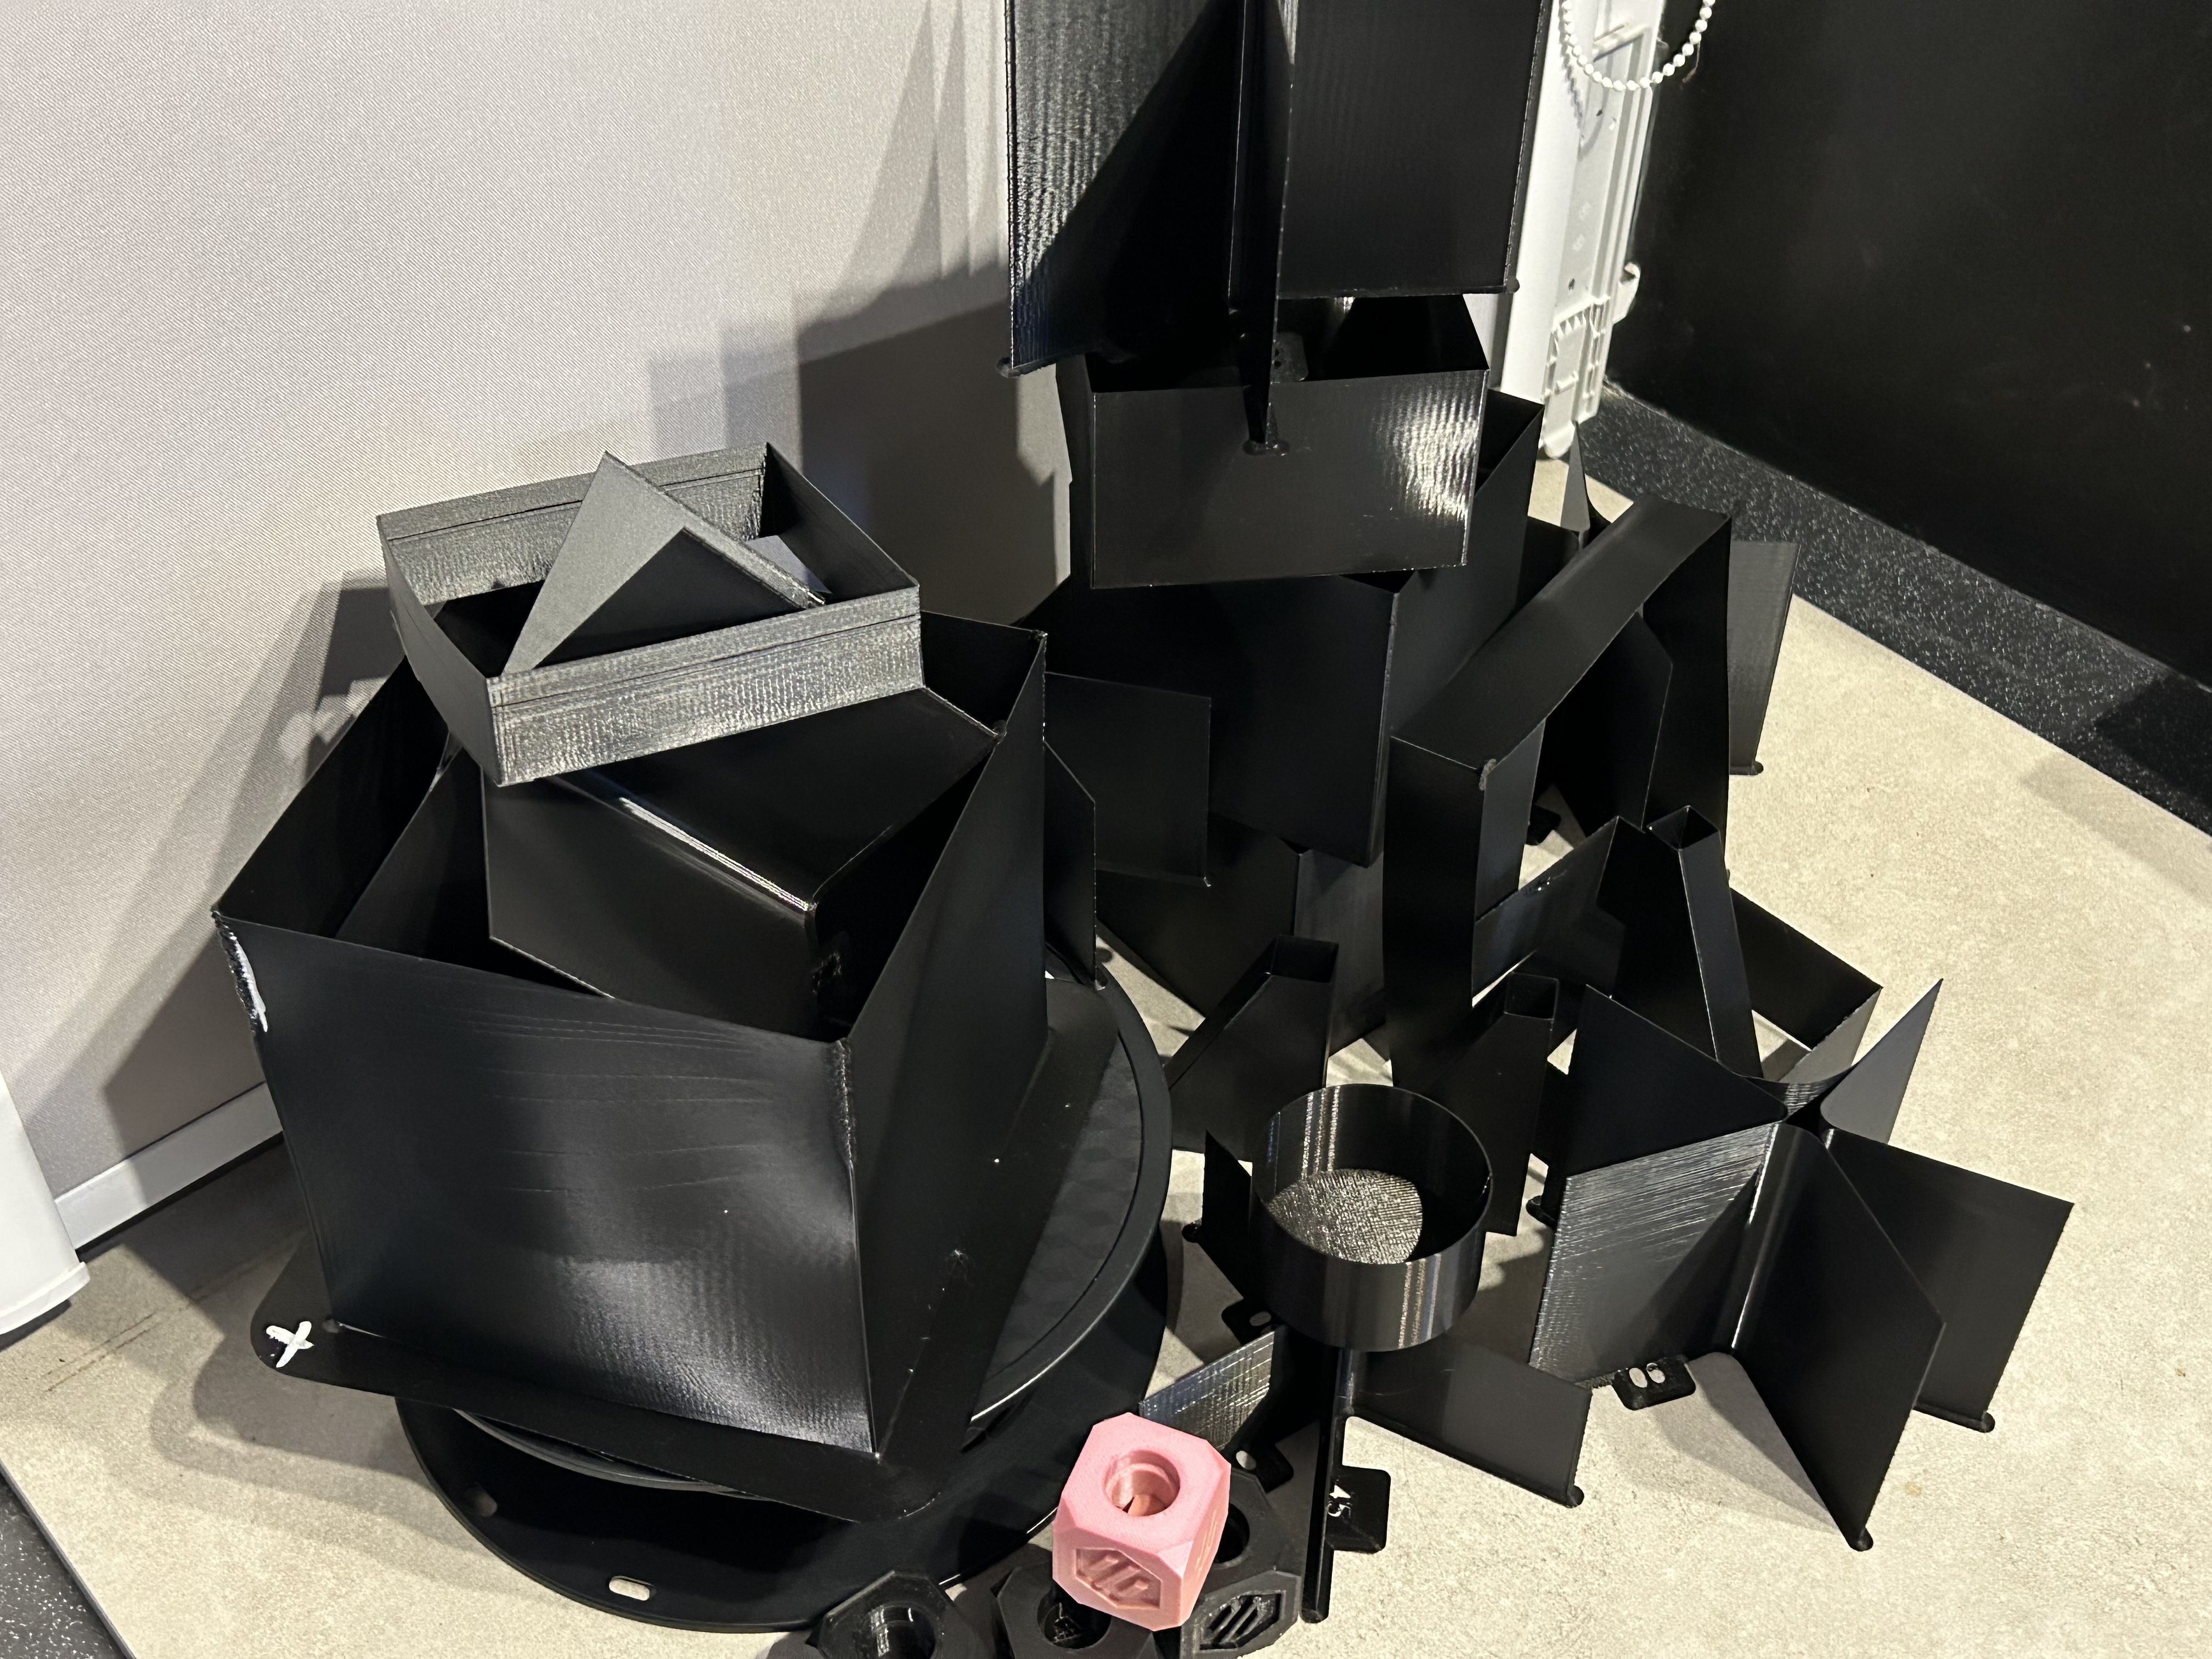
Part 4: Enclosure and Panels
For panels I would recommend using polycarbonate (PC) sheets instead of acrylic, as they are more less prone to deformation and color change over time. I used 3mm PC sheets for side panels and 4mm for bottom and rear sides.
If possible, go with a precut kit as cutting PC is not an easy task. Use a a scoring knife and a straight edge to score the sheet multiple times, then snap it along the scored line.
I didn't find black PC sheets locally, so I used transparent ones and applied a self-adhesive tint film for aesthetics.
Calibration and First Print
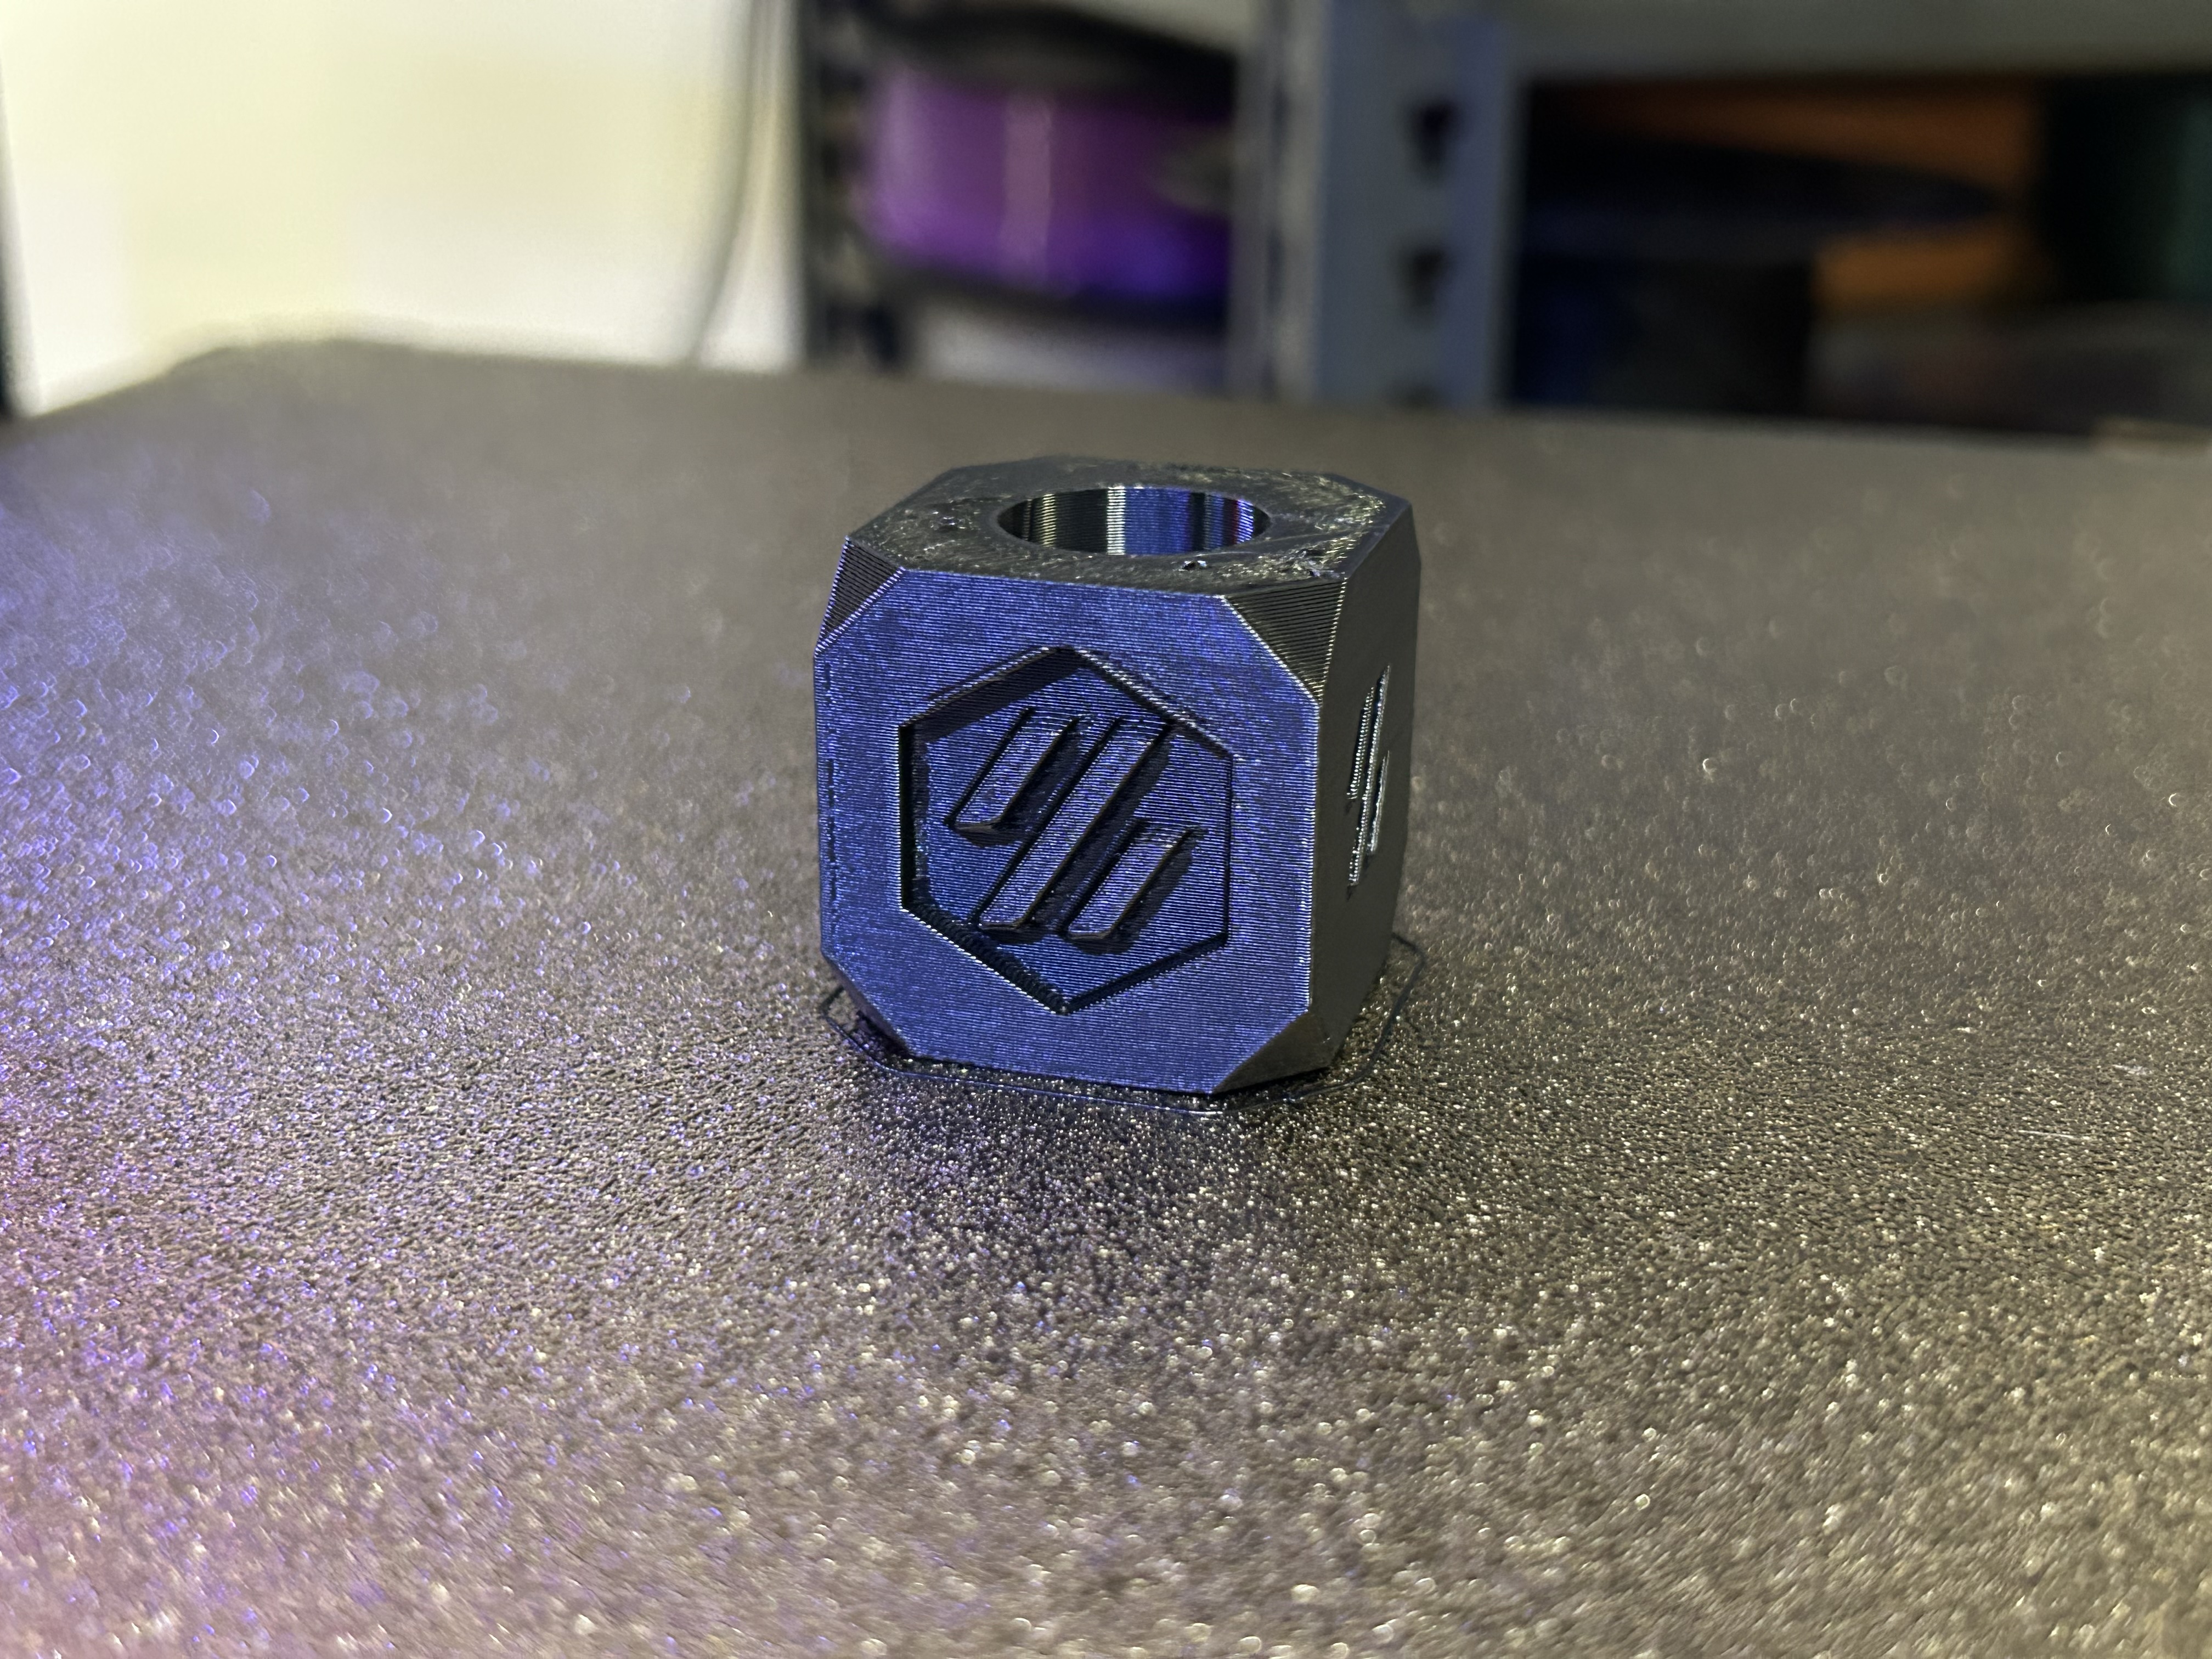
After the initial klipper setup and basic configuration I decided to print the calibration cube first to check if everything is working as expected. And to my surprise it worked well from the first try! Of course, some tuning was required later on, but the initial print was a success.
Then a long and tedious process of calibration followed: PID tuning, pressure advance, input shaper, cartographer, TMC register values, extruder steps, backlash and so on.
Mods and Upgrades I've already applied
🦆 The most important Voron mod - Duck!
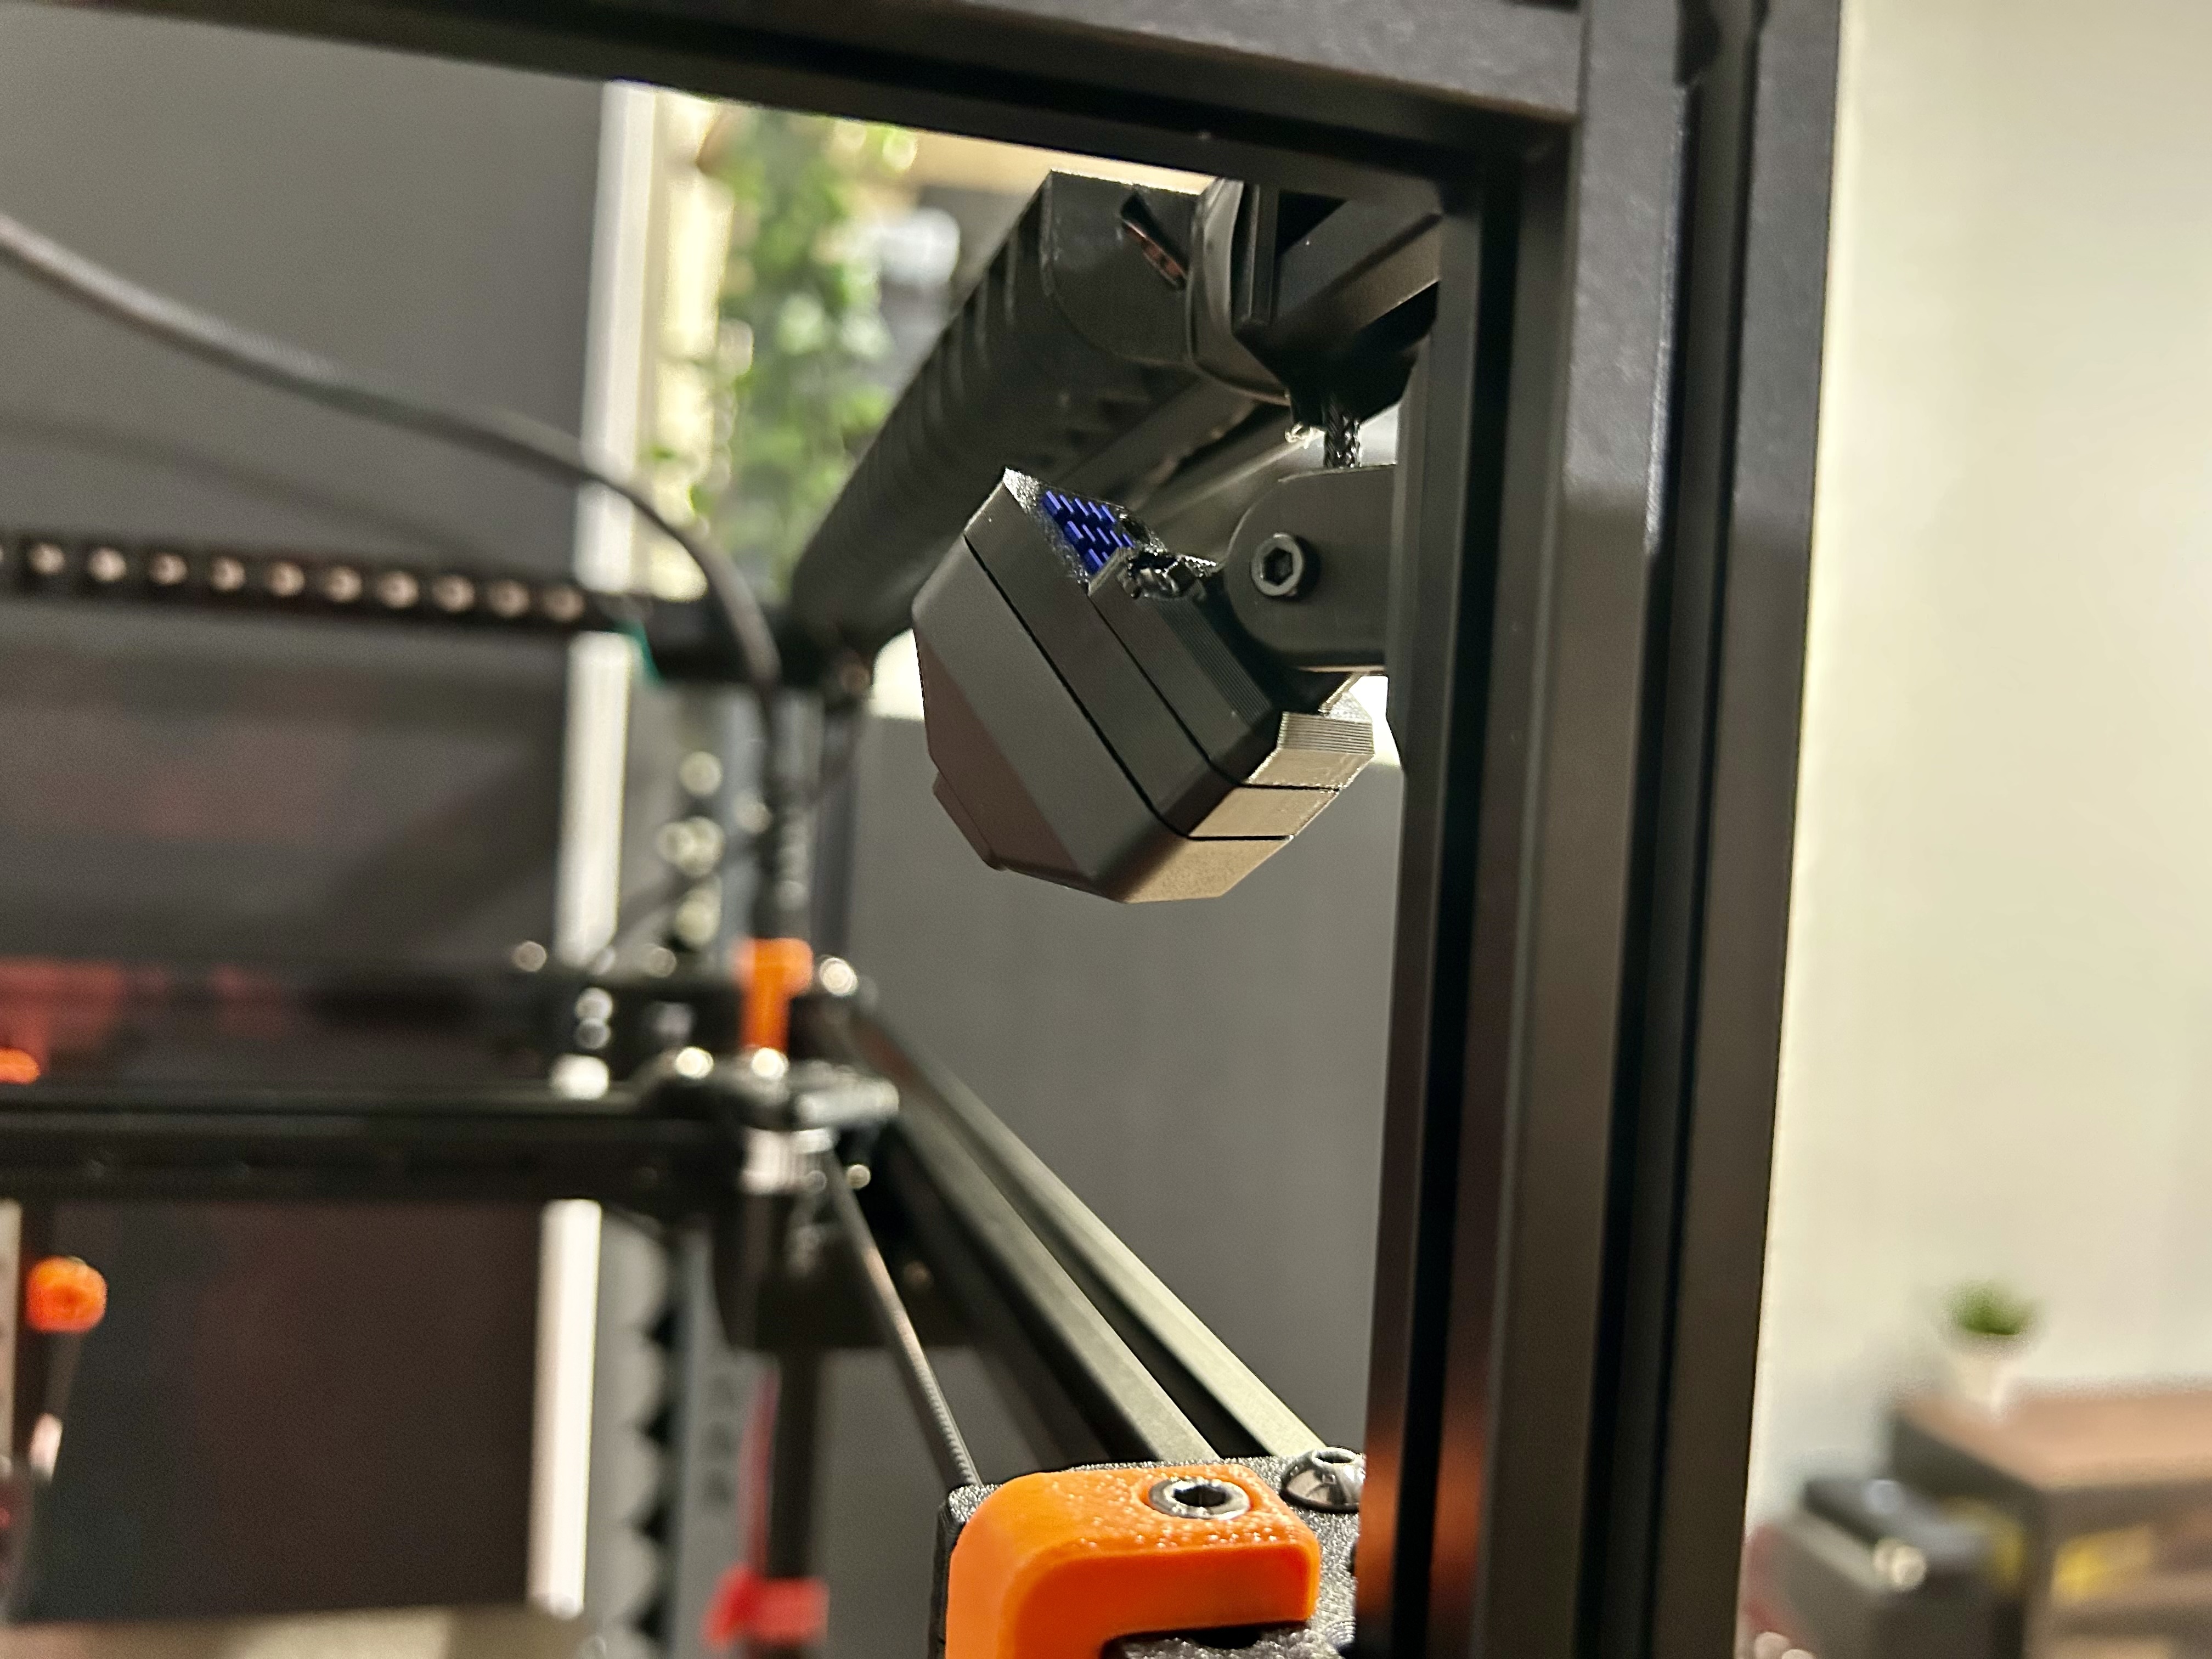
A spare Creality K1 camera I had in the drawer was repurposed for Voron using this Creality K1 Camera 2020 Extrusion Mount from Flustered. Of course it's better to use something with hardware H.264 encoding, but for now it works fine at 1280x960@15.
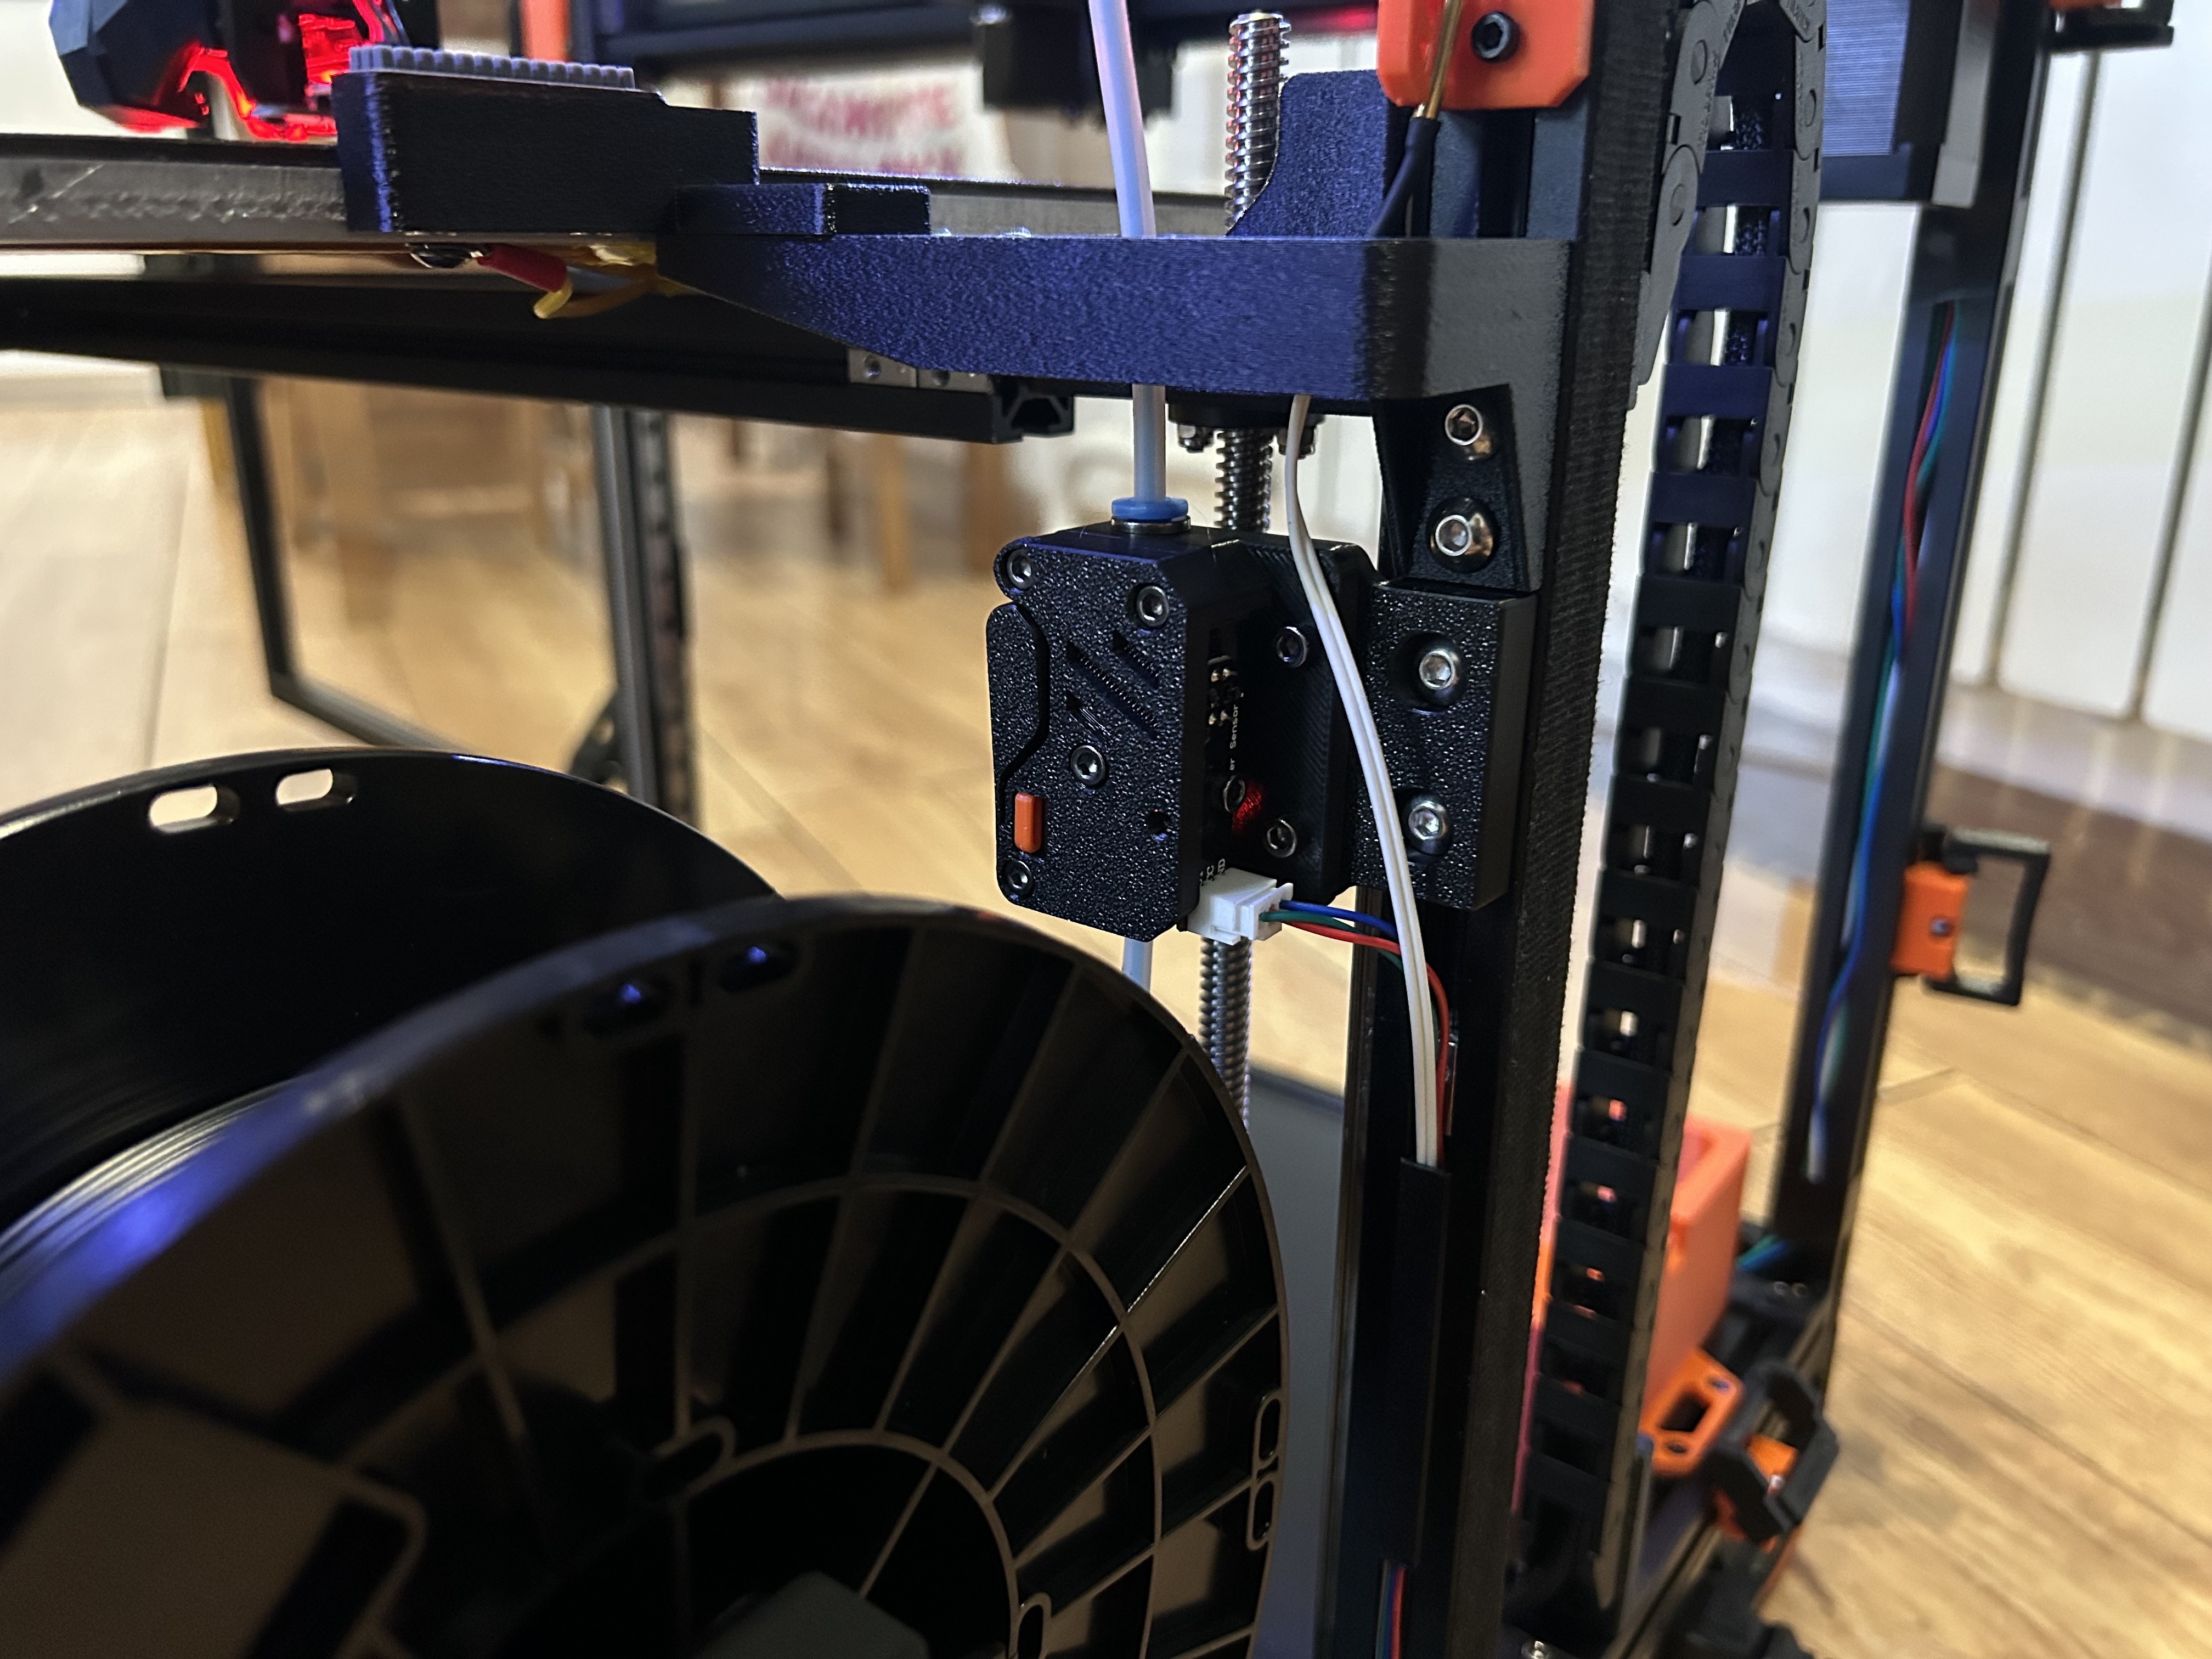
- To prevent filament issues, installed an ERCF Filament Motion Sensor from Groon and designed a custom mount to fit.
- Bambu A1 silicone nozzle scrubber and some random arm to hold it in place.
- Snap Latches for easy polycarbonate panels installation and removal.
- Chamber Thermistor mount for 2020 extrusion to monitor chamber temperature.
- Clicky-Clack Fridge Door for better chamber sealing
- Y extrusion backers to counteract bimetallic frame warping. I used stainless MGN rails from AliExpress.
- Trident LED Strips for better lighting.
- Fysetc Skirt Buttons for common macro actions.
- Bonto Box v2.0 carbon filter for enclosure air filtration and mixing.
Lessons learned and tips for future builders
- Make sure to perform all the dimensional calibrations and test prints before printing the final parts.
- Use a relatively flat surface for the frame assembly (like kitchen countertop or granite slab). I used a ceramic floor tile I had left from renovation works.
- Ensure 90-degree angles using a precision square tool, block or anything similar. You can find some 2020 profile auxiliary tools that help with this task.
- Carefully get familiar with the PDF assembly guide prior to starting the build. It will protect you from some mistakes.
- If going with self-sourcing, buy fasteners and maybe even motion parts as a full set to save time and headaches.
- Crimping tool is a must-have. WAGO connectors are also great, get more than you think you'll need.
Final Thoughts and Uncovered Aspects
I'm really happy with the results of my build 😊 and don't regret a single moment spent on it. Looking at this journey retrospectively, I can say that building a Voron from scratch indeed requires a lot of time, patience and effort, but the end result is totally worth it.
Would I go it again? Definitely yes! I'm already considering building a Voron 2.4 with Stealthchanger or a Micron 180.
Next steps for my Trident would be upgrading the toolhead to Dragon Burner with Crossbow filament cutter and finishing [ERCF v2] MMU setup.
I haven't covered absolutely everything in this post as there are many small details and nuances that would require a separate one, but at least firmware setup and calibration will be covered in the next post.
Thank you for reading and happy printing!
The Builder's FAQ: Voron Trident Edition
What Stepper Motors to use?
I ended up using Leadshine 42CM08 motors for X and Y axis, replacing OMC. Leadshine are among the best low inductance motors and it was a significant upgrade.
What Stepper Drivers to use?
I used TMC2209 drivers for all axes. If you are not considering 48v setup, they are a good choice for quiet operation and price-performance ratio.
What type of strain relief to use for umbilical?
I would definitely recommend using PUG connectors instead of PG7. PG7 are a nightmare to work with and overkill for 3D printer umbilicals.
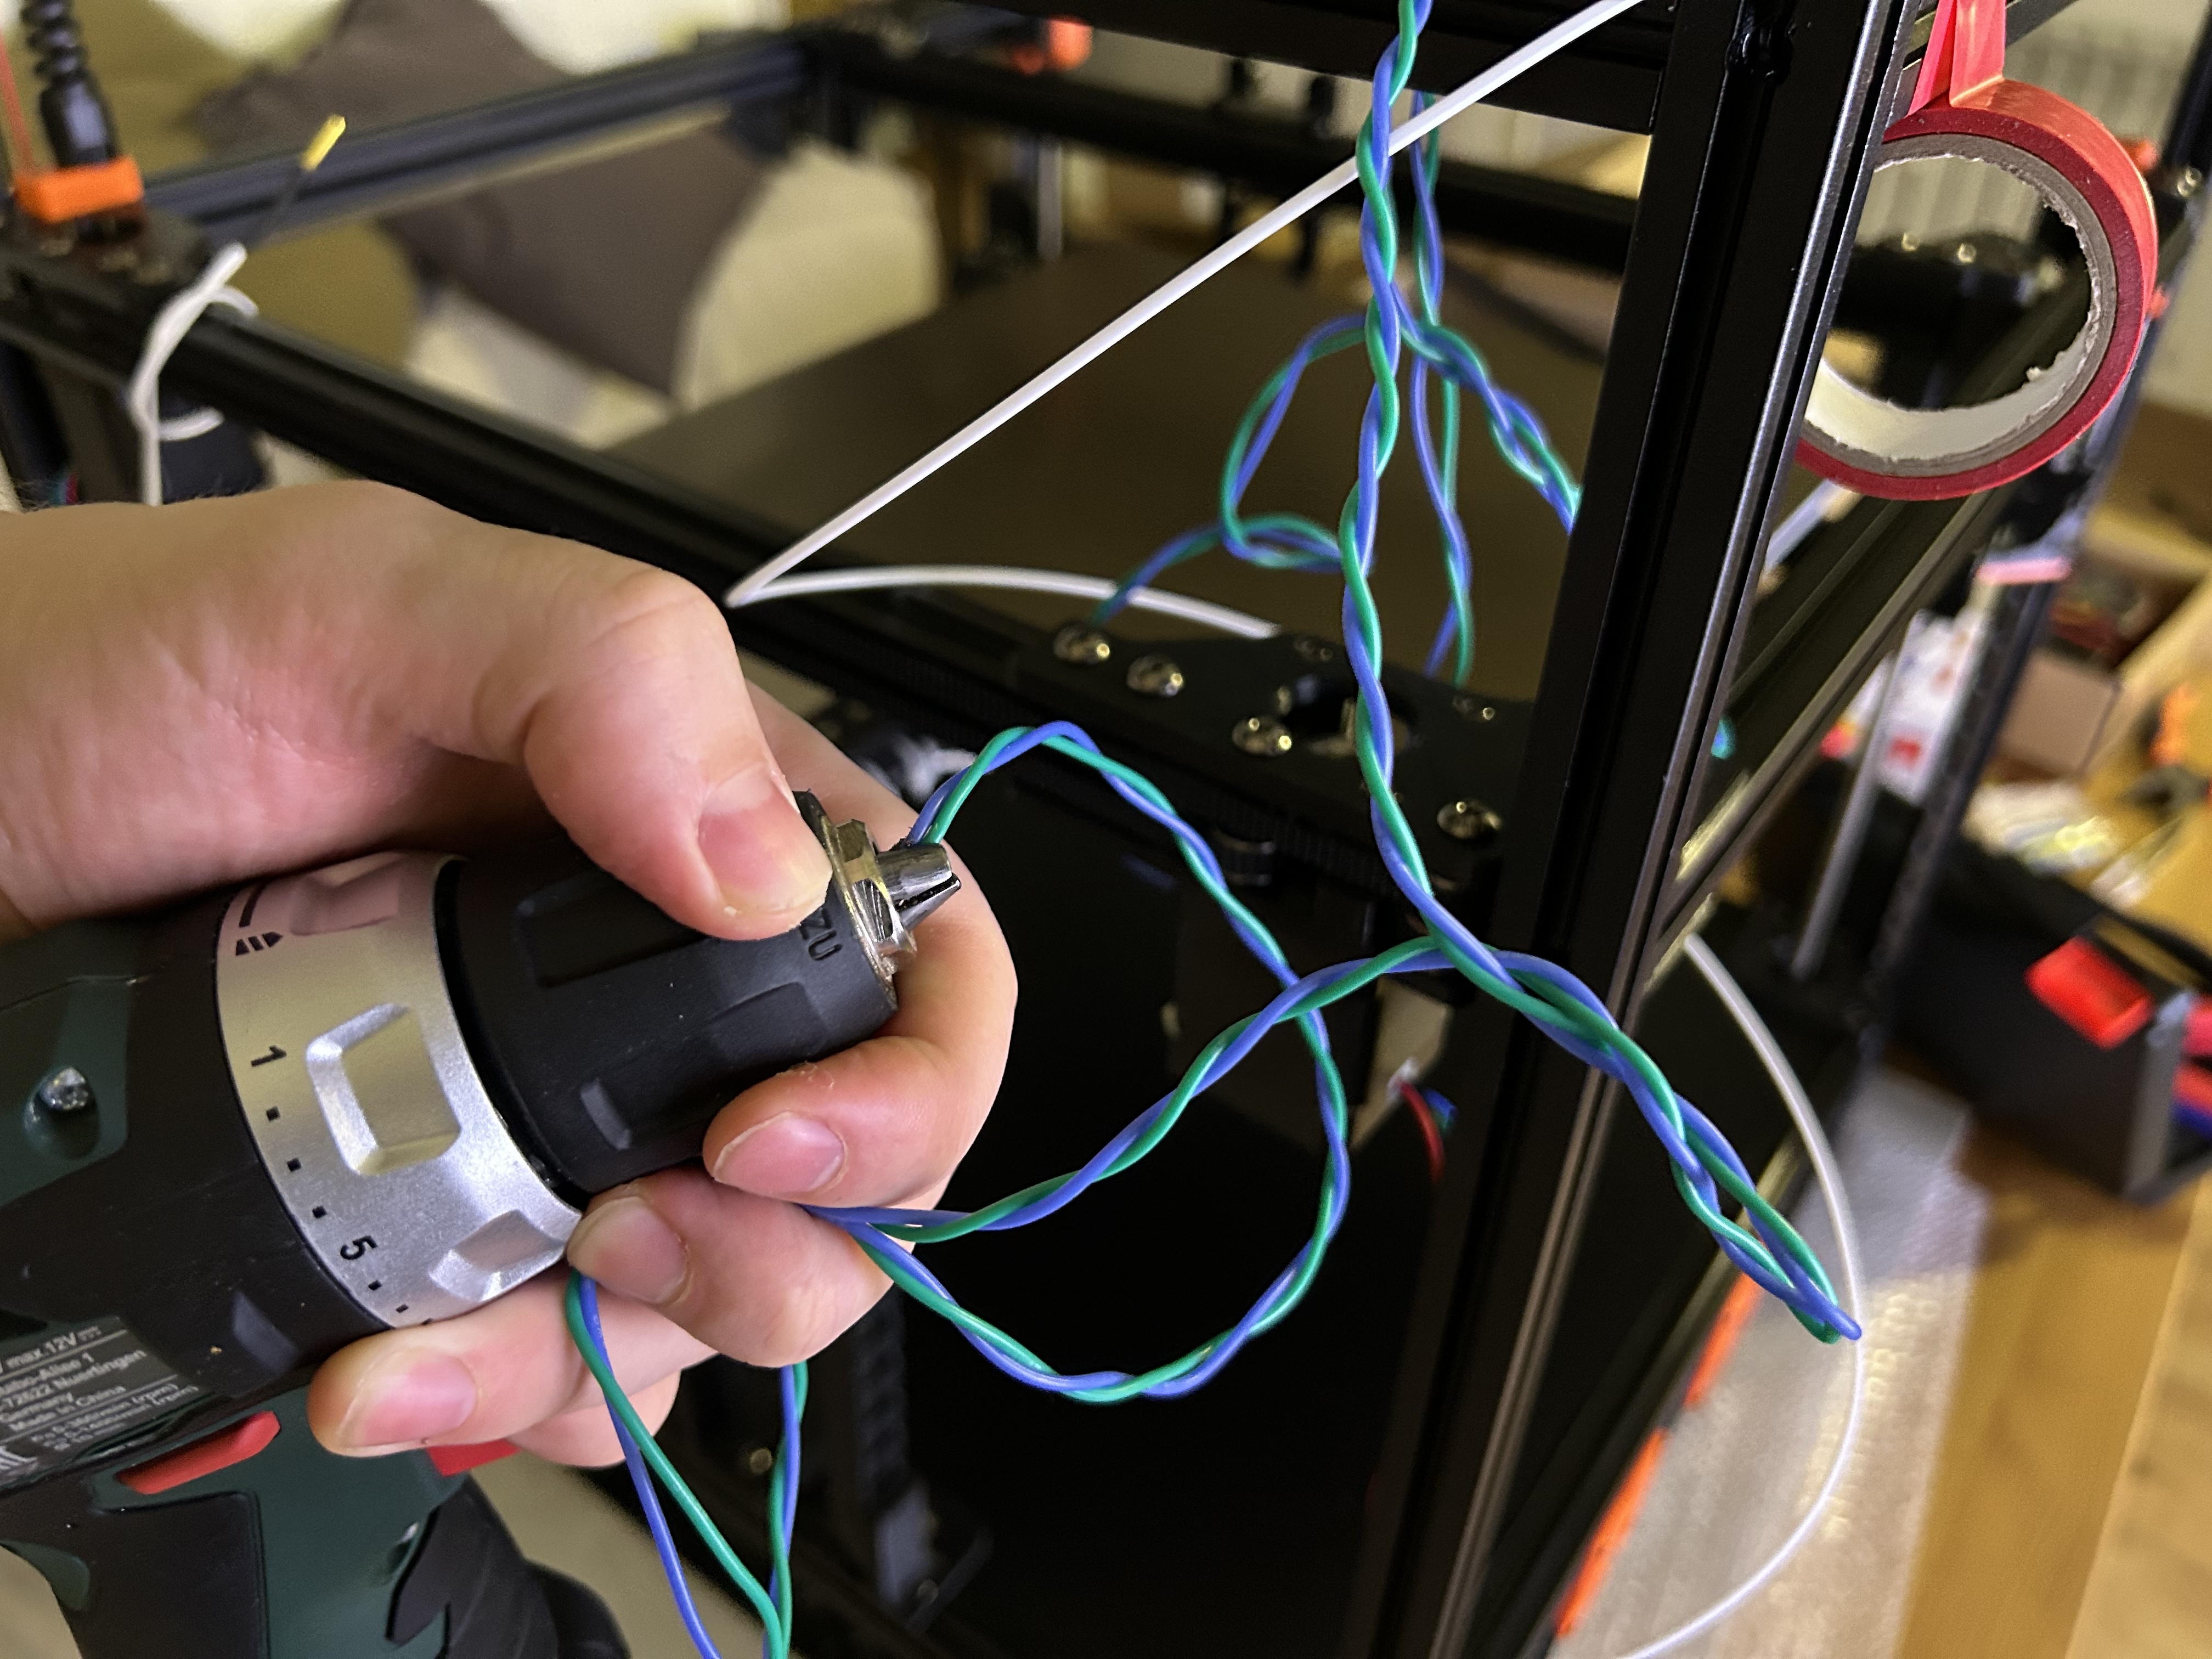
What type of cable to use for Can Bus?
Typically twisted pair cables are used and you can twist them manually using an electric screwdriver. But I would recommend buying an 100W+ Type-C cable what I've done eventually following some advice from the community. Just make sure cable specs are enough for your hotend power requirements.
What Voron toolhead is the best?
There are several great options available now: Dragon Burner, A4T with Crossbow filament cutter, and others. Stealthburner is a good starting point but has some nuances.
Is CNC carriage better than printed one?
Yes, machined parts are more precise and temperature resistant. If you can afford it, go at least with CNC carriage, AB motor mounts and XY joints.
What Voron extruder is the best?
Using Stealthburner I would leave Clockwork 2 as is or upgrade to G2E (Galileo 2). For other toolheads, G2SA, WWG2, Ordiber or Sherpa Mini/Micro all are great options. Galileo 2 due to its single gear design produces a bit more stable extrusion which affects external surface quality positively.